Powering P1
Power On Procedure
When the Robot is off, turn on the battery first by short pressing + long pressing; the battery light will turn on.

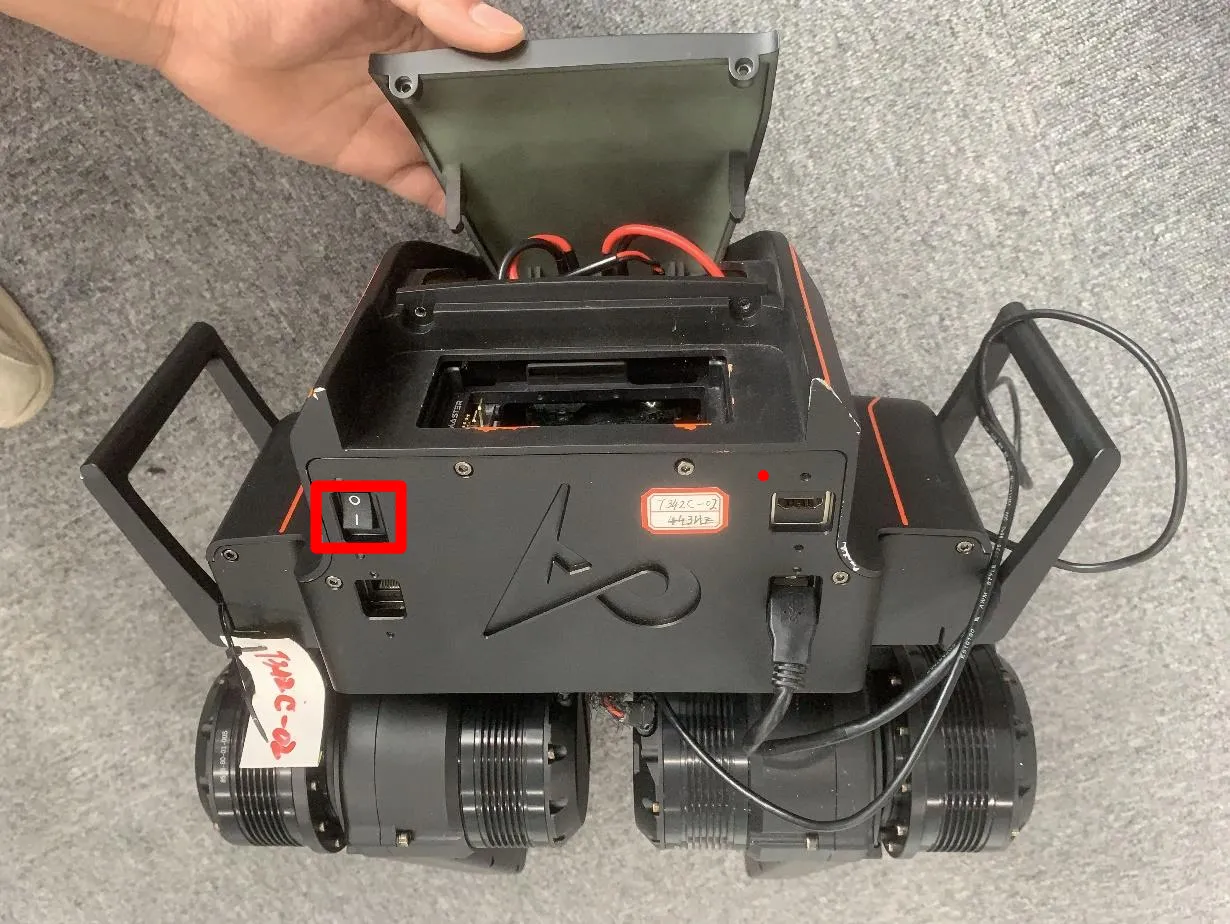
Then turn on the robot switch to start the robot located at the back of the robot.
Wait 30-40 sseconds for the robot to power on complete.
Power Off Procedure
When the Robot is on, turn off the robot switch(located at the back of the robot) first.
Turn off the battery by short pressing + long pressing; the light will turn off.
Power off complete.
Note
If the device cannot be controlled or does not enter the system after powering on, please check the battery level and try restarting.
Important
When powering on or off, please ensure the device is in a controllable state (e.g., lifeup or crouched on the ground, pictures below).
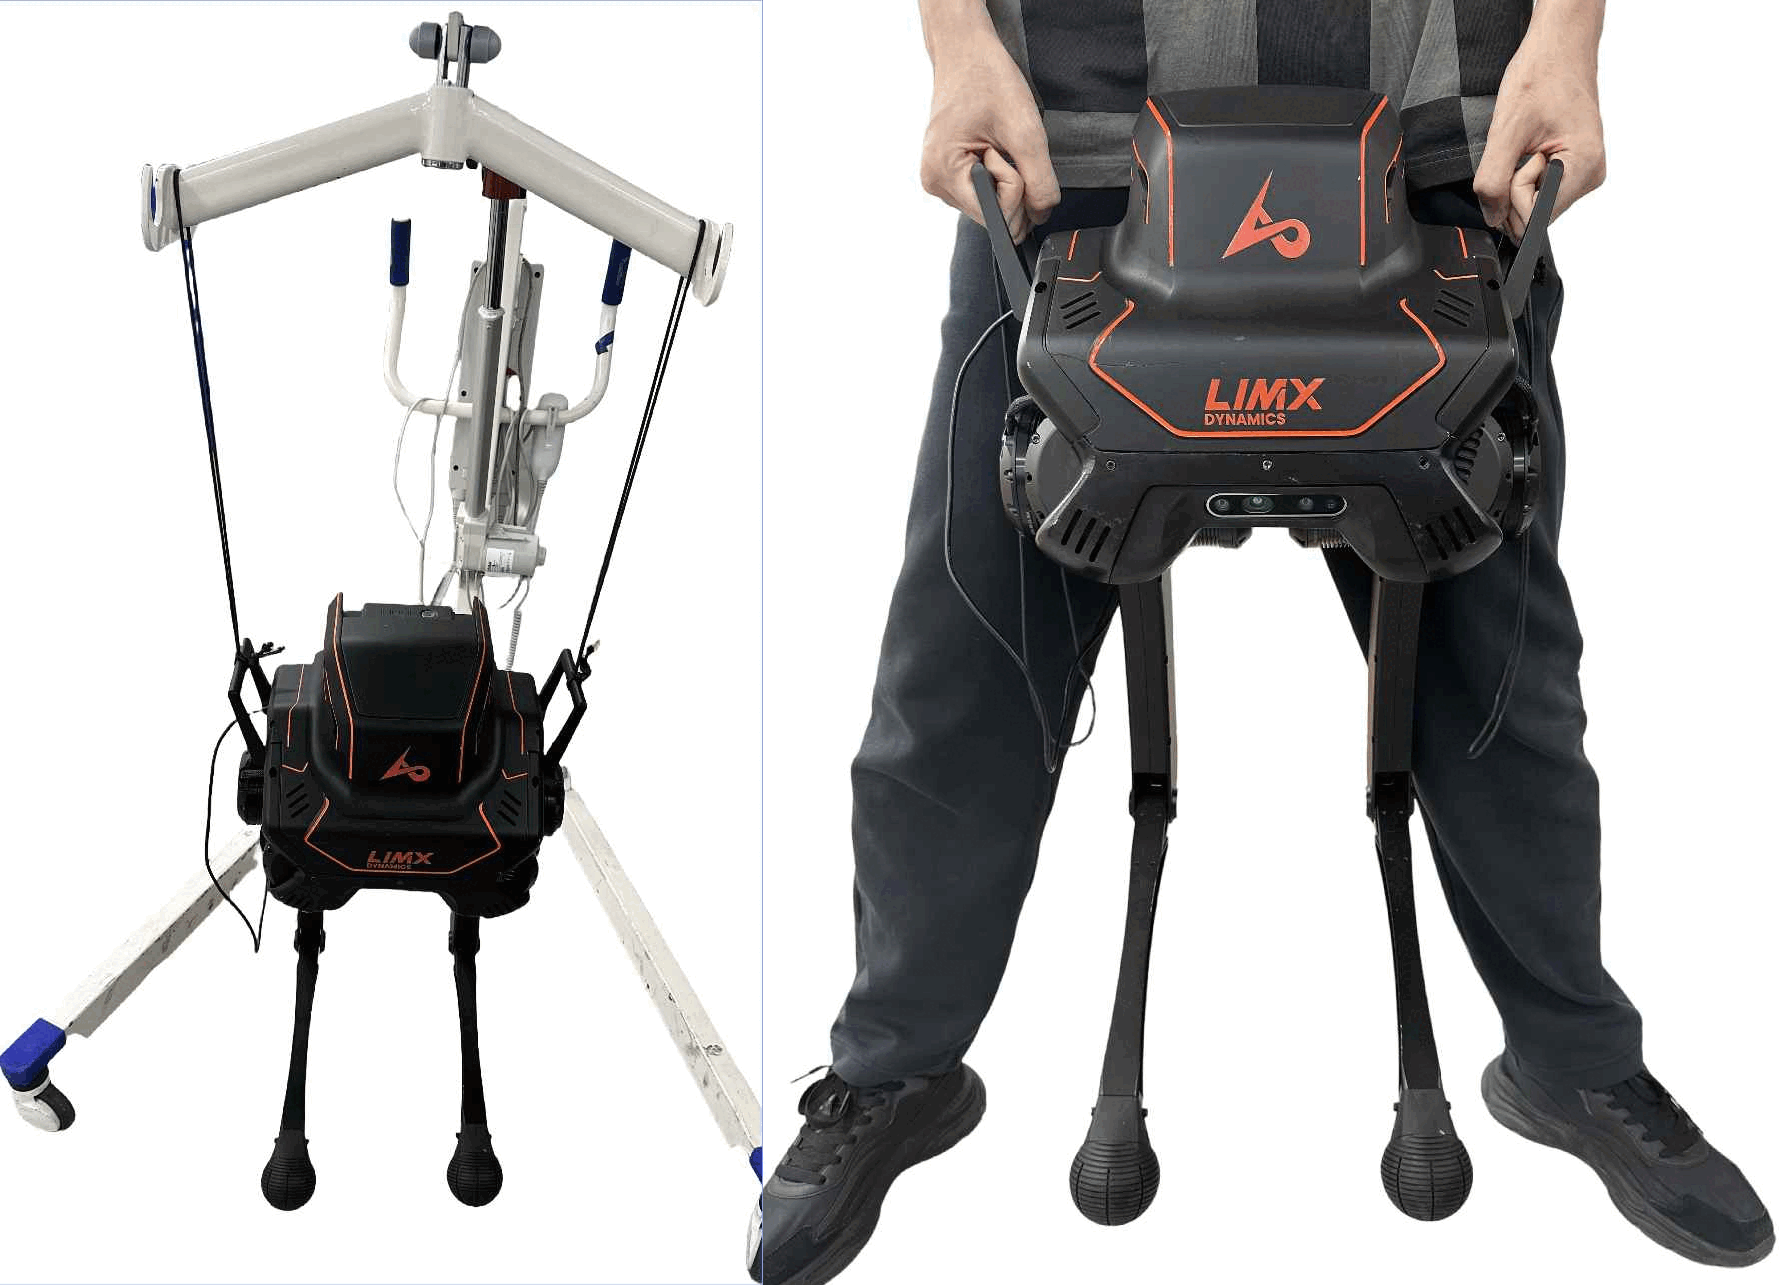
Use a hanging bracket to lift the robot off the ground, or you can hold and lift the robot by hand.
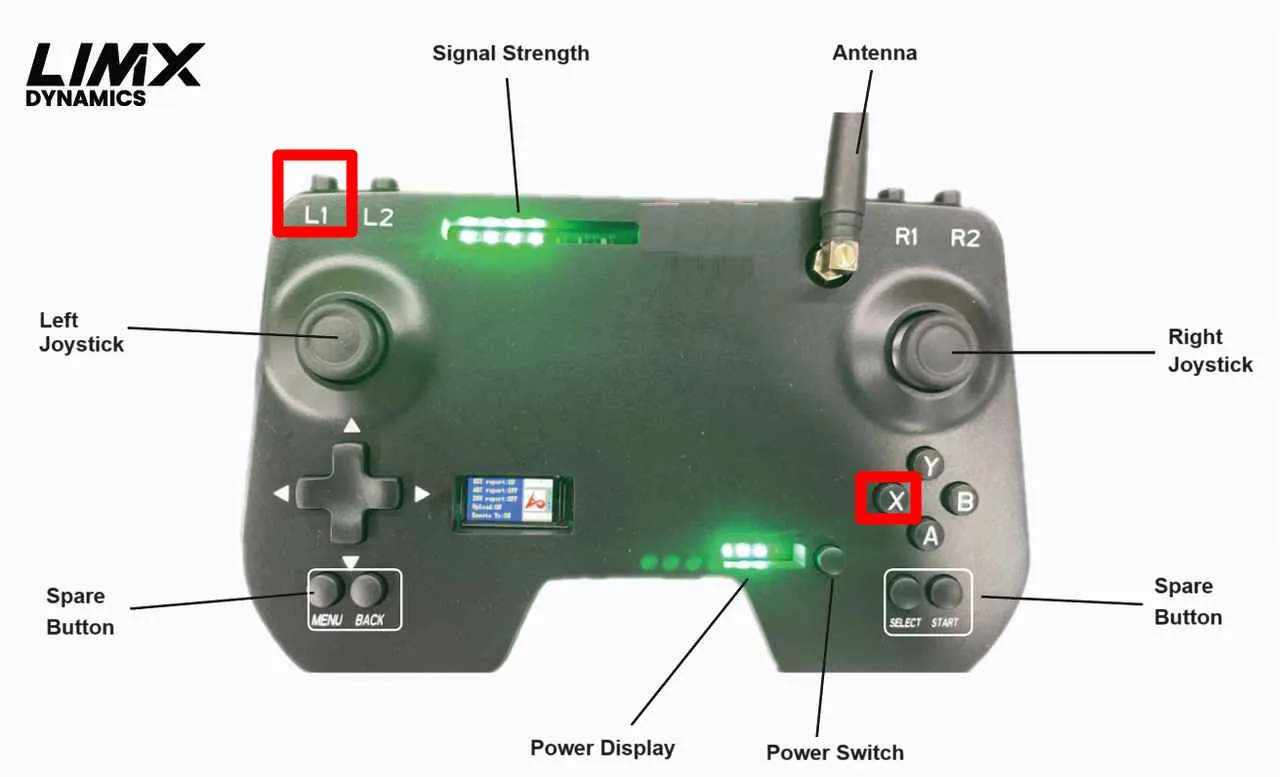
If robot auto zero correction fails. Please re-zero the robot (Press L1+X, then press L1+R1).
Robot Startup
Turn on the battery switch and ensure the system completes power-up by turning on the switch at the back of the robot and waiting 30-40 secondsafter power-up.
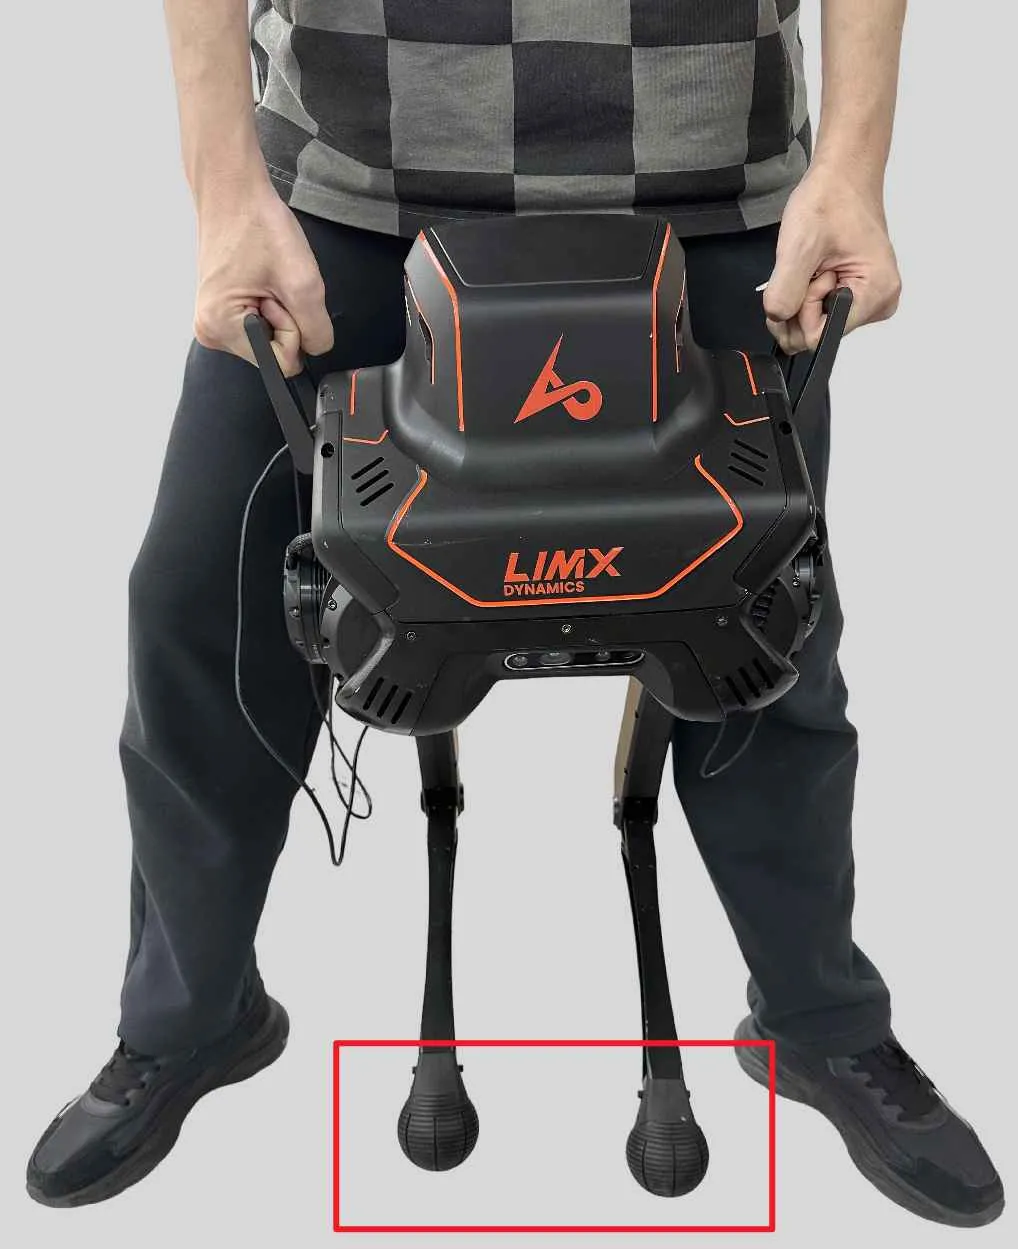
Lift the robot onto its toes.
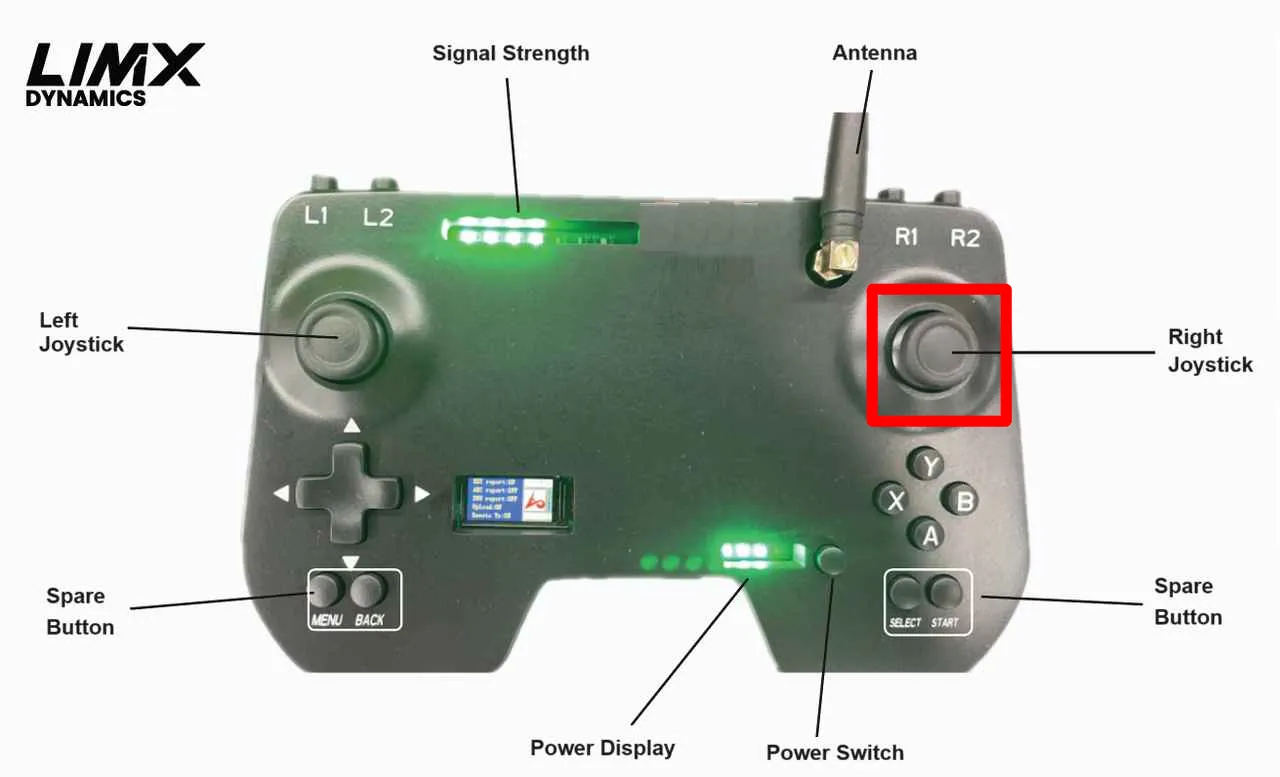
Press Right joystick to fully activate the robots controls.
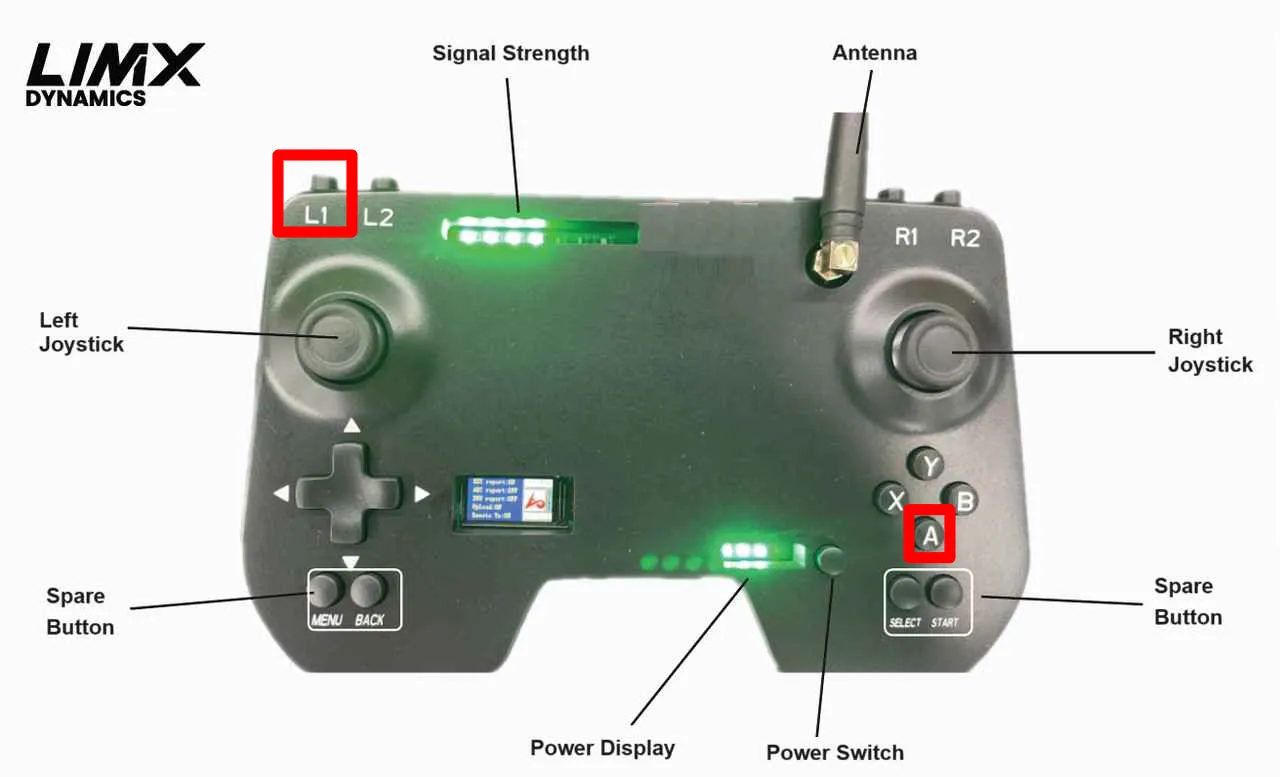
Use the remote control to zero the robot (press L1 + R1).
Use the remote control to put the robot into standing mode (press L1 + A) (the robot’s feet need to touch the ground).
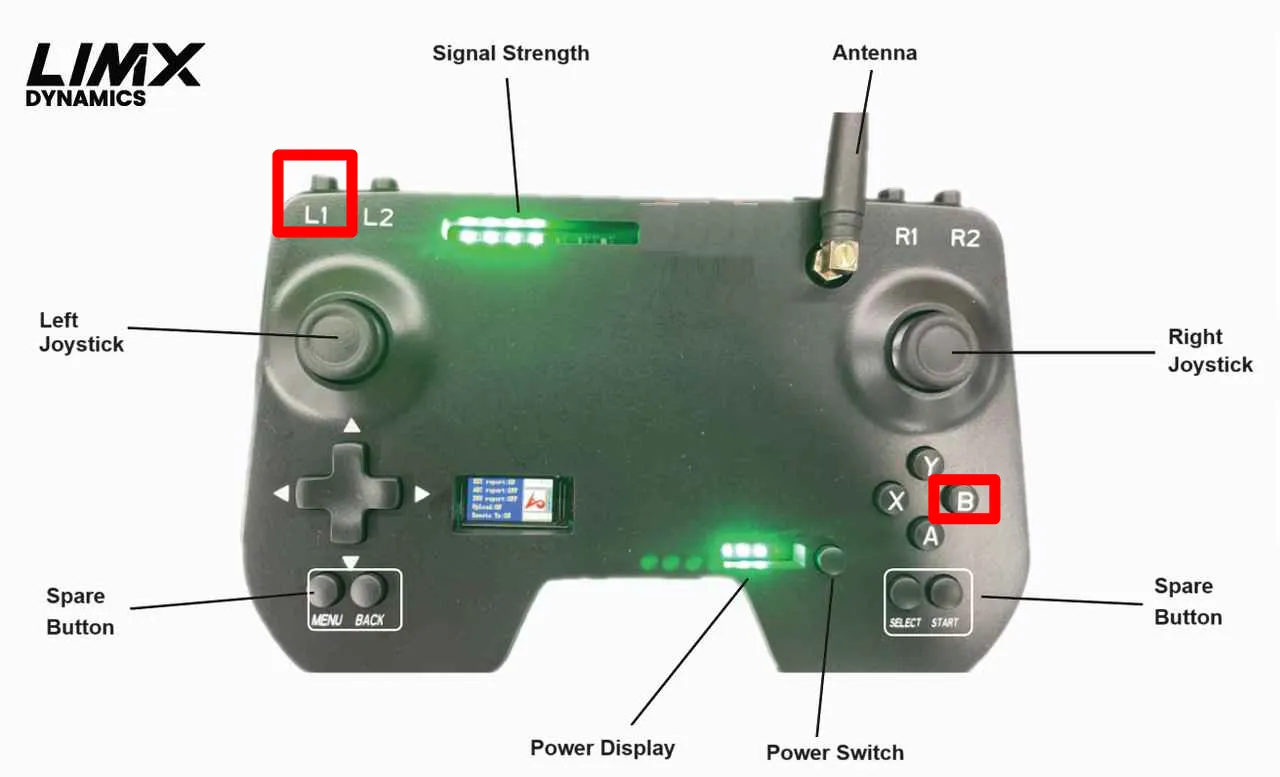
Use the remote control to put the robot into walking mode (press L1 + B) (the right joystick of the remote control controls forward and sideways walking of the robot, while the left joystick controls left and right rotation).
Use the remote control to put the robot into damping mode (press L1 + X, support the toes before entering damping mode).
Power down the entire system by turning off the switch at the back of the robot.
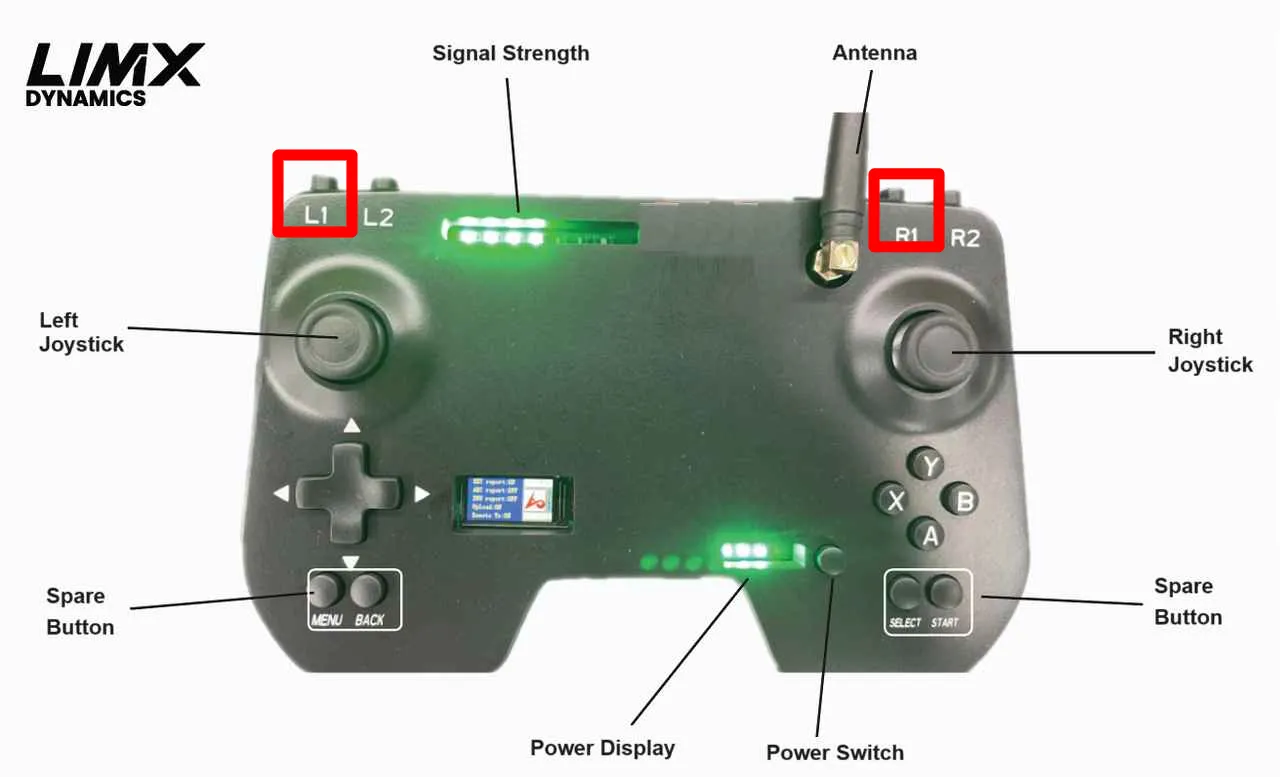
Remote Control
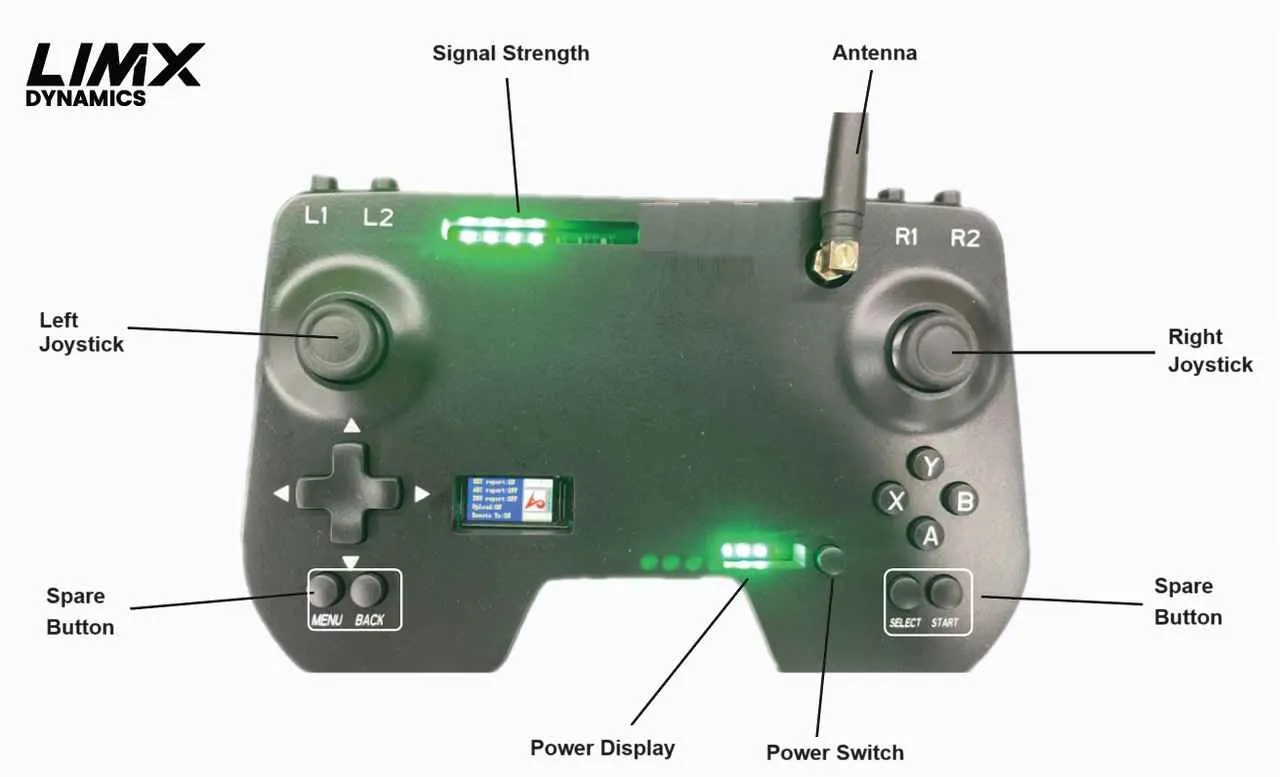
Signal Strength: At least 1 bar of signal is needed to control the robot.
Power Display: When there is only 1 bar of power left, there is a risk of the remote control.
Left Joystick: Controls the robot’s forward and backward movement and lateral movement.
Right Joystick: Controls the robot’s direction.
Power Switch: Single click to turn on the power, double click to turn off the power
Spare Button: Currently it has no function.
Remote Control Modes
States |
Key Value |
States Description |
Preconditions |
|---|---|---|---|
Auto Zeroing |
L1+R1 |
Initialize all joints |
The robot needs to be suspended and off the ground |
Idle State |
L1+X |
All joint motors are in torque damping mode and gradually descend This mode is entered after powering on |
The robot needs to be suspended and off the ground |
Standing State |
L1+A |
Both legs autonomously Standing power up and perform State ground contact/stand-up actions |
Requires external force assistance, and both feet are in contact with the ground |
Walking State |
L1+B |
The robot enters a stepping state and can be controlled remotely |
X |
Developer State |
R1+Left |
Users can deploy control and secondary development programs |
After switching to developer mode, the main station automatically restarts to take effect |
Non-Developer State |
R1+Right |
Mode for RL model- controlled robot movement |
Effective after switching until switching to other modes (developer mode / MB mode) After switching modes, the main station automatically restarts to take effect |
E-Stop |
Left and right joystick button |
All motors and computers immediately Global power off but battery power and indicator lights remain on the entire unit may drop |
Press simultaneously; triggers emergency stop in any mode and state, immediately cutting off all motor power |
E-Release |
Right Joystick button |
Motor Power-up again |
Single click; no effect in other states; upon release, enters damping state |
External Power
To use externel power as an input please follow the below mentioned steps:
Remove the top cover of P1 by uncrewing two screws as shown in the picture below.
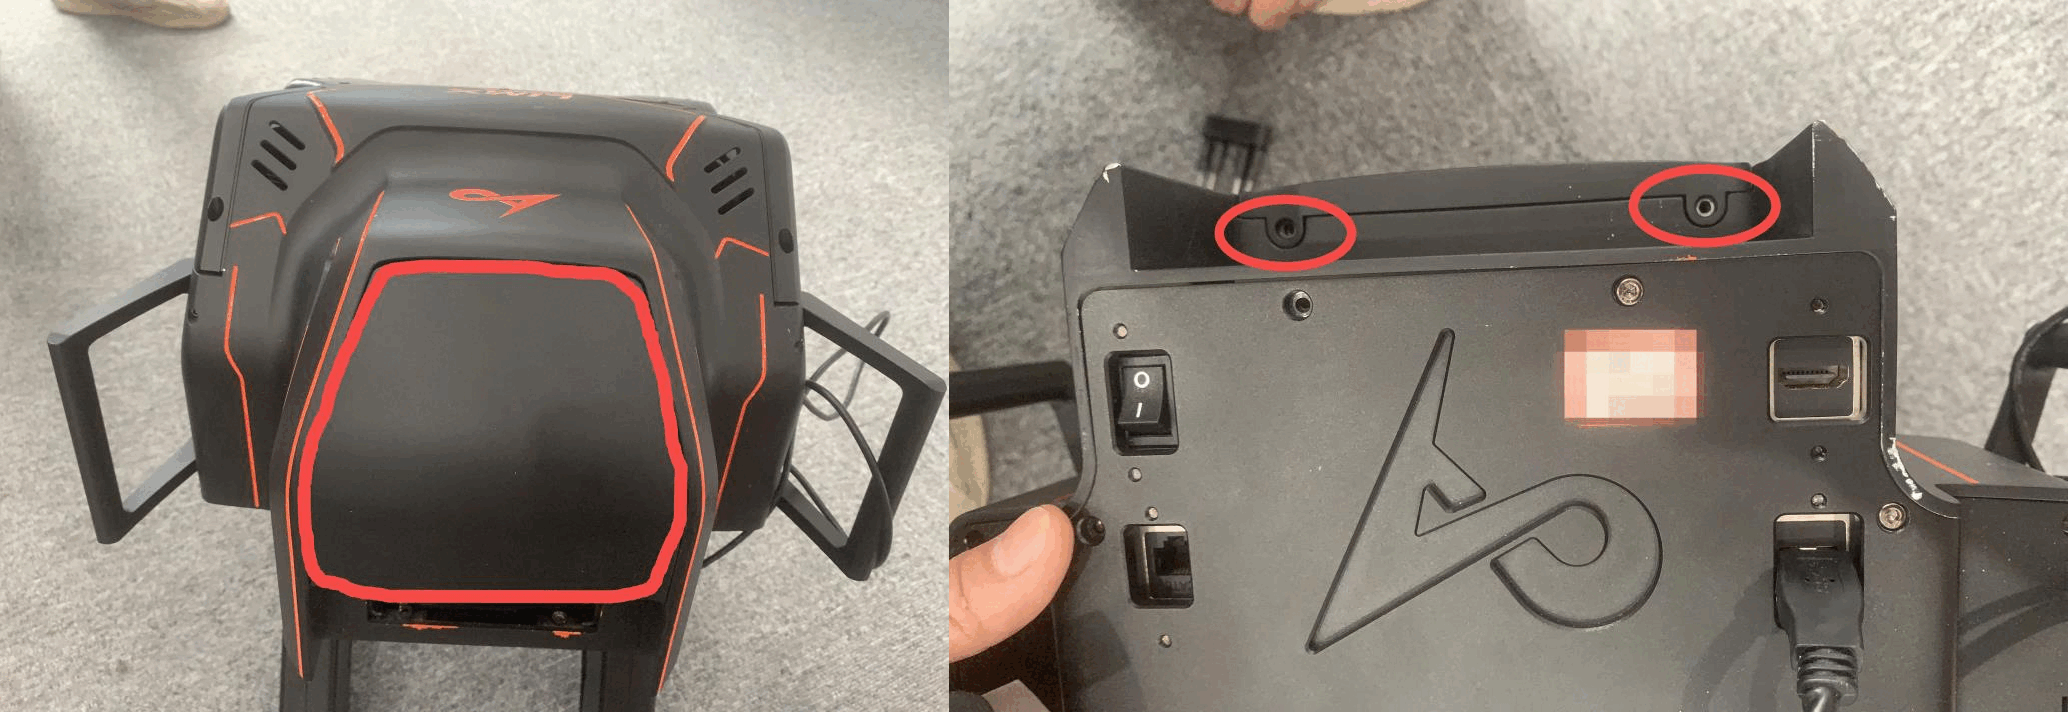
Once unscrewed you should be able to see the power ports from which one of them is for the DJI battery.
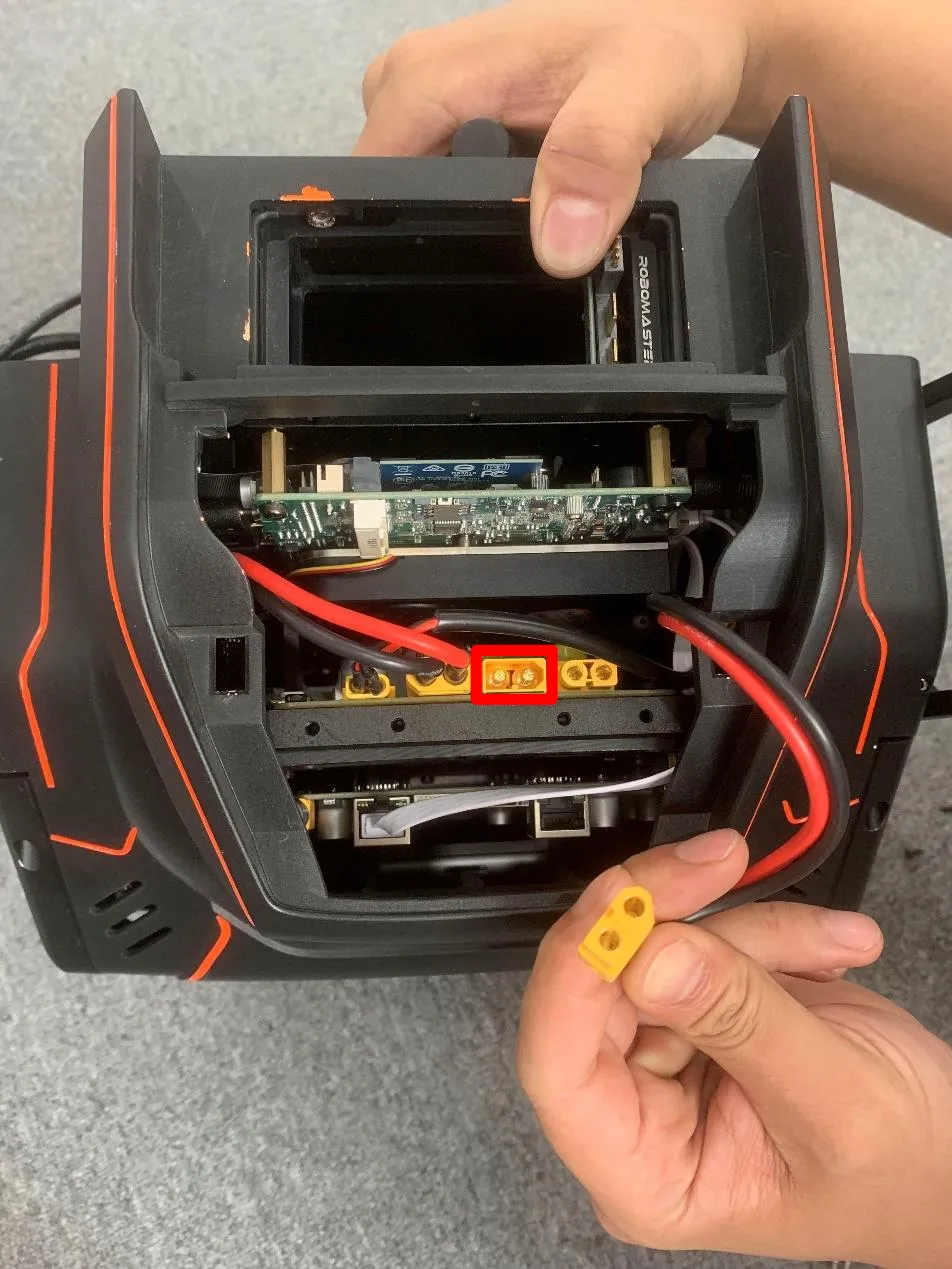
Unplug that power port and and connect the alternative 24V extrenal power supply that you want to use.