Pre-requisites
Safety Guidelines Robotic Manipulator Safety.
Power On Power On.
Network Interface Network Interface.
Installation Robot Installation.
Autostart
Coming Soon
Systemd Services
The ROVO3 uses systemd services for automatic startup of ROS2 nodes.
Install Startup Services:
ros2 run rovo_autostart startup_installer.py
Service Management:
Services can be managed via the webserver or command line:
# Check service status
sudo systemctl status rovo_platform.service

# Start a service
sudo systemctl start rovo_platform.service

# Stop a service
sudo systemctl stop rovo_platform.service

# Enable service at boot
sudo systemctl enable rovo_platform.service

# Disable service at boot
sudo systemctl disable rovo_platform.service
Available Services:
Service |
Description |
|---|---|
|
Platform driver (CAN, odometry, IMU) |
|
Web control interface |
|
Joystick and twist mux |
Environment Configuration
Setup Script (config/setup.bash):
This script sets up environment variables and aliases.
Environment Variables:
Variable |
Default |
Description |
|---|---|---|
|
|
Robot namespace |
Useful Aliases:
# Build and source workspace
rovo_build
CAN Interface Setup
The CAN interface is configured via the rovo_can.bash script:
sudo ip link set can0 down
sudo ip link set can0 type can bitrate 500000
sudo ip link set can0 up
udev Rules
Hardware udev rules are installed at /etc/udev/rules.d/45-mbs.rules for consistent device naming.
Webserver
Coming Soon
Robot Webserver
The ROVO3 features a web-based control interface built with Flask.
Access: http://192.168.131.1:9000
Default Credentials:
Username:
adminPassword:
mybotshop
Login
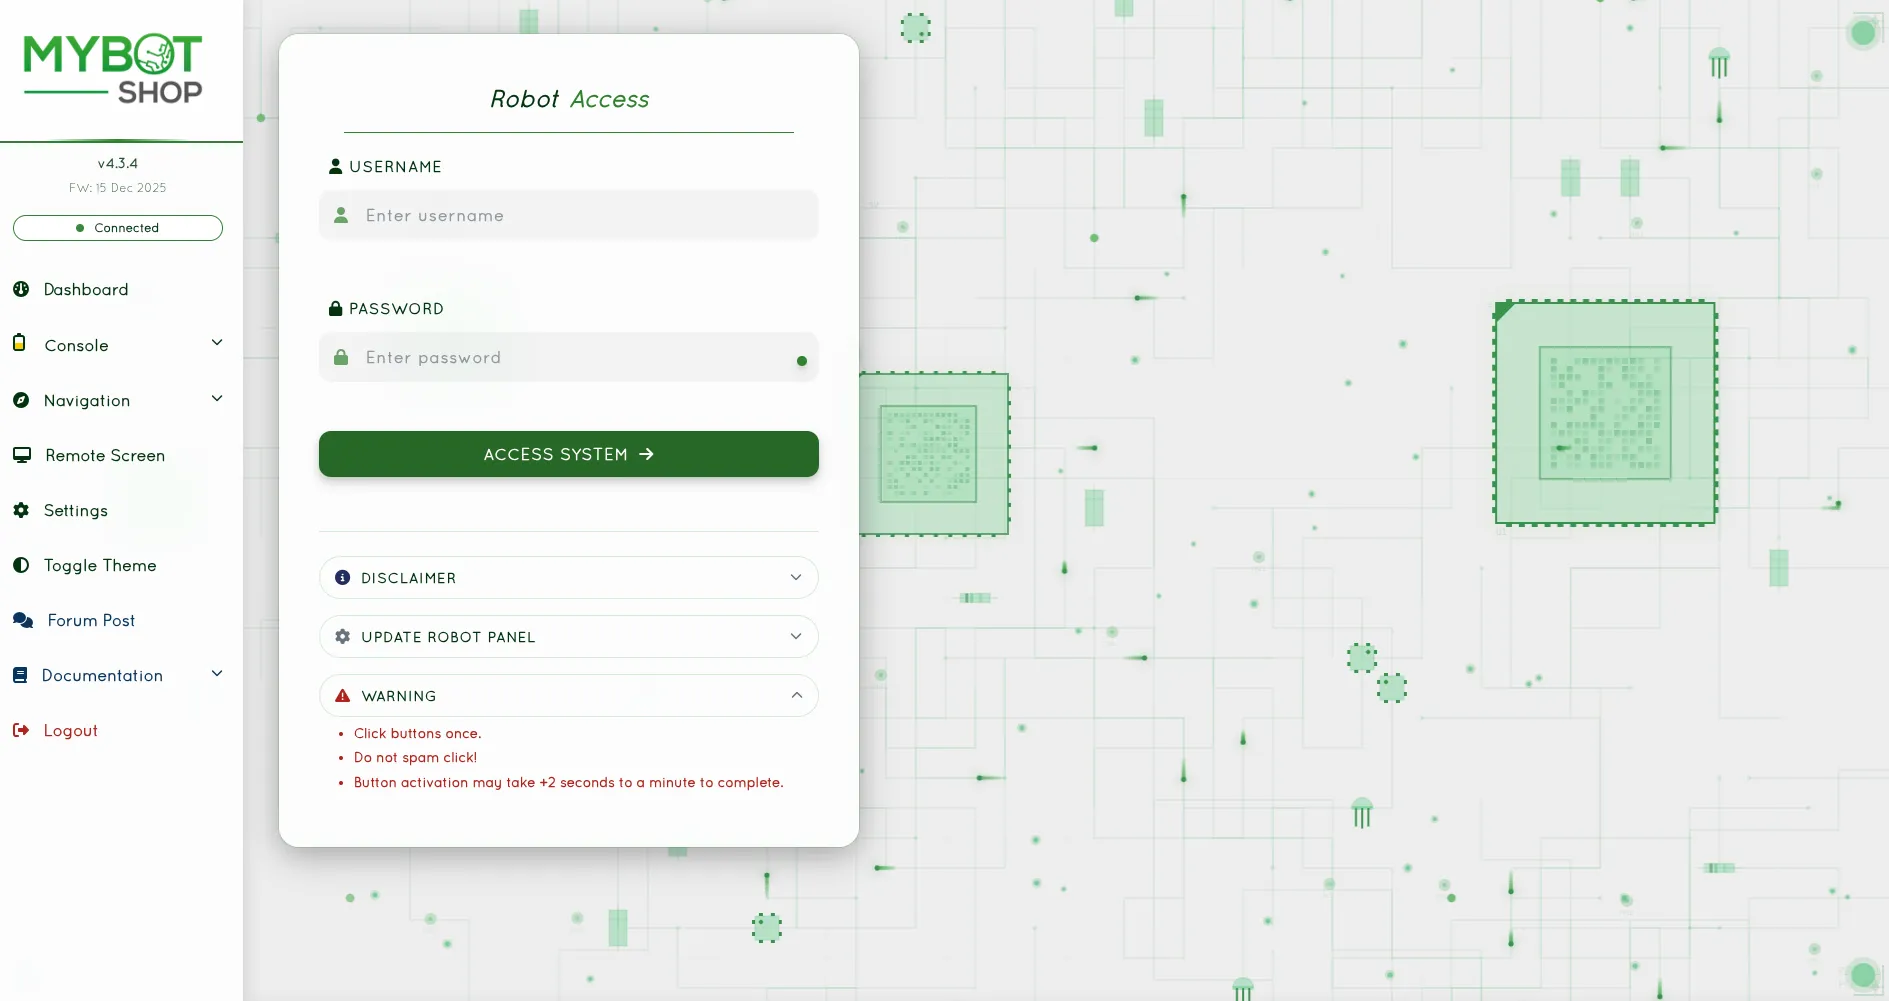
Webserver Login Page
Dashboard
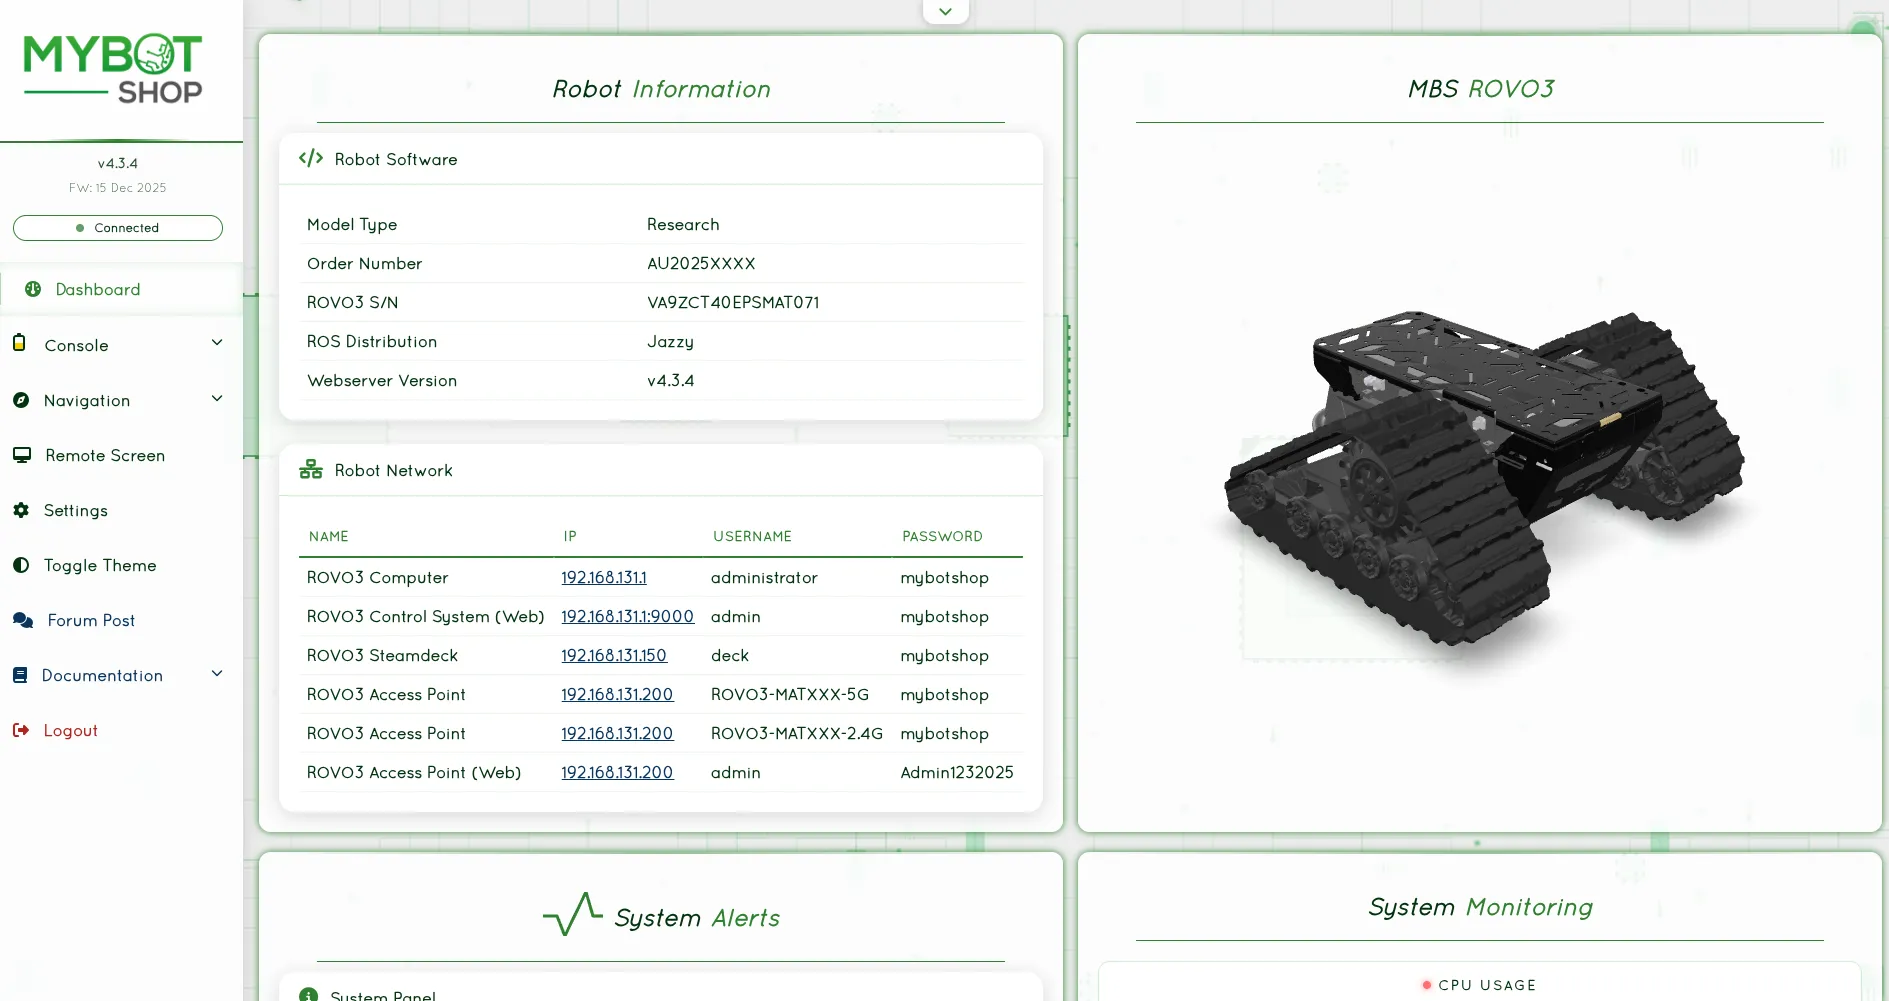
Main Dashboard with 3D Robot Visualization
Features:
Feature |
Description |
|---|---|
3D Visualization |
Real-time robot model via GLTF |
Joystick Teleop |
Browser-based joystick control |
Service Management |
Start/stop ROS2 nodes and services |
Map Visualization |
View navigation maps |
Battery Monitoring |
Real-time battery state |
GPS Waypoints |
Record and manage GPS waypoints |
Rosbag Recording |
Start/stop rosbag recordings |
VNC Access |
Remote desktop via VNC |
System Management
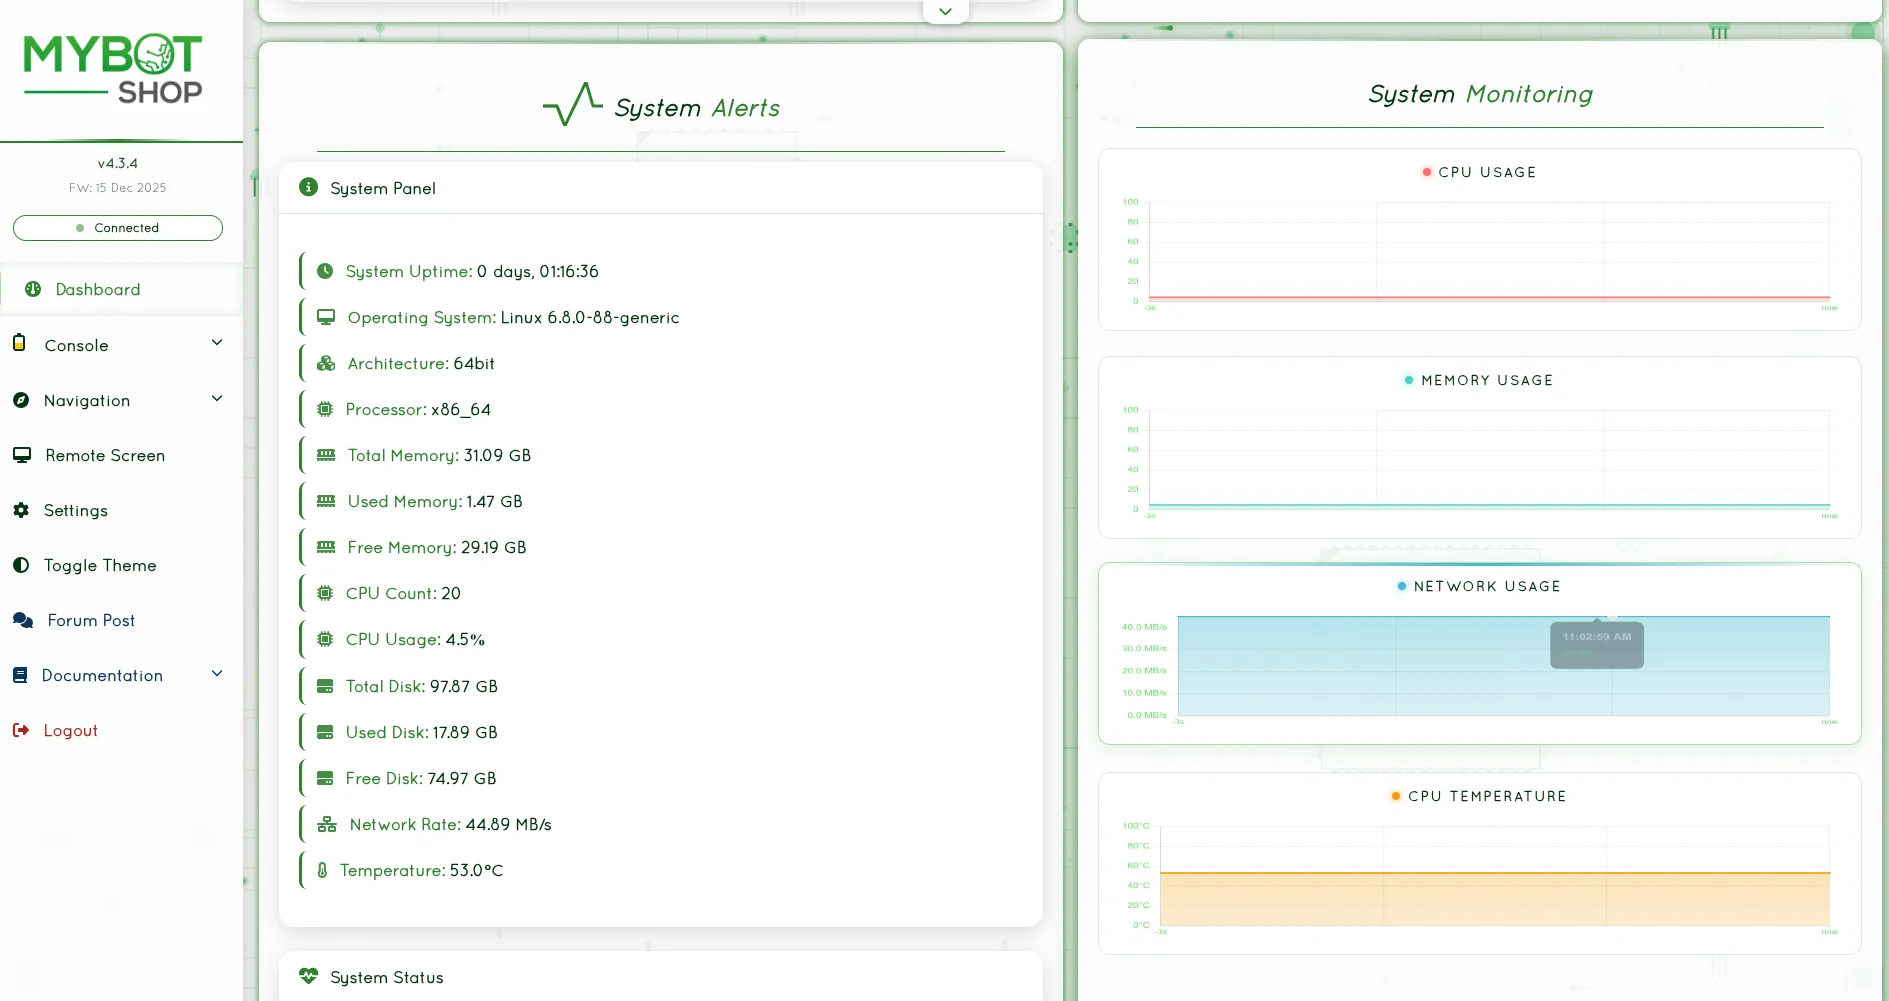
System Management Interface
Console
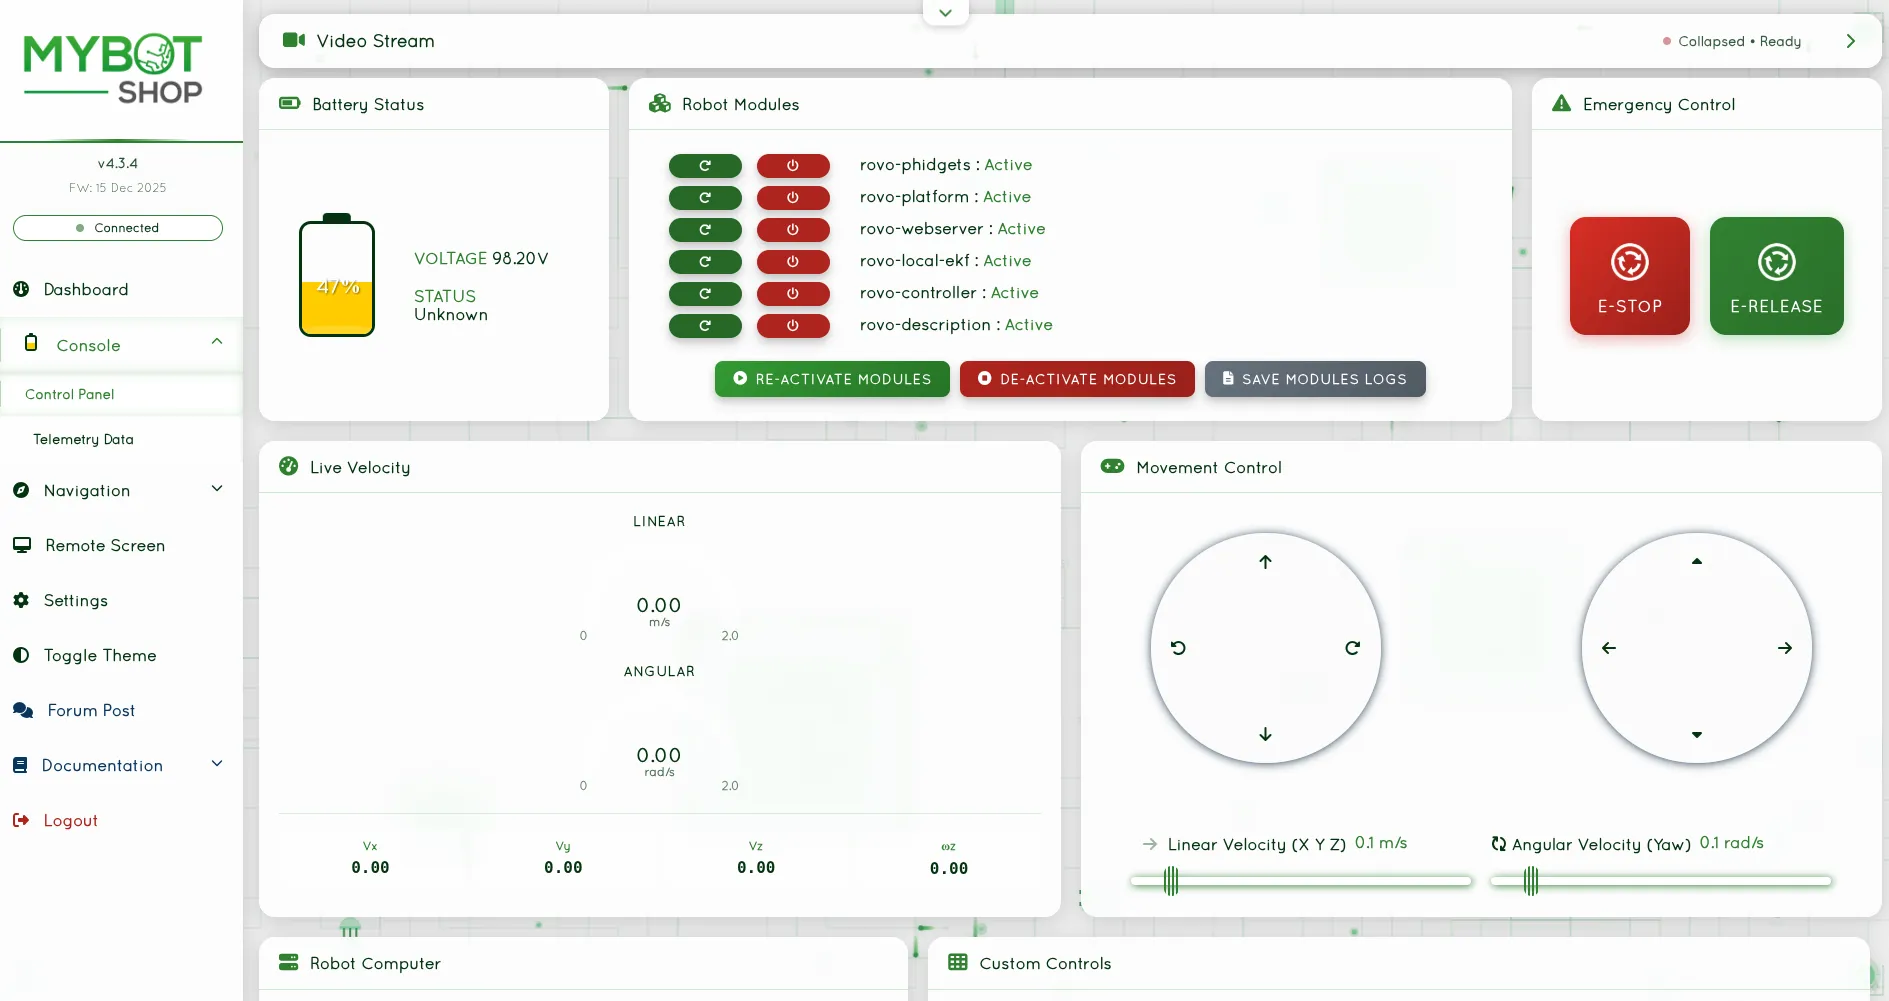
Web Console Interface
Indoor Navigation
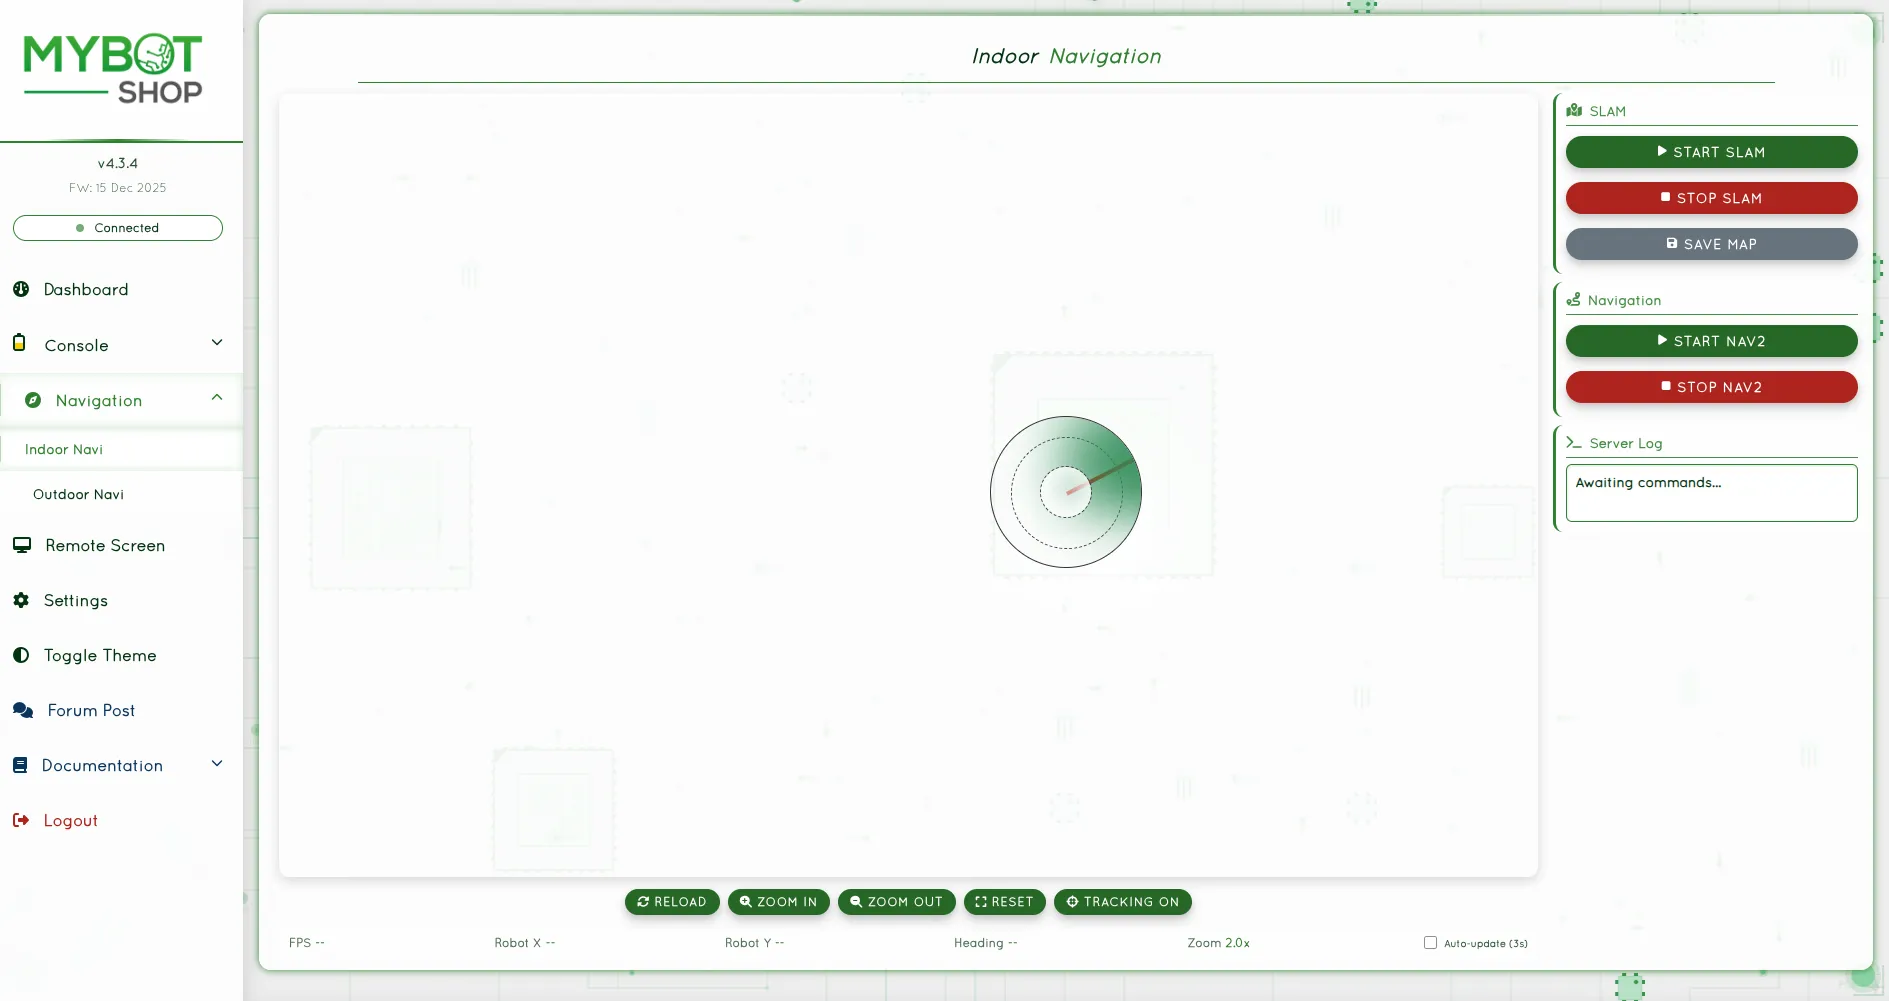
Indoor Navigation View
Outdoor Navigation
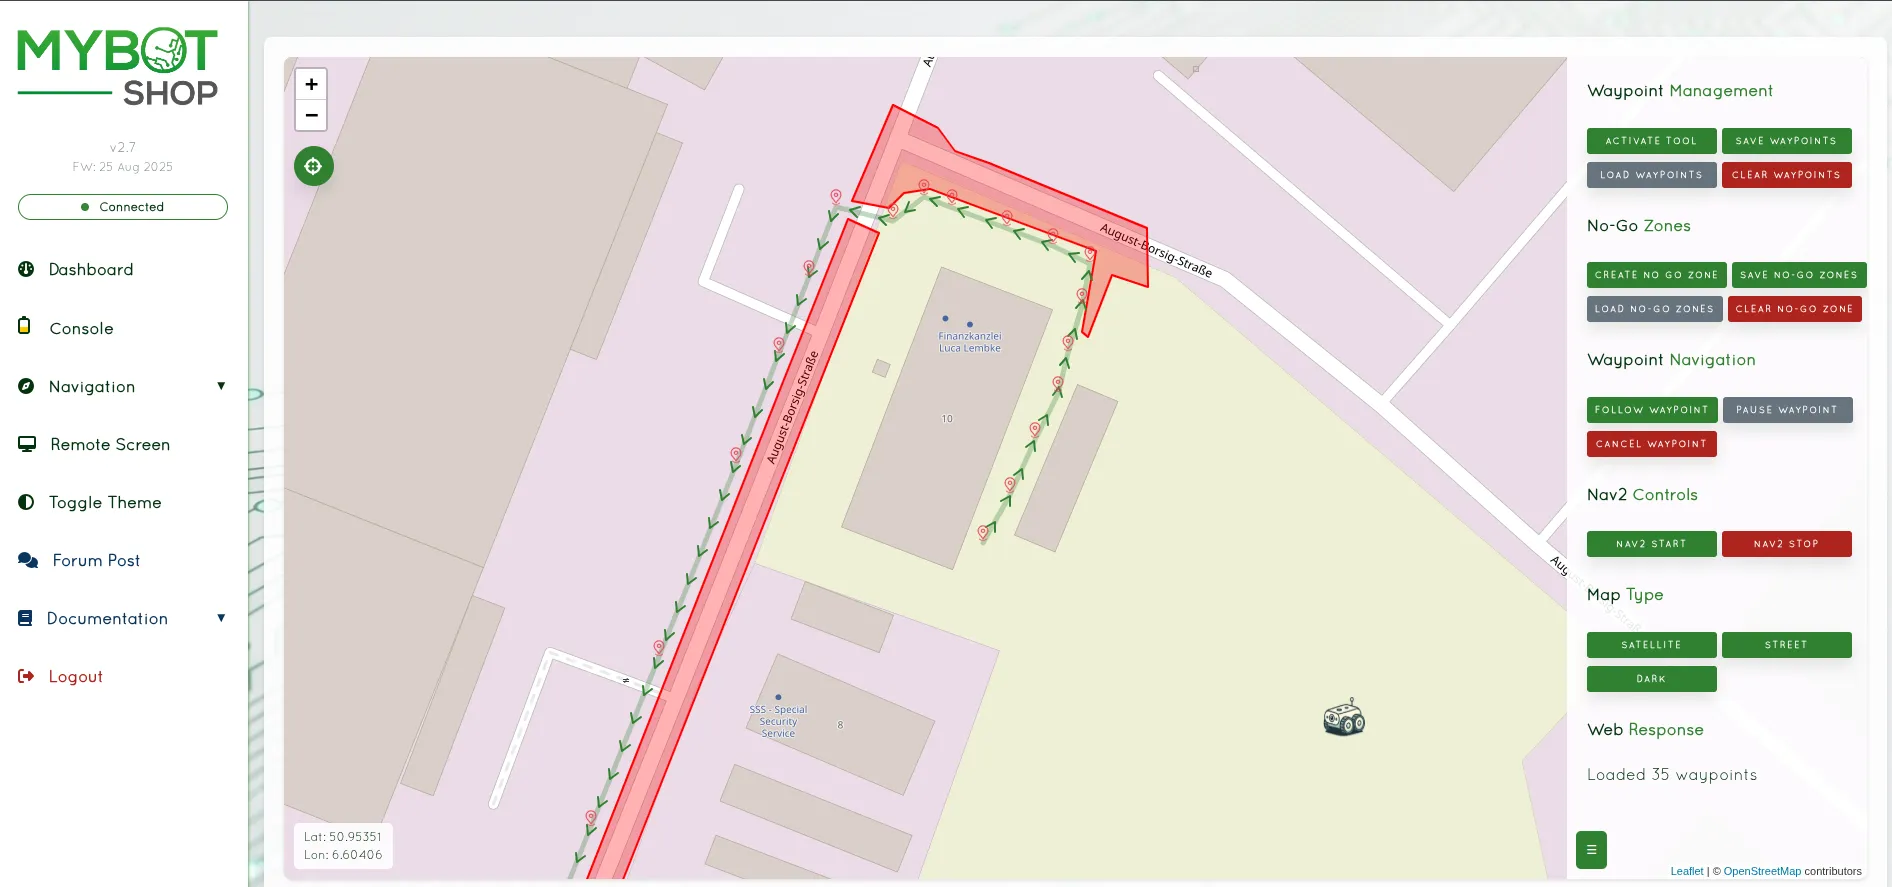
Outdoor Navigation View with GPS
VNC Remote Desktop
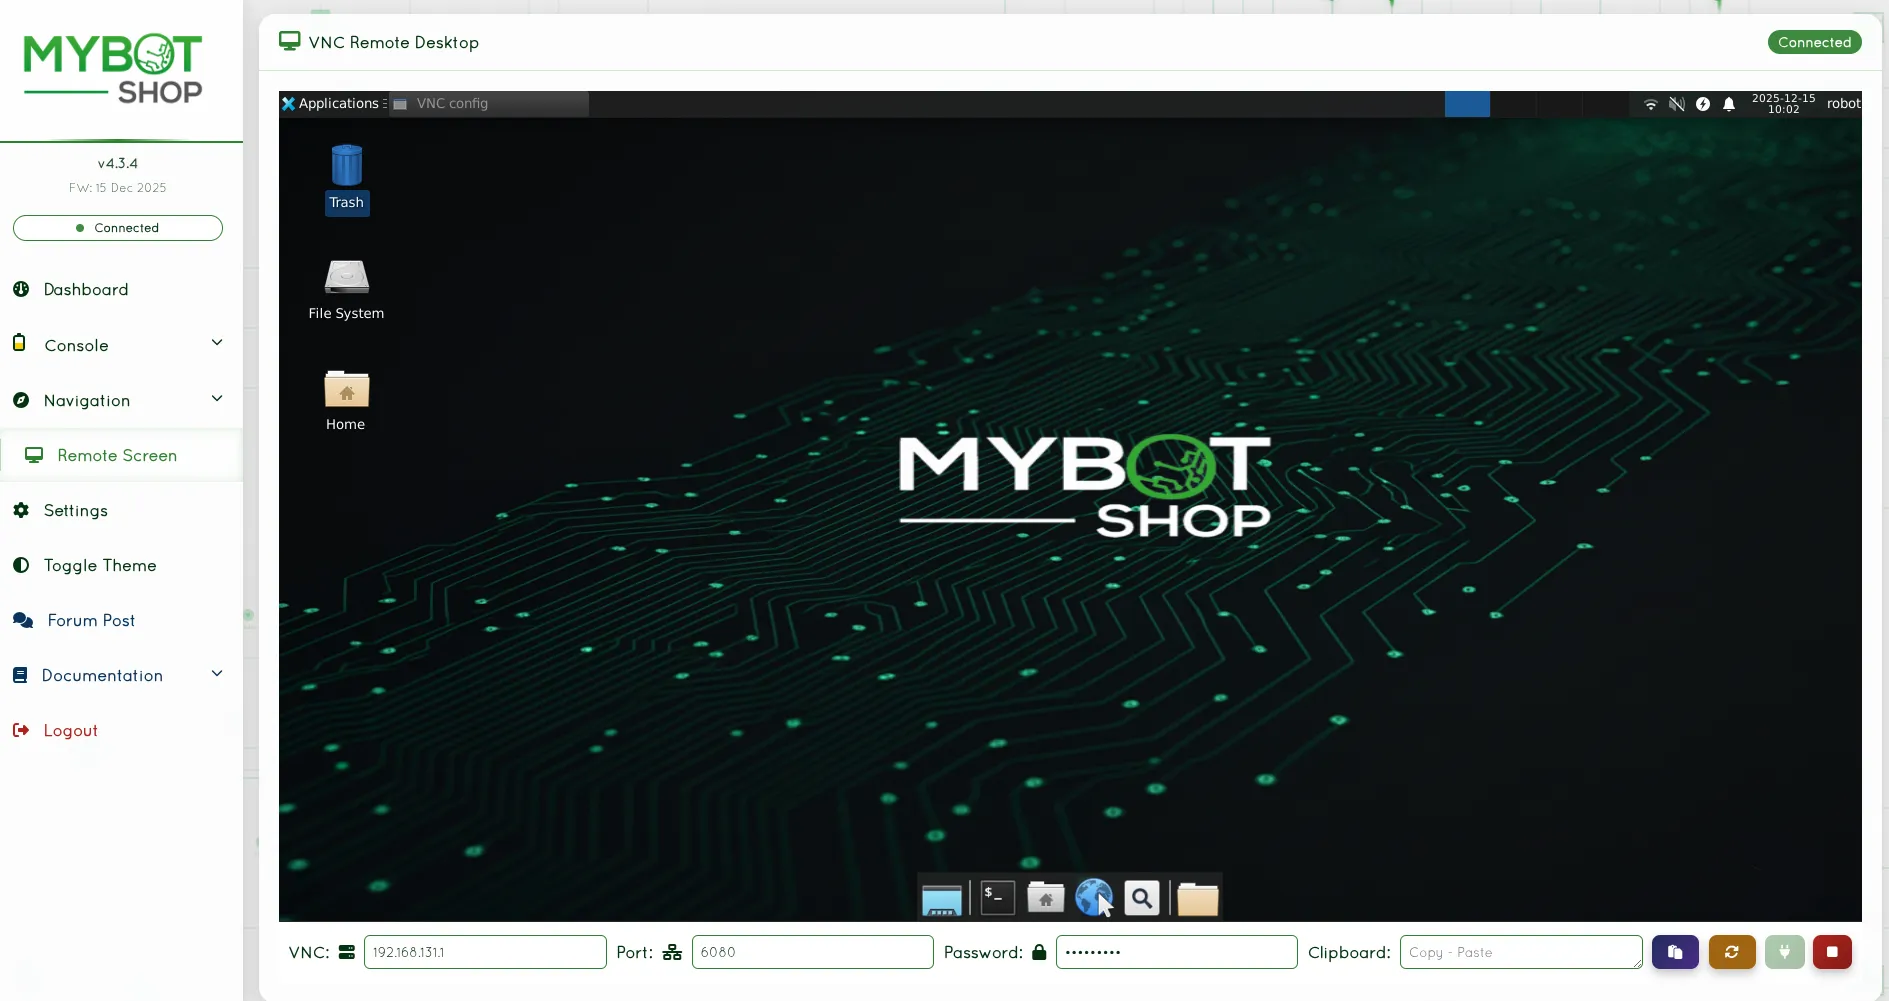
VNC Remote Desktop Access
Configuration (config/robot_webserver.yaml):
Parameter |
Description |
|---|---|
|
Rosbag storage directory |
|
List of controllable services |
|
Map topic name |
|
Velocity command topic |
|
Emergency stop topic |
|
GPS topic |
|
Battery state topic |
Launch Webserver:
The webserver is typically started automatically via systemd. To launch manually:
ros2 launch rovo_webserver webserver.launch.py
Dependencies:
pip3 install Flask playsound TTS
sudo apt-get install espeak-ng
VNC Setup:
To enable VNC remote desktop:
vncpasswd ~/.vnc/passwd
# Password: mybotshop
Firmware Updates:
The webserver supports firmware updates for the ROS2 workspace:
Navigate to the Firmware Update section
Upload a
.zipor.tar.gzarchive containing the new workspaceThe system automatically:
Creates a backup of the current workspace
Extracts and replaces the old workspace
Rebuilds using
colcon build
Restart ROS2 services after update
Teleoperation
Command Line Interface
Command Line Interface
Teleoperate the ROVO3 using the keyboard via ROS2:
Warning
Extreme caution required when using the ROVO3. Please go through the provided manuals before operating.
Prerequisites:
Ensure
rovo_autostartservices are running (check via webserver)Robot platform drivers must be active
Do not run duplicate drivers
1. Set Gear
Before moving the robot, set the appropriate gear:
# Set gear to 1 (drive mode)
ros2 service call /$ROVO_NS/platform/set_gear rovo_interface/srv/RovoGear "{gear: 1}"
2. Launch Keyboard Teleop
ros2 run teleop_twist_keyboard teleop_twist_keyboard --ros-args --remap cmd_vel:=/$ROVO_NS/cmd_vel
3. Control Keys
Key |
Action |
|---|---|
i |
Move forward |
k |
Stop |
, |
Move backward |
j |
Turn left |
l |
Turn right |
u |
Forward + left |
o |
Forward + right |
m |
Backward + left |
. |
Backward + right |
q/z |
Increase/decrease speed |
4. Return to Neutral
When finished, set the gear back to neutral:
ros2 service call /$ROVO_NS/platform/set_gear rovo_interface/srv/RovoGear "{gear: 0}"
Joystick Control
The ROVO3 supports Logitech joystick control with the following button mapping:
Button |
Function |
|---|---|
Button 4 (LB) |
Enable movement (hold to move) |
Button 5 (RB) |
Enable turbo mode (hold for faster speed) |
Left Stick Y (Axis 1) |
Linear X velocity (forward/backward) |
Right Stick X (Axis 3) |
Angular Z velocity (turning) |
D-Pad Up |
Increase gear |
D-Pad Down |
Decrease gear |
Speed Modes:
Mode |
Linear (m/s) |
Angular (rad/s) |
|---|---|---|
Normal (LB) |
0.2 |
0.3 |
Turbo (LB+RB) |
1.0 |
1.0 |
Web Interface Control
Access the webserver at http://192.168.131.1:9000 for browser-based joystick control.
Steamdeck Control
The ROVO3 can be controlled via Steamdeck using the steamdeck_joy_teleop interface.

Steamdeck Controller Interface
Visualization
RViz2
RViz2
RViz2 is used for visualizing the robot state, sensor data, and navigation information.
ROVO3 TF Frame Visualization in RViz2
Launch RViz2:
ros2 launch rovo_viz view_robot.launch.py
Available Configurations:
Configuration |
Description |
|---|---|
|
Full robot visualization with navigation |
|
Robot model only |
|
Steamdeck optimized view |
Displayed Elements:
Robot model (URDF)
TF transforms
Odometry
LiDAR point cloud
Depth camera images
Navigation costmaps
Path planning visualization
External Host Setup:
To visualize the robot from an external computer:
Build visualization packages:
colcon build --symlink-install --packages-select rovo_description rovo_viz
source install/setup.bash
Set the robot namespace:
export ROVO_NS="rovo_unit_071"Launch RViz2:
ros2 launch rovo_viz view_robot.launch.py
Note
Ensure your computer is on the same network as the robot and ROS2 DDS discovery is configured properly.
Rigs
Coming Soon
MBS Rig System
The ROVO3 platform supports the MBS Rig System for mounting sensors and accessories.
Rig integration documentation coming soon.
Note
Contact MYBOTSHOP for information about available rig configurations for the ROVO3 platform.
Manipulation
Coming Soon
Robotic Arm Integration
The ROVO3 platform supports integration with robotic manipulators for mobile manipulation applications.
Manipulation documentation coming soon.
Note
Contact MYBOTSHOP for information about supported robotic arm configurations for the ROVO3 platform.
Sensors
Depth Cameras
Lidars
GPS
Auxiliary
Depth Cameras
The ROVO3 supports the Intel RealSense D435i depth camera for RGB-D perception.
Test Native Driver:
ros2 launch realsense2_camera rs_launch.py depth_module.depth_profile:=1280x720x30 pointcloud.enable:=true
Launch via ROVO3 Package:
The camera can be controlled via the webserver or systemctl. When disabled via services, test manually:
ros2 launch rovo_depth_camera realsense.launch.py
Published Topics:
Topic |
Type |
|---|---|
|
|
|
|
|
|
Note
The ROVO3 utilizes the camera’s inbuilt IMU. External USB connection may be required for depth functionality.
Lidars
The ROVO3 supports Ouster OS1-64 LiDAR for 3D perception and mapping.
Network Configuration:
Default IP:
192.168.131.20
Launch via ROVO3 Package:
The LiDAR can be controlled via the webserver or systemctl. When disabled via services, test manually:
ros2 launch rovo_lidar ouster.launch.py
Published Topics:
Topic |
Type |
|---|---|
|
|
|
|
|
|
Dependencies:
# Install Ouster ROS2 driver
sudo apt-get install ros-jazzy-ouster-ros
For more information, see the Ouster ROS2 driver documentation.
GPS
GPS integration is available for outdoor navigation and waypoint recording. Configuration depends on the specific GPS hardware installed on your ROVO3 unit.
Auxiliary
The ROVO3 platform includes an integrated IMU that publishes orientation and acceleration data.
Published Topic:
/<ns>/platform/imu/data(sensor_msgs/Imu)
The BMS provides battery state information.
Published Topic:
/<ns>/platform/bms/state(sensor_msgs/BatteryState)
Simulation
Gazebo
Isaac Sim
Gazebo
The ROVO3 uses Gazebo Harmonic for simulation, which is the recommended simulator for ROS2 Jazzy.
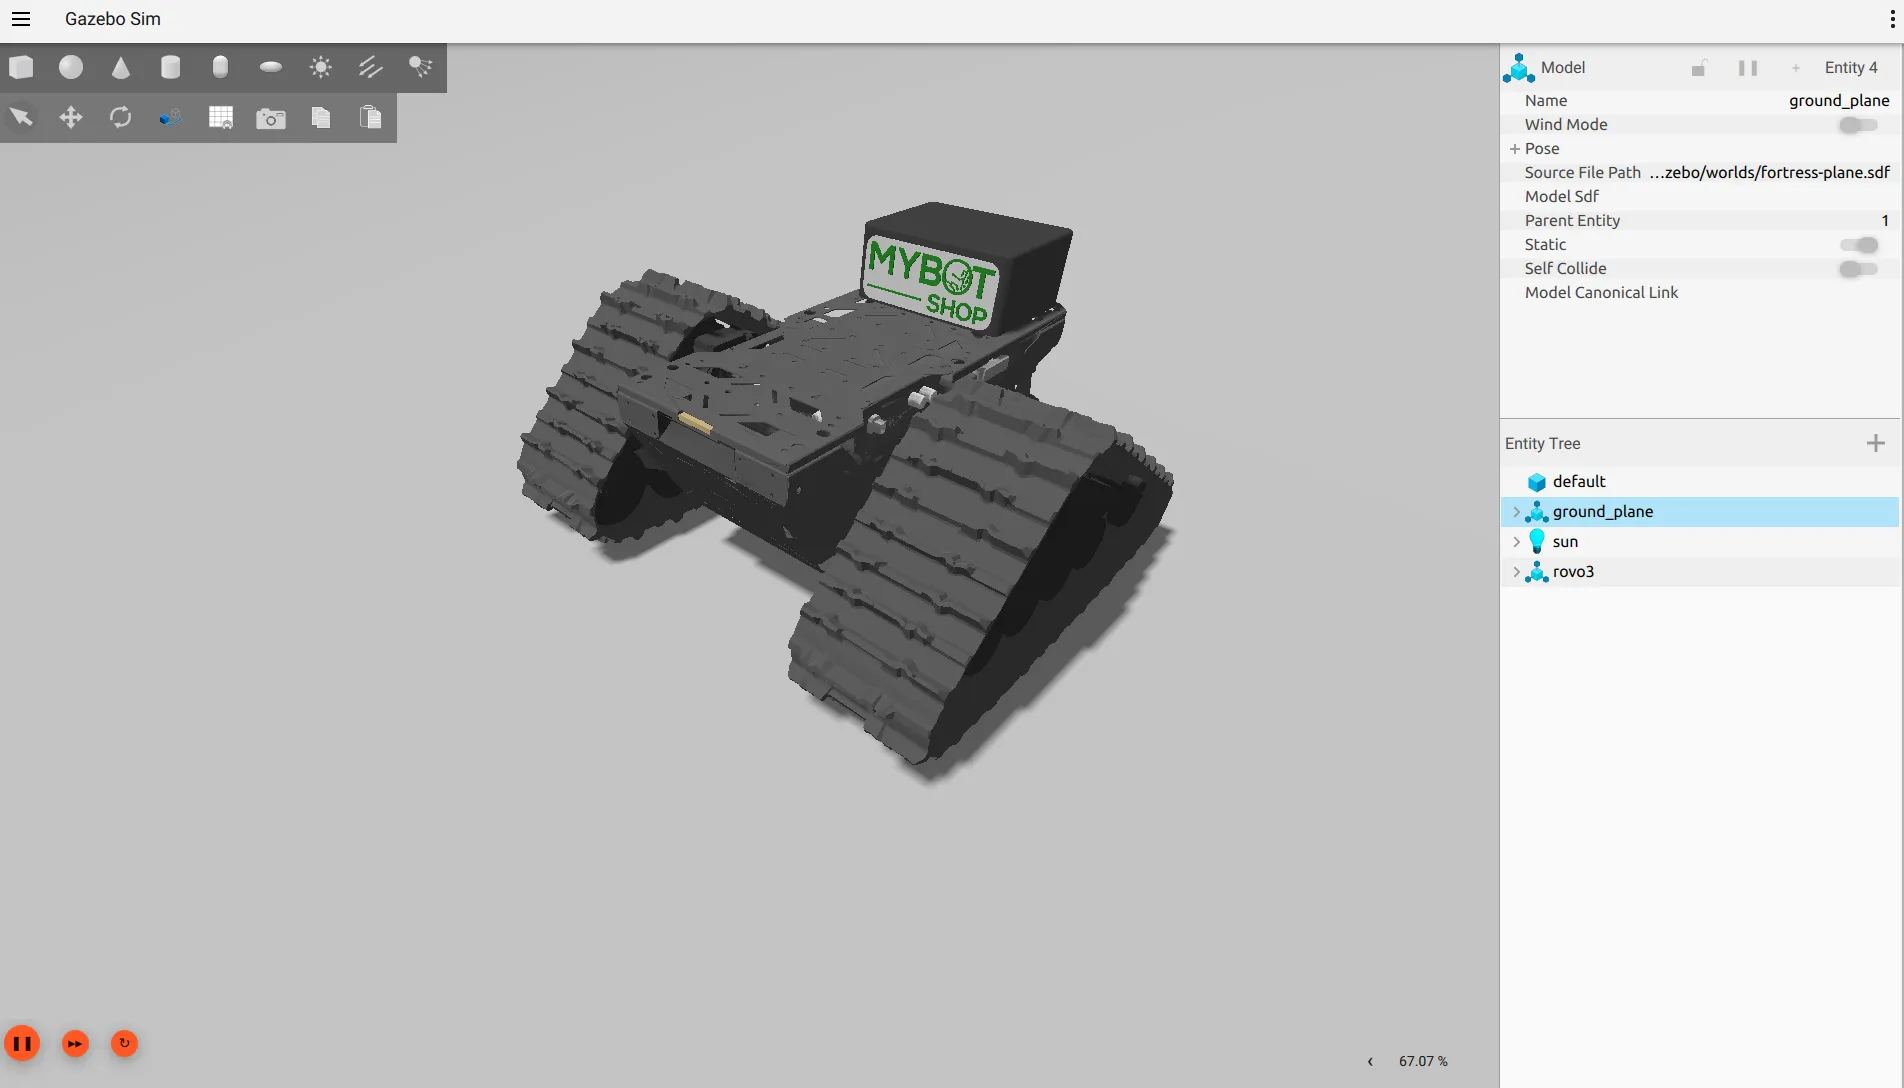
ROVO3 Simulation in Gazebo Harmonic
Launch Simulation:
ros2 launch rovo_gazebo simulation.launch.py
Available Worlds:
World File |
Description |
|---|---|
|
Flat ground plane (default) |
|
Industrial substation environment |
|
Lunar terrain |
Teleoperate in Simulation:
ros2 run teleop_twist_keyboard teleop_twist_keyboard
Simulated Sensor Topics:
Topic |
Type |
Description |
|---|---|---|
|
|
Simulation time |
|
|
Robot odometry |
|
|
IMU data |
|
|
RGB camera |
|
|
Depth image |
|
|
RGB-D point cloud |
|
|
LiDAR scan |
|
|
LiDAR point cloud |
Clean Up Gazebo Processes:
If Gazebo does not close properly, use the cleanup script:
ros2 run rovo_gazebo kill_gz.sh
Dependencies:
sudo apt-get install ros-jazzy-ros-gz ros-jazzy-ros-gz-bridge
For more information, see the Gazebo Harmonic documentation.
Isaac Sim
NVIDIA Isaac Sim integration is planned for future releases. Check back for updates on Isaac Sim support for the ROVO3 platform.
Packages
Robot Description
Twist Mux
EKF Localization
rovo_description
URDF and Xacro robot description files for the ROVO3 tracked robot platform.
Contents:
launch/rovo_description.launch.py- Robot state publisherlaunch/view_robot.launch.py- View URDF in RVizmeshes/- Platform and sensor visual meshesxacro/robot.xacro- Main robot description
Usage:
# Publish robot description
ros2 launch rovo_description rovo_description.launch.py

# Get URDF from Xacro
xacro $(ros2 pkg prefix rovo_description)/share/rovo_description/xacro/robot.xacro
rovo_platform
Hardware driver and control interface for the ROVO3 tracked robot platform. Provides CAN bus communication, motor control, odometry publishing, and ROS2 service interfaces.
Configuration Parameters (config/rovo_platform.yaml):
Parameter |
Default |
Description |
|---|---|---|
|
|
CAN node ID |
|
|
CAN interface name |
|
|
CAN bitrate (500 kbit/s) |
|
|
Distance between tracks (m) |
|
|
Maximum linear speed (m/s) |
|
|
Drive sprocket diameter (m) |
|
|
Gear ratio (16.0 for i16, 7.0 for i7) |
|
|
Publish TF transforms |
Published Topics:
Topic |
Type |
Description |
|---|---|---|
|
|
Robot odometry |
|
|
Track joint states |
|
|
IMU data |
|
|
Battery state |
Subscribed Topics:
Topic |
Type |
Description |
|---|---|---|
|
|
Velocity commands |
Services:
Service |
Type |
Description |
|---|---|---|
|
|
Set gear (0=neutral, 1-3=drive) |
|
|
Set operating mode |
Usage:
ros2 launch rovo_platform rovo_driver.launch.py

# Set gear
ros2 service call /$ROVO_NS/platform/set_gear rovo_interface/srv/RovoGear "{gear: 1}"
rovo_controller
Joystick teleoperation and command multiplexing for the ROVO3 platform.
Twist Mux Priority Table:
Priority |
Source |
Topic |
|---|---|---|
255 |
E-Stop (Lock) |
|
25 |
Logitech Joystick |
|
20 |
Steamdeck |
|
15 |
Web Interface |
|
10 |
Interactive Marker |
|
5 |
External |
|
3 |
Autonomous (High) |
|
2 |
Autonomous (Mid) |
|
1 |
Autonomous (Low) |
|
Logitech Joystick Button Mapping:
Button |
Function |
|---|---|
Button 4 (LB) |
Enable movement (hold to move) |
Button 5 (RB) |
Enable turbo mode (hold for faster speed) |
Left Stick Y (Axis 1) |
Linear X velocity (forward/backward) |
Right Stick X (Axis 3) |
Angular Z velocity (turning) |
D-Pad Up |
Increase gear |
D-Pad Down |
Decrease gear |
Speed Settings:
Mode |
Linear (m/s) |
Angular (rad/s) |
|---|---|---|
Normal |
0.2 |
0.3 |
Turbo |
1.0 |
1.0 |
rovo_gazebo
Gazebo Harmonic simulation package for the ROVO3 platform.
Available Worlds:
fortress-plane.sdf- Flat ground plane (default)fortress-substation.sdf- Industrial substation environmentfortress-moon.sdf- Lunar terrain
Simulated Topics (GZ -> ROS):
Topic |
Type |
Description |
|---|---|---|
|
|
Simulation time |
|
|
Robot odometry |
|
|
IMU data |
|
|
RGB camera |
|
|
Depth image |
|
|
RGB-D point cloud |
|
|
LiDAR scan |
|
|
LiDAR point cloud |
rovo_navigation
Nav2-based navigation stack for the ROVO3 platform.
Launch Files:
Launch File |
Description |
|---|---|
|
SLAM mapping mode |
|
Odometric navigation (no map) |
|
Map-based autonomous navigation |
Configuration Files:
param/nav2_slam.yaml- SLAM parametersparam/nav2_odom.yaml- Odometry navigation parametersparam/nav2_map.yaml- Map navigation parametersbehavior_trees/nav_to_pose.xml- Custom behavior tree
rovo_viz
RViz2 visualization package with pre-configured displays.
RViz Configurations:
rviz/robot.rviz- Full robot visualization with navigationrviz/model.rviz- Robot model onlyrviz/steam.rviz- Steamdeck optimized view
rovo_autostart
System bringup and automatic startup configuration.
Files:
config/setup.bash- Environment variables and aliasesconfig/startup.bash- Startup scriptconfig/rovo_can.bash- CAN interface setupdebian/45-mbs.rules- udev rules for hardwarescripts/startup_installer.py- Systemd service installer
Environment Variables:
Variable |
Default |
Description |
|---|---|---|
|
|
Robot namespace |
rovo_webserver
Web-based robot control interface with Flask backend.
Features:
Real-time robot visualization (3D model via GLTF)
Joystick teleoperation
Service management (start/stop ROS nodes)
Map visualization
Battery monitoring
GPS waypoint recording
Rosbag recording
VNC remote desktop access
Access: http://192.168.131.1:9000
rovo_interface
Custom ROS2 service definitions for the ROVO3 platform.
RovoGear.srv:
int32 gear      # 0=neutral, 1-3=drive gears
---
bool success
string message
RovoModes.srv:
string request_data
---
bool success
string reason
Usage:
# Set gear to 1
ros2 service call /$ROVO_NS/platform/set_gear rovo_interface/srv/RovoGear "{gear: 1}"

# Set mode
ros2 service call /$ROVO_NS/platform/set_mode rovo_interface/srv/RovoModes "{request_data: 'auto'}"
Debugging
Coming Soon
RQT
RQT provides a GUI framework for ROS2 debugging tools.
Launch RQT:
ros2 run rqt_gui rqt_gui --ros-args --remap tf:=/$ROVO_NS/tf --remap tf_static:=/$ROVO_NS/tf_static
Available Plugins:
Topic Monitor
Service Caller
Parameter Reconfigure
Node Graph
TF Tree
Dynamic Reconfigure
Use dynamic reconfigure to adjust parameters at runtime:
ros2 run rqt_gui rqt_gui --ros-args --remap tf:=/$ROVO_NS/tf --remap tf_static:=/$ROVO_NS/tf_static
From the GUI, select Plugins > Configuration > Dynamic Reconfigure.
TF
TF Tree Visualization:
ros2 run rqt_tf_tree rqt_tf_tree --force-discover \
  --ros-args --remap tf:=/$ROVO_NS/tf --remap tf_static:=/$ROVO_NS/tf_static
Generate TF Frames PDF:
ros2 run tf2_tools view_frames.py --force-discover \
  --ros-args --remap tf:=/$ROVO_NS/tf --remap tf_static:=/$ROVO_NS/tf_static
Topic Debugging
List all topics:
ros2 topic list
Echo a topic:
ros2 topic echo /$ROVO_NS/platform/odom
Check topic frequency:
ros2 topic hz /$ROVO_NS/platform/odom
Service Debugging
List all services:
ros2 service list
Call a service:
ros2 service call /$ROVO_NS/platform/set_gear rovo_interface/srv/RovoGear "{gear: 0}"
Node Debugging
List all nodes:
ros2 node list
Get node info:
ros2 node info /rovo_platform
CAN Debugging
Configure CAN Interface:
sudo ip link set can0 down
sudo ip link set can0 type can bitrate 500000
sudo ip link set can0 up
Monitor CAN Traffic:
sudo candump can0
Note
The CAN bitrate for ROVO3 is 500000 (500 kbit/s).
Common Troubleshooting
Service Not Found
If you see “Unit ros2.service could not be found”, it means there is no startup service installed. Run:
ros2 run rovo_autostart startup_installer.py
Service Status Indicators
Red marker - The startup job has failed
Green marker - Everything is working correctly
Grey marker - The service has not started yet
Restart Failed Service
sudo service rovo-platform restart
Network Connection Issues
Note
Sometimes other networks can cause disruptions when connecting to the ROVO3. It is best to have only your connection to the robot active and all others inactive.
Miscellanious
Coming Soon
Sync Host and Robot
Synchronize files between host computer and robot using rsync:
Sync to Robot:
rsync -avP -t --delete -e ssh src robot@192.168.131.1://opt/mybotshop
Sync to Steamdeck:
rsync -avP -t --delete -e ssh src deck@192.168.131.150://home/deck/ros2_ws
Core Launch Files
Warning
Do not run these files manually as they should already be running via the webserver!
These launch files are managed by systemd services and the webserver:
Platform Driver:
ros2 launch rovo_platform rovo_driver.launch.py
Webserver:
ros2 launch rovo_webserver webserver.launch.py
Controller:
ros2 launch rovo_controller controller.launch.py
Robot Description:
ros2 launch rovo_description rovo_description.launch.py
CAN Hardware Connections
Recommended Parts:
Primary: Part 1-1564337-1
Backup: Part 967650-1
Pin Mapping:
ROVO |
Peak-USB |
|---|---|
Pin1 Can2 Low |
Pin2 Can Low |
Pin2 Can2 High |
Pin7 Can High |
Pin3 Can Gnd |
Pin3 Can Gnd |
Useful Commands
Build Workspace:
cd /opt/mybotshop
colcon build --symlink-install --cmake-args -DCMAKE_BUILD_TYPE=Release
source install/setup.bash
Quick Build Alias:
rovo_build
Check ROS2 Environment:
printenv | grep ROS
Source Workspace:
source /opt/mybotshop/install/setup.bash
Installation
Installation Robot
Installation External
Installation Robot
The ROVO3 comes pre-installed with ROS2 Jazzy. For a fresh installation or re-installation, follow these steps:
1. Set Robot Hostname
sudo hostnamectl set-hostname rovo-unit-071
2. Create Workspace Directory
sudo mkdir /opt/mybotshop && sudo chown -R robot:robot /opt/mybotshop
3. Clone and Install
Clone the repository to the robot’s PC and run the installer:
cd /opt/mybotshop/src/mybotshop/robot_installer
sudo chmod +x total_install.sh
sudo ./total_install.sh
4. Build ROS2 Workspace
cd /opt/mybotshop
colcon build --symlink-install --cmake-args -DCMAKE_BUILD_TYPE=Release
source install/setup.bash
5. Install Startup Services
ros2 run rovo_autostart startup_installer.py
6. Disable System Suspend
sudo systemctl mask sleep.target suspend.target hibernate.target hybrid-sleep.target
sudo systemctl disable systemd-networkd-wait-online.service
sudo systemctl mask systemd-networkd-wait-online.service
7. Configure Network
Edit the netplan configuration:
sudo nano /etc/netplan/01-network-manager.yaml
Add the following configuration:
network:
  version: 2
  renderer: NetworkManager
  bridges:
    br0:
      interfaces:
        - eno1
        - enp3s0
      dhcp4: no
      addresses:
        - 192.168.131.1/24
      nameservers:
        addresses:
          - 8.8.8.8
          - 1.1.1.1
      parameters:
        stp: false
        forward-delay: 0
      optional: true

  ethernets:
    eno1:
      dhcp4: no
      optional: true
    enp1s0:
      dhcp4: no
      optional: true
Apply the configuration:
sudo netplan apply
Installation External
For external (host) computers that need to visualize and interact with the ROVO3:
1. Clone the Repository
Clone the ROVO3 repository into your ROS2 workspace.
2. Build Essential Packages
colcon build --symlink-install --packages-select rovo_description rovo_viz
source install/setup.bash
3. Set Environment and Launch
export ROVO_NS="rovo_unit_071"
ros2 launch rovo_viz view_robot.launch.py
Dependencies
Install the required ROS2 packages:
sudo apt-get install ros-jazzy-urdf ros-jazzy-xacro \
                     ros-jazzy-joint-state-publisher ros-jazzy-robot-state-publisher \
                     ros-jazzy-joy ros-jazzy-teleop-twist-joy ros-jazzy-twist-mux \
                     ros-jazzy-navigation2 ros-jazzy-nav2-bringup \
                     ros-jazzy-ros-gz ros-jazzy-ros-gz-bridge