Ascento Handling and Transport
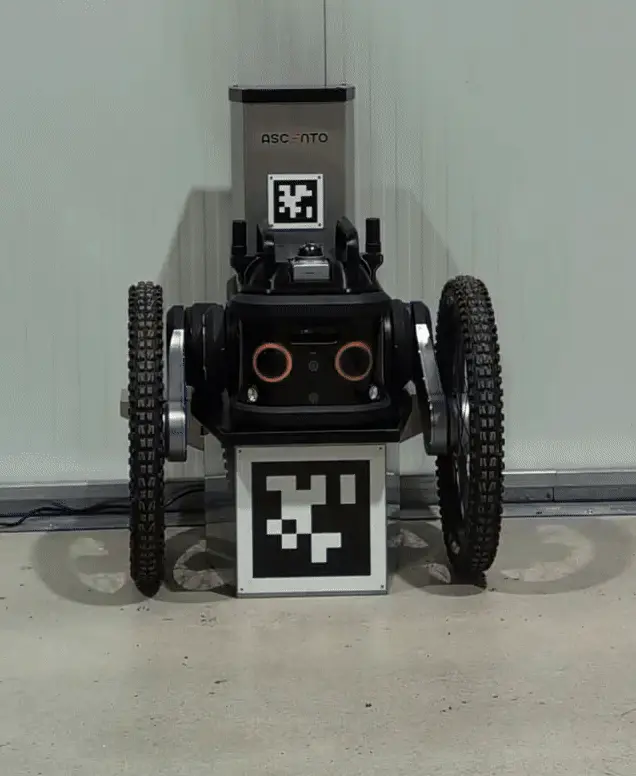
Before transporting the Ascento robot, ensure proper handling by using the pre-installed handles. These handles are designed for secure grip and even weight distribution, making it easy and safe to carry the robot. Proper handling minimizes the risk of damage and ensures efficient transport.
Single-Person Transport
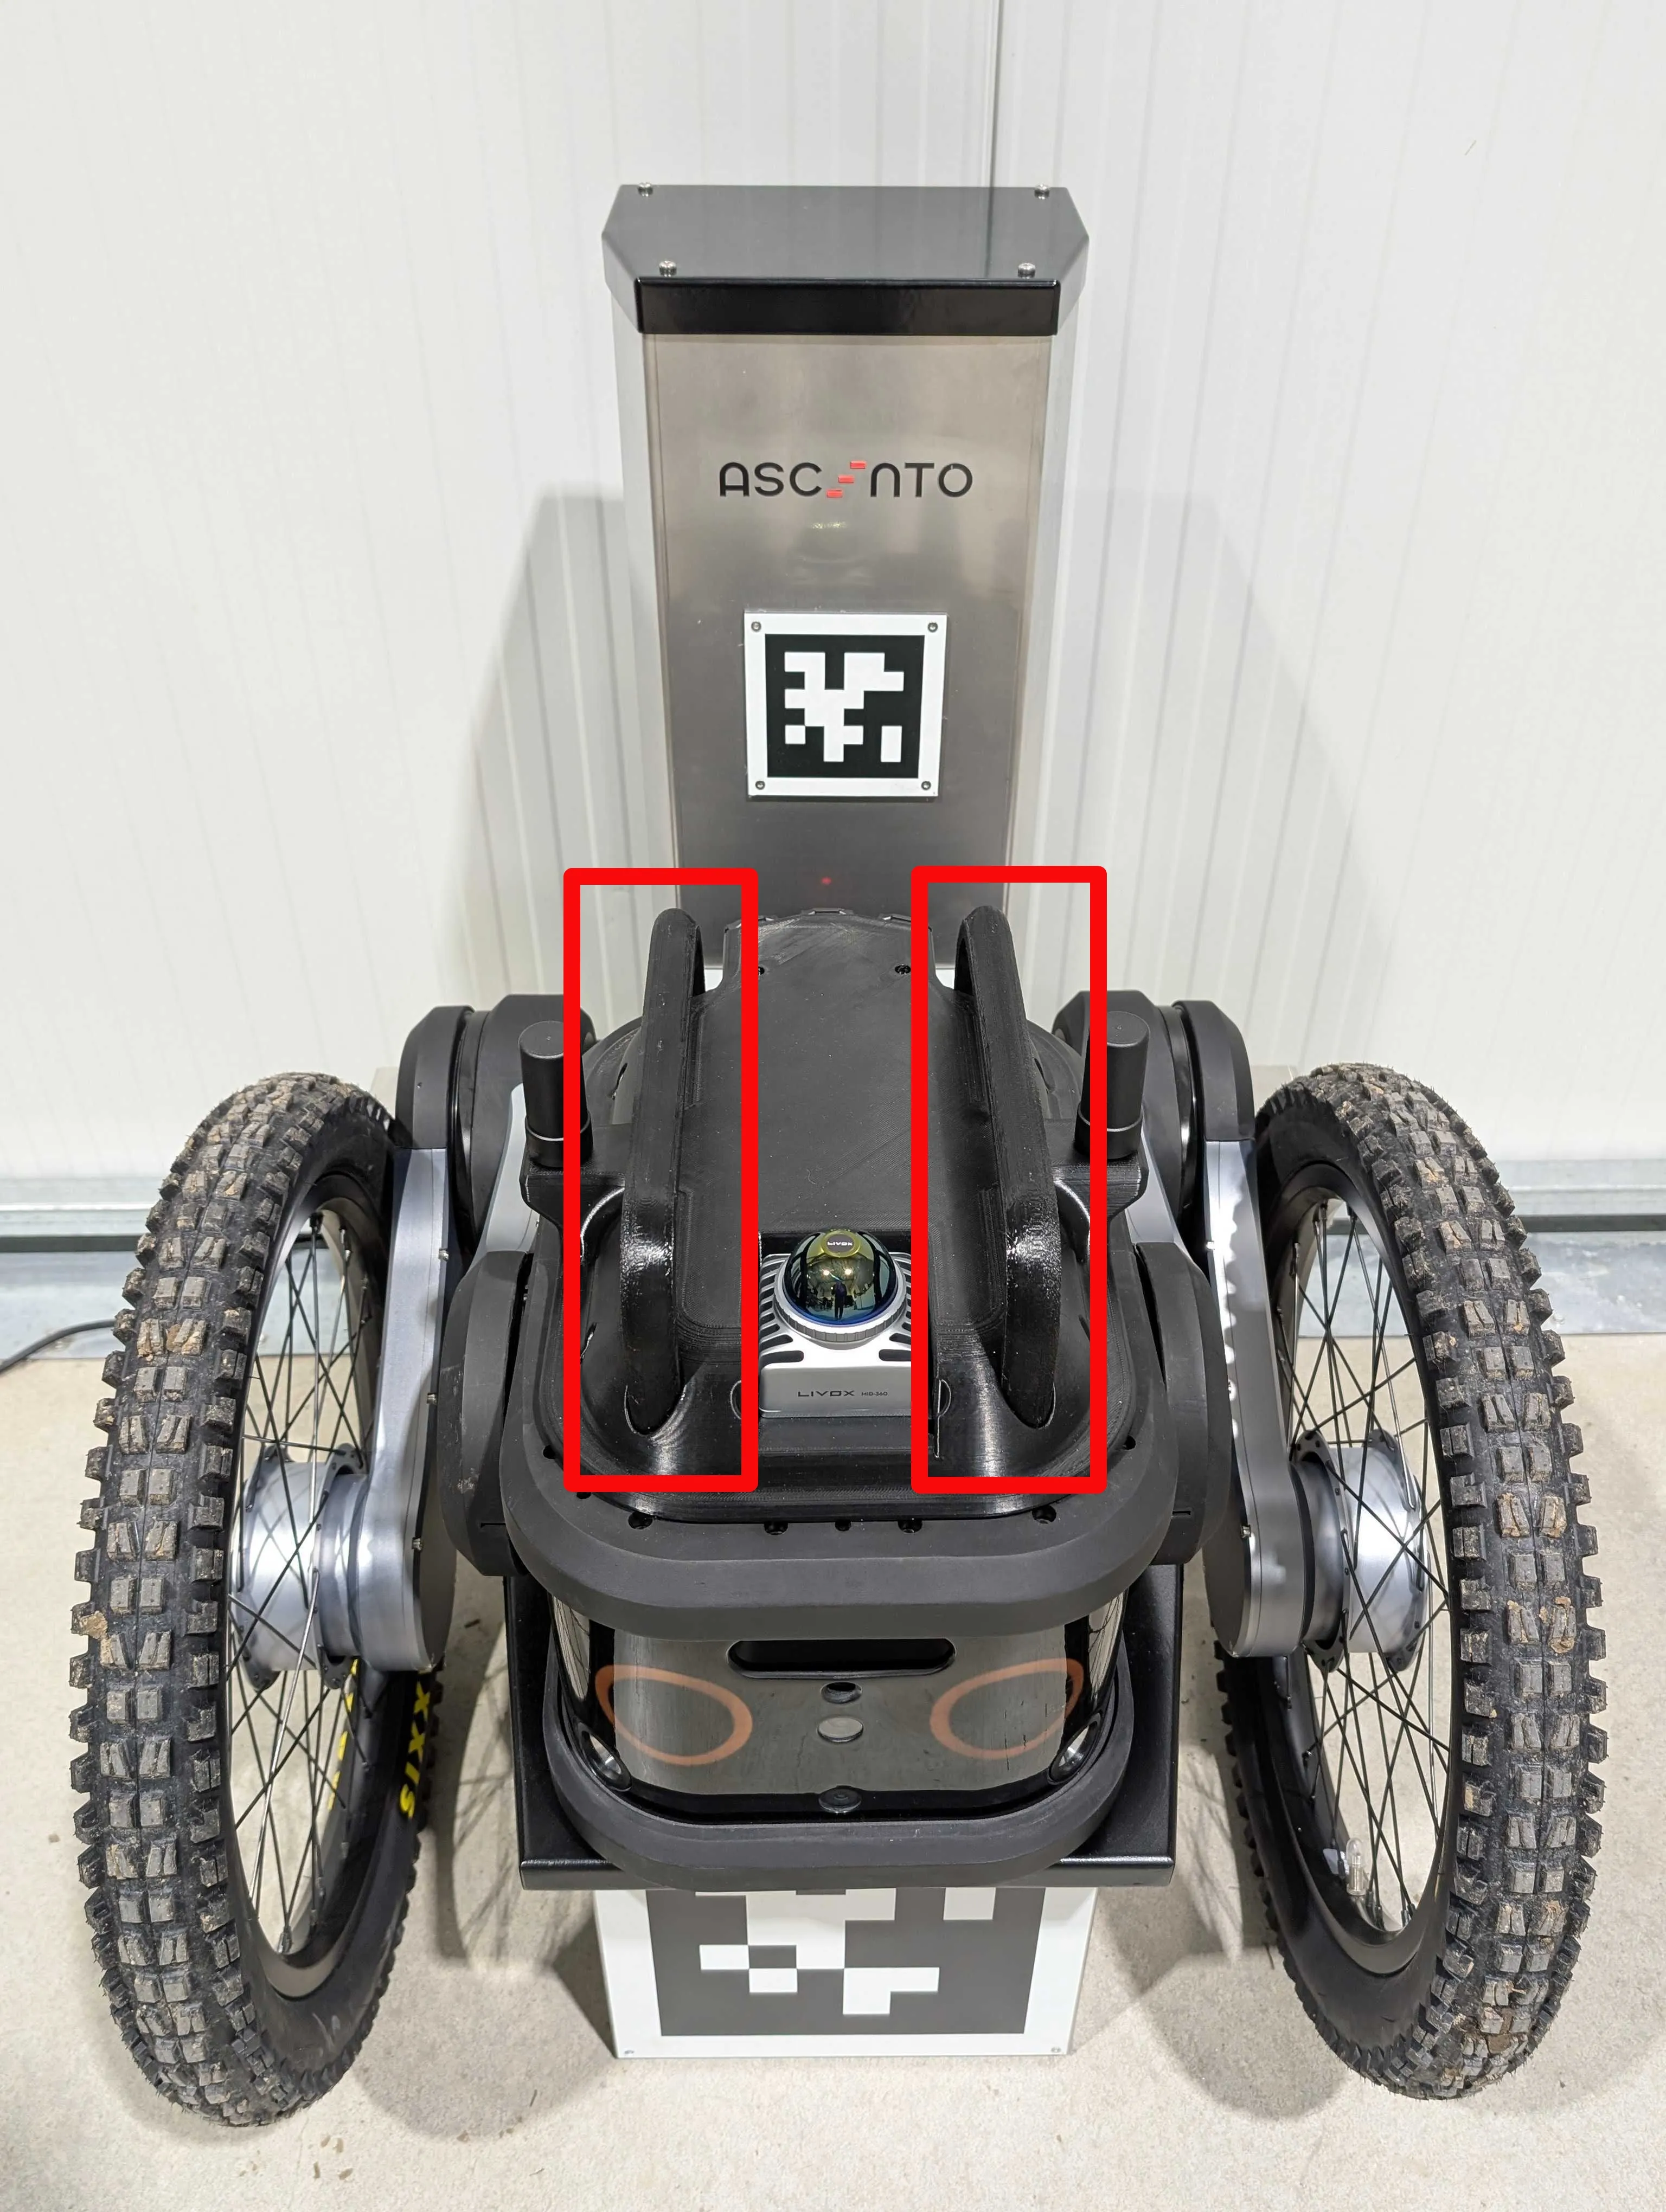
When transporting the Ascento robot by yourself, it is crucial to handle it properly to avoid injury or damage to the robot. The robot should be lifted using the designated handles located on the top of the main body. These handles are specifically designed to help distribute the robot’s weight evenly, allowing you to carry it safely and with greater ease. Ensure that you maintain a stable posture and use both hands to securely grip the handles while lifting.
Two-Person Transport (Recommended)
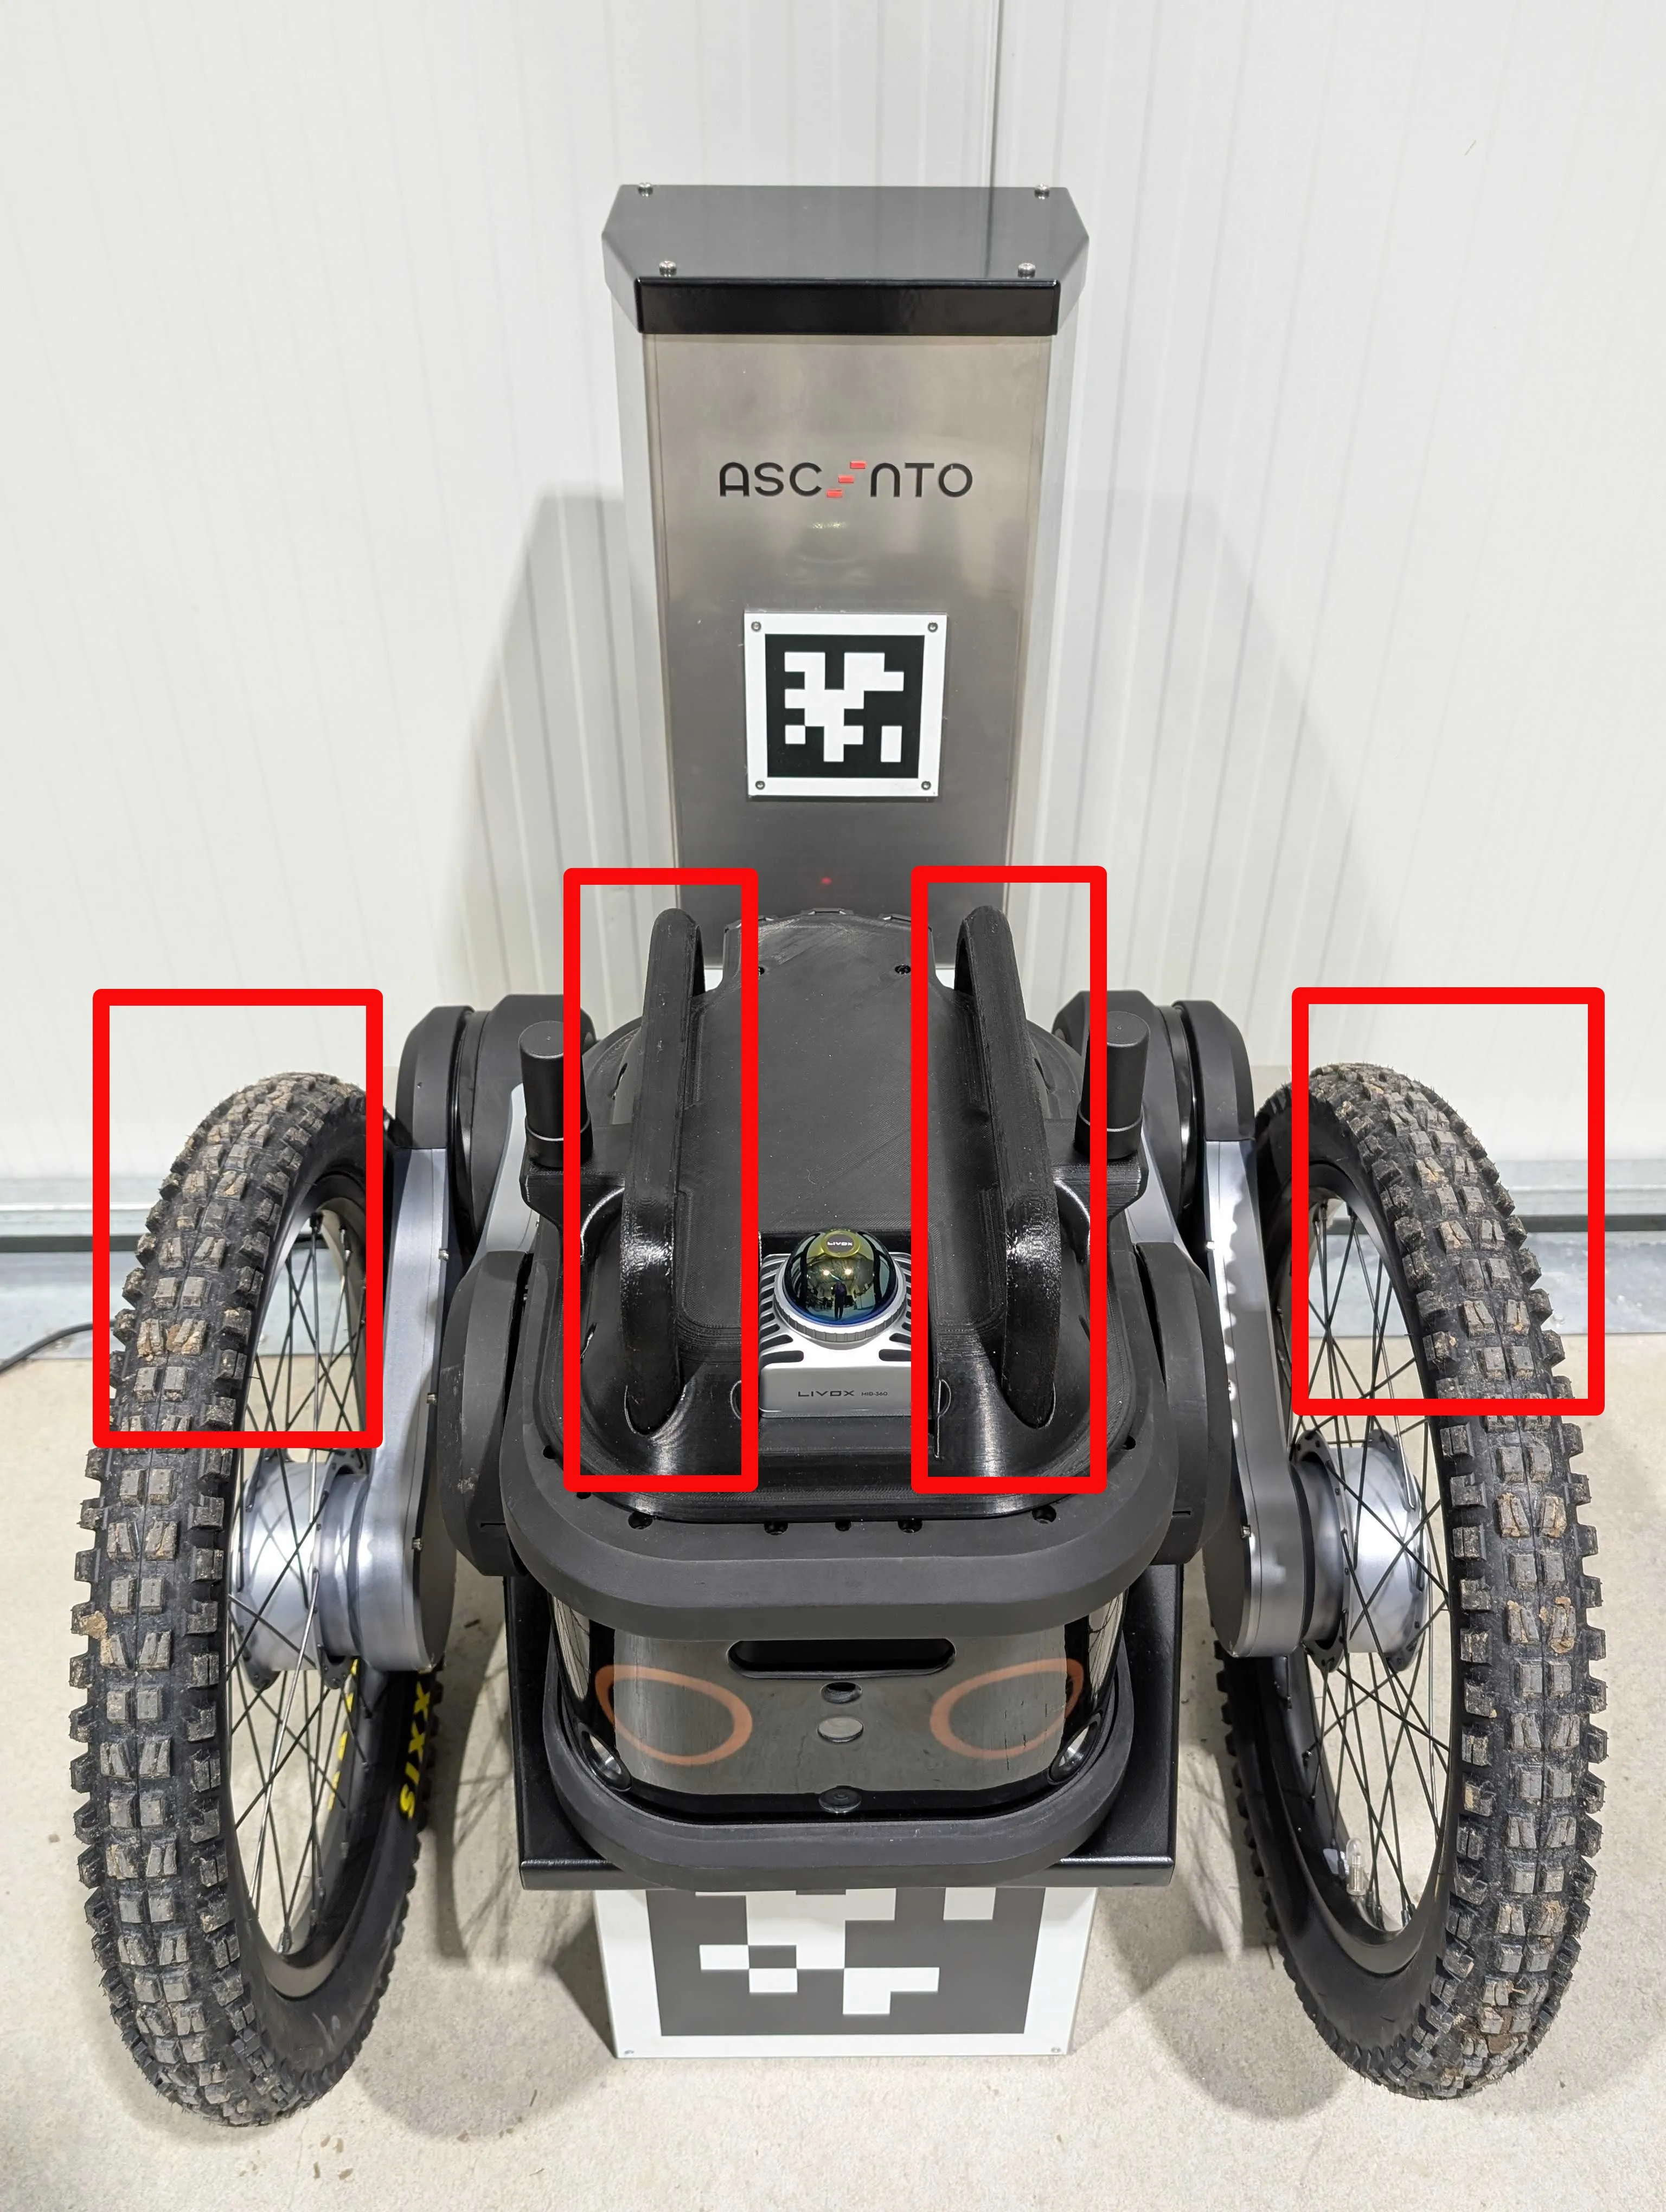
For optimal safety and ease, it is recommended that two people transport the Ascento robot. One person should grip the handle on the left side of the robot’s main body and simultaneously support the left wheel. Similarly, the other person should hold the handle on the right side of the robot’s main body and support the right wheel. This method ensures balanced weight distribution and enhanced stability, making it easier to carry the robot without risking accidental drops. Transporting the robot with two people not only reduces the strain on each individual but also provides better control over the robot’s balance and movement.
Ascento Powering ON
Hardware Setup
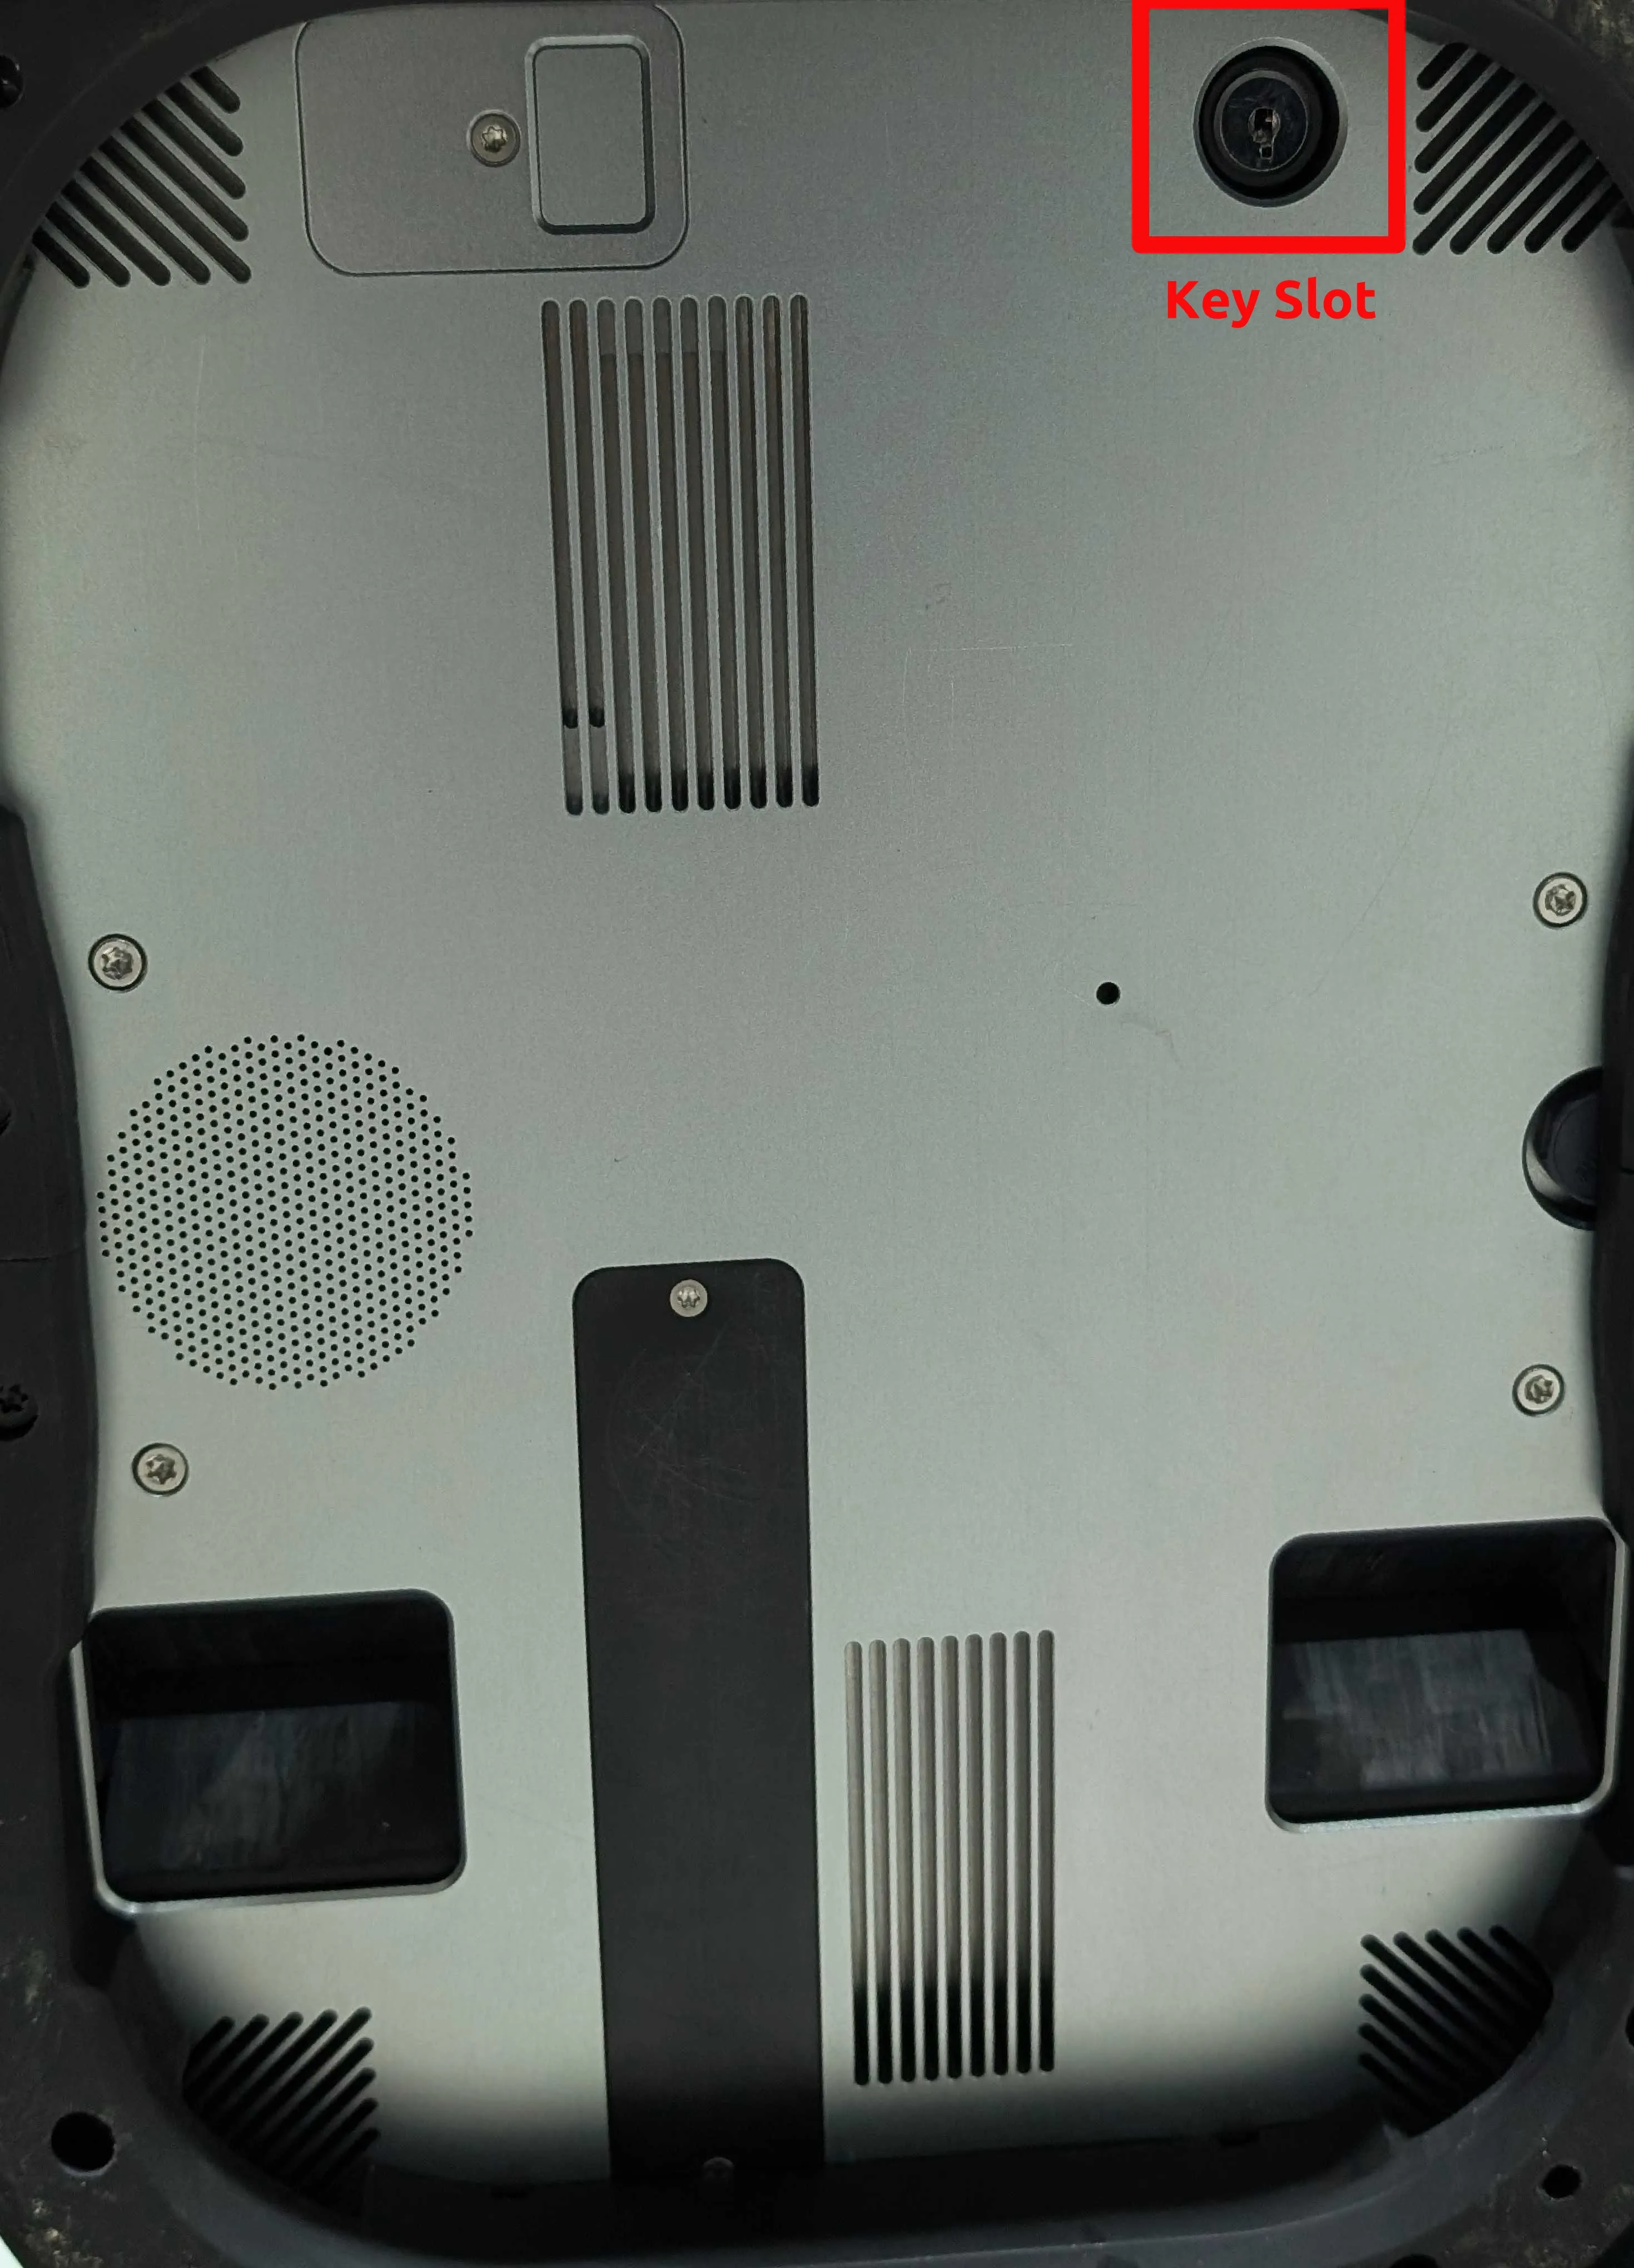
Tilt the robot upward.
Insert the key into the bottom slot and turn it clockwise to unlock.
The robot’s flashlights will blink, indicating that the power is on.
Steam Deck Activation
Wait for 1 minute after powering up.
Verify that the Steam Deck is connected to Ascento’s 5G WiFi.
Click on the joystick GUI to initiate communication between the Steam Deck and the Ascento robot.
Ensure the Ascento is positioned flat on the ground.
Perform Homing of the Ascento wheels by pressing L2 + Right. (Required only at first boot or if Ascento’s eyes blink red.)
Once homed, press L2 + Up to make the robot stand up.
Ascento Powering Off
To power off, one person should remain close to Ascento.
Press Soft E-Stop (L2 + B)—this will cause the robot’s motors to dampen, allowing it to gently fall to the ground.
Lock the robot with the key.
Ascento Charging
Ascento is designed to be fully weatherproof, with its battery securely integrated inside the robot’s body to withstand various environmental conditions. Charging the robot is achieved through a specialized docking station, which provides a convenient and efficient solution for autonomous applications. The docking station features a built-in LED indicator that shows the current charging status of the robot. When the LED is red, it signifies that the robot is in the process of charging. Once the LED turns green, it indicates that the robot is fully charged and ready for deployment.
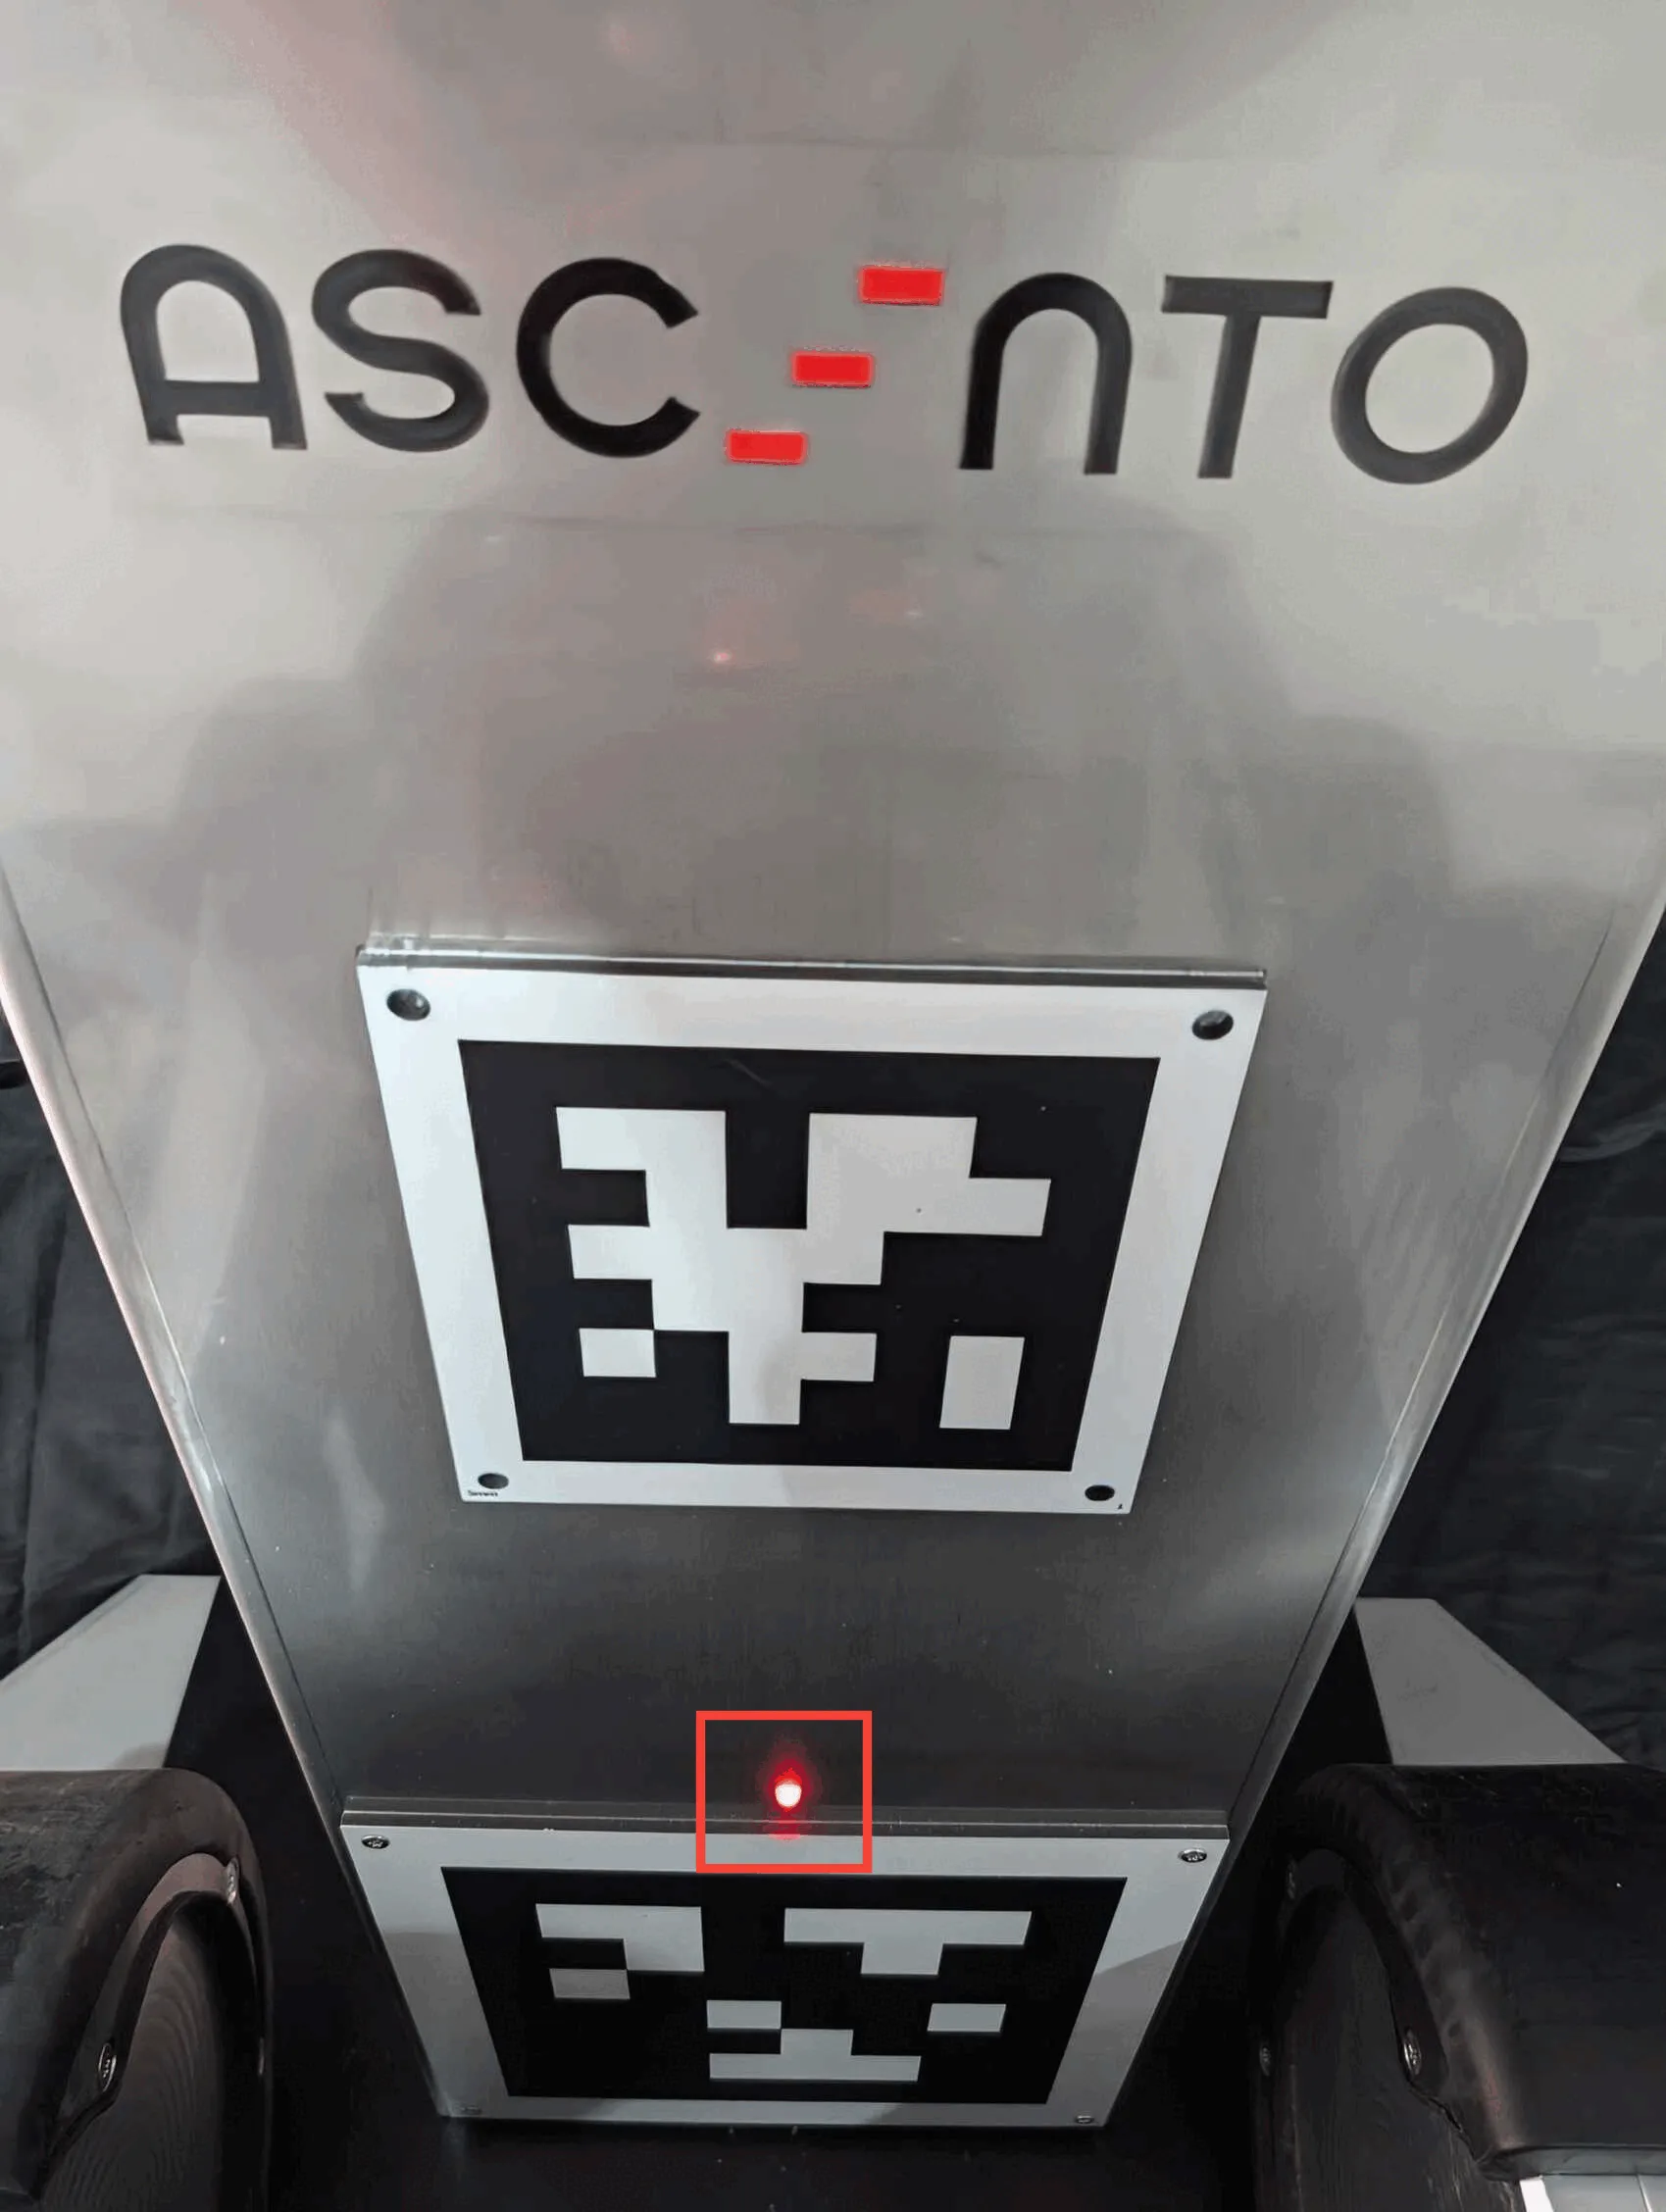
LED indicator showing charging in progress |
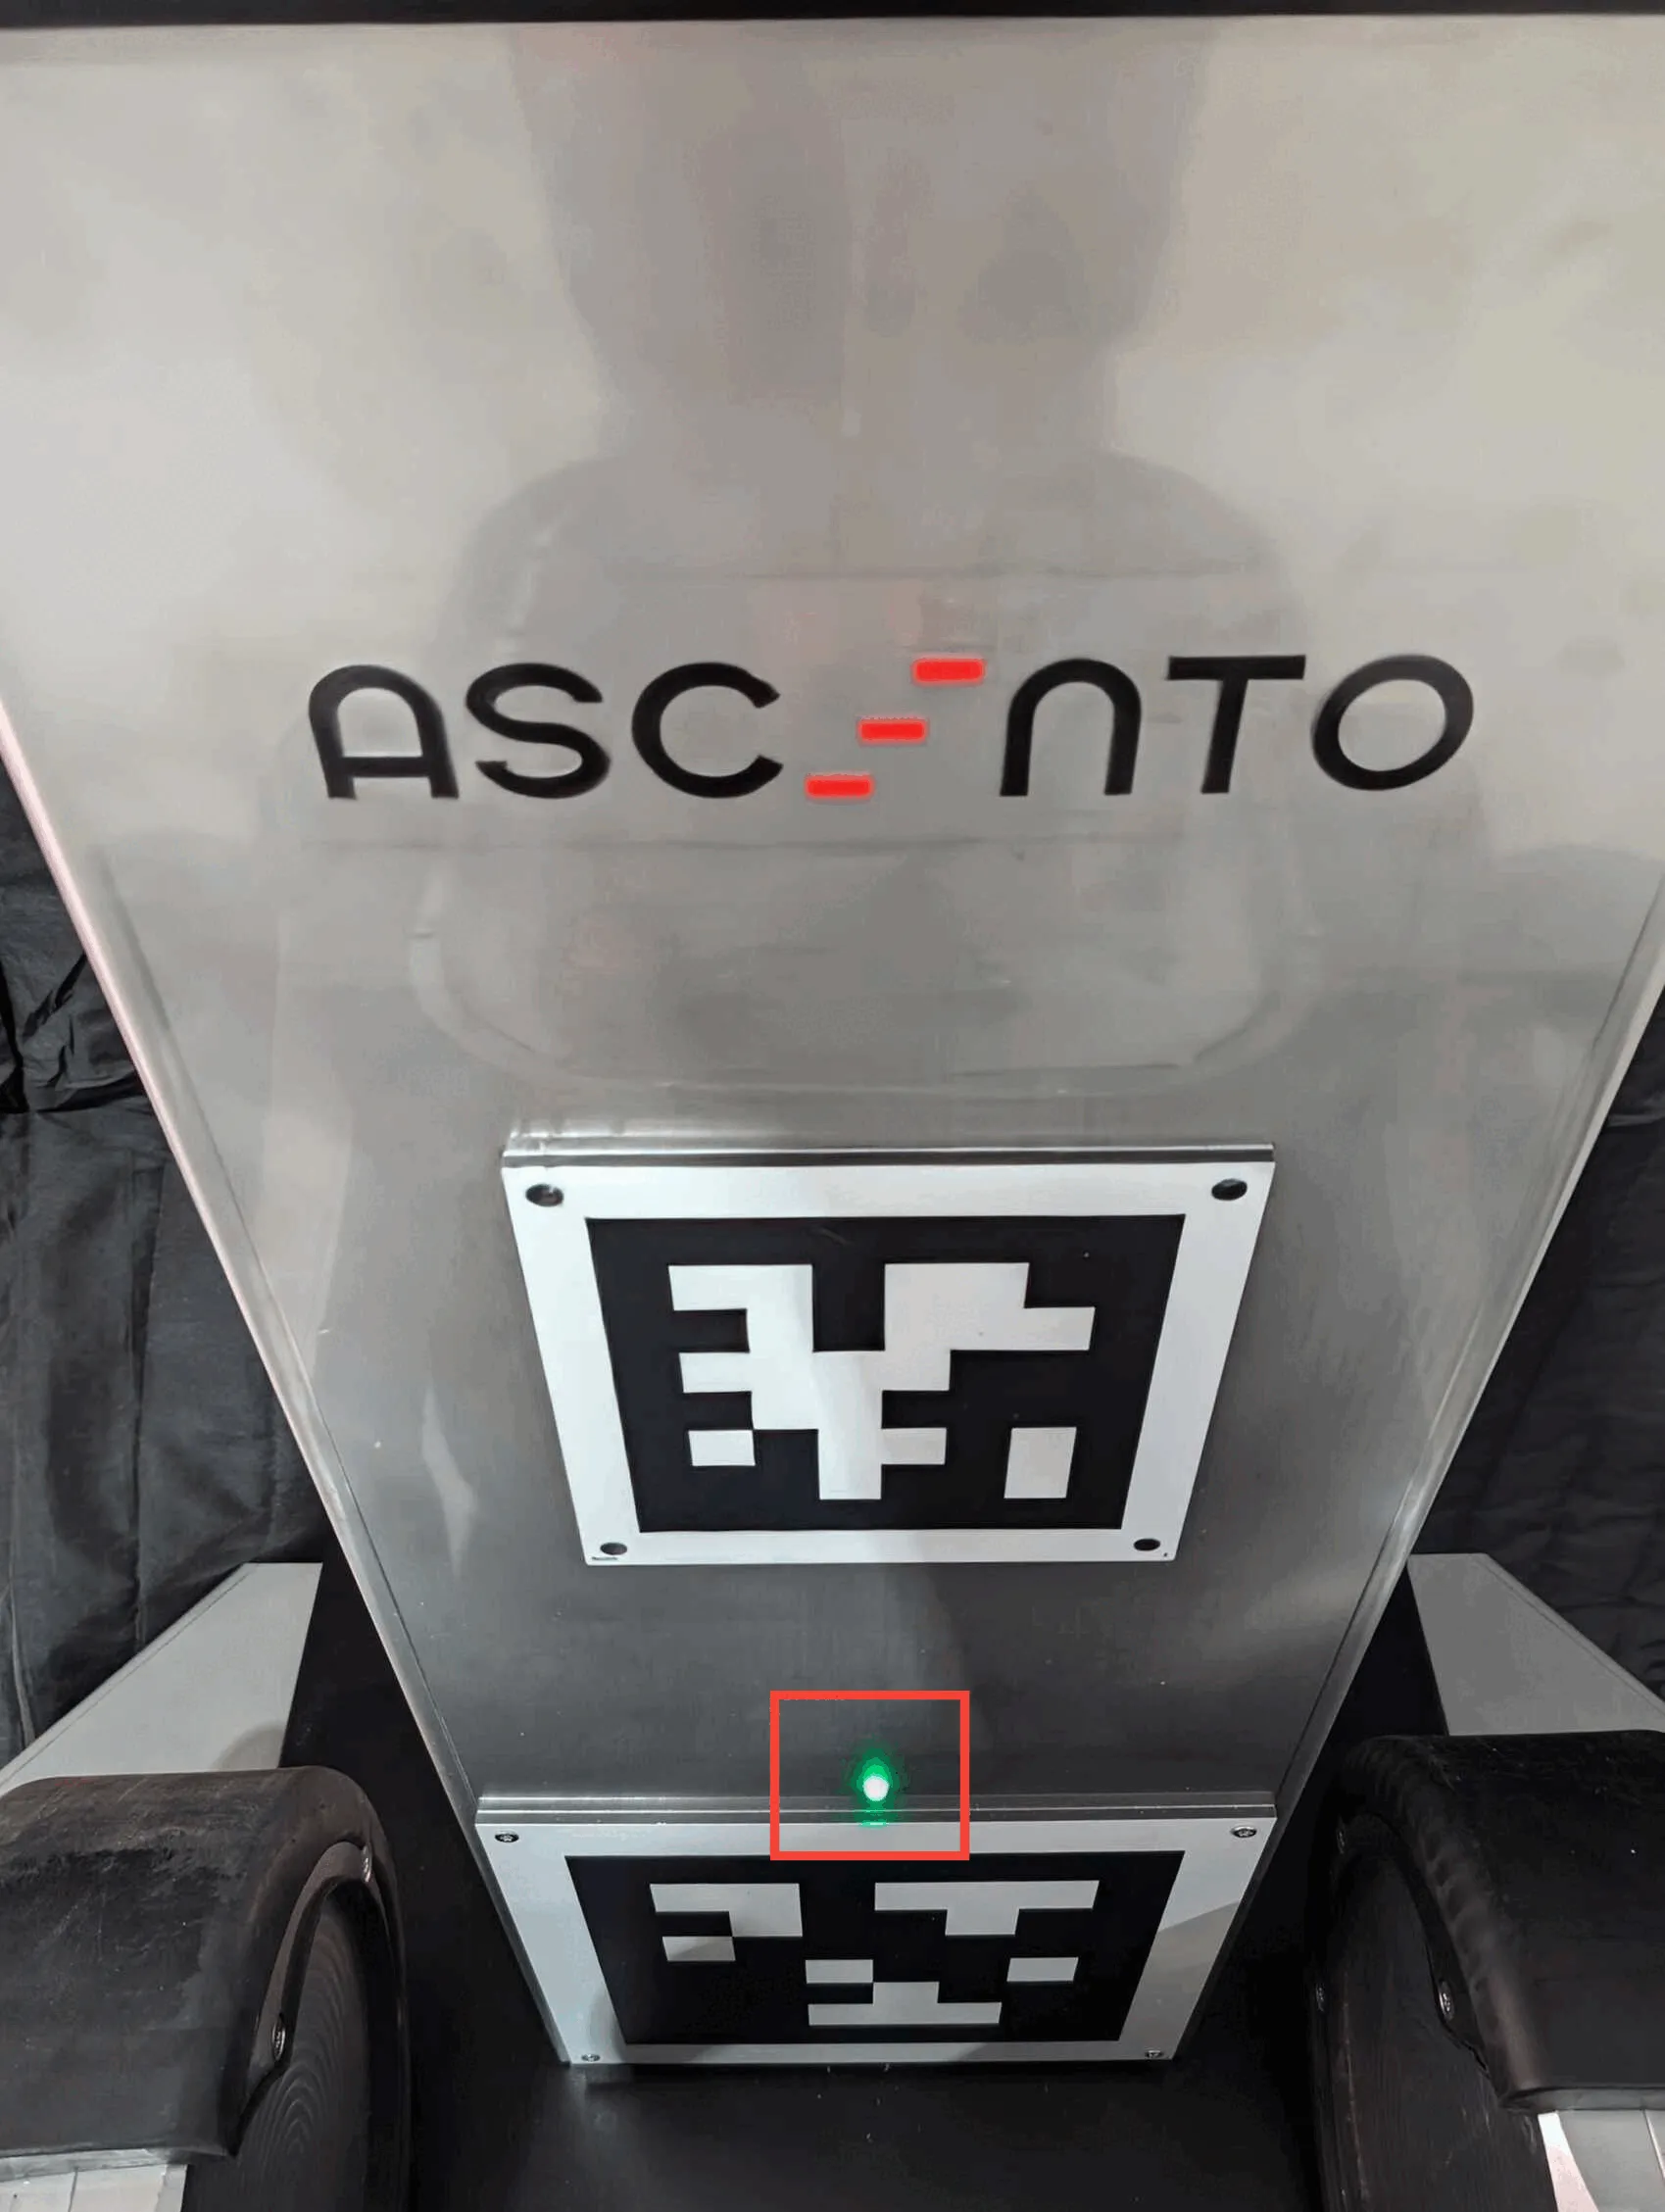
LED indicator showing charging status Complete |
Ascento Steam Deck Controller
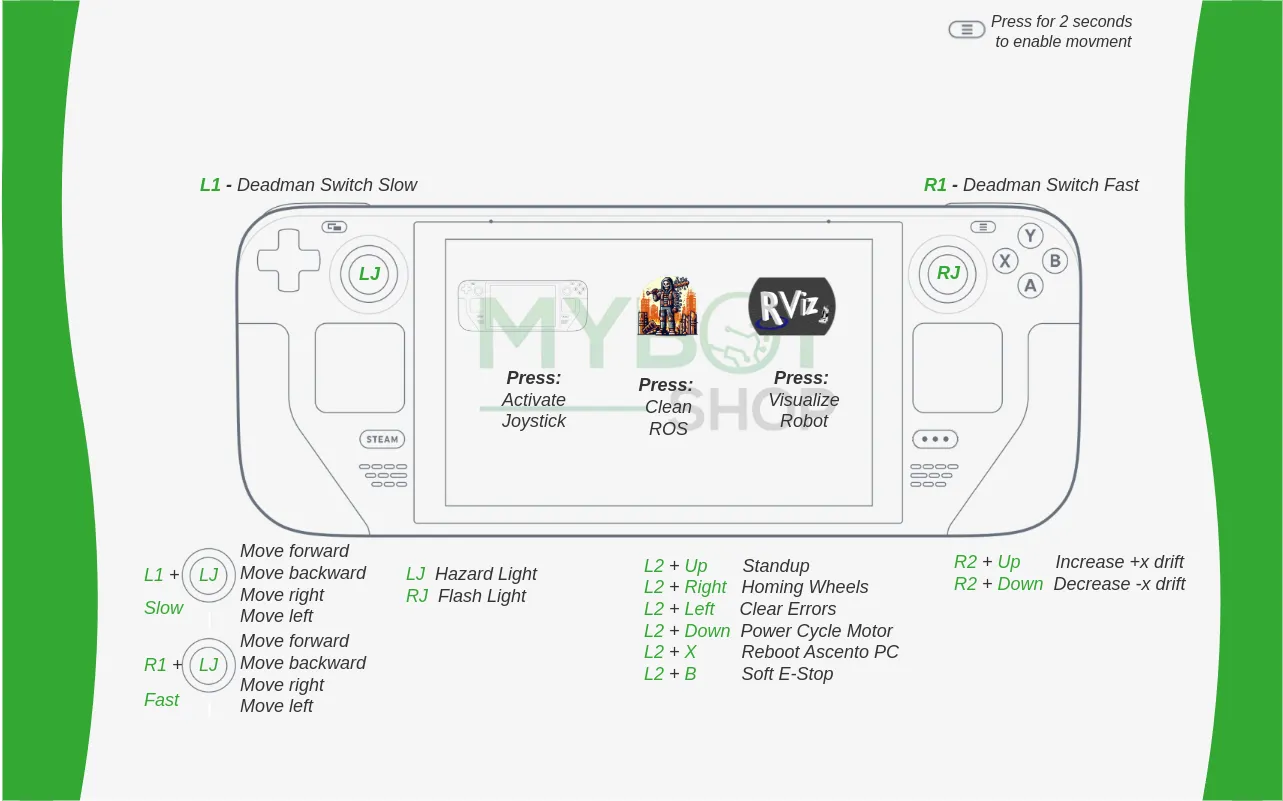
The Ascento robot can be manually controlled using the Steam Deck controller. To begin, connect the Steam Deck to the Ascento robot’s Wi-Fi. Once connected, use the Activate Joystick function to establish communication between the Steam Deck and the robot.
Controller Button Functions
The Steam Deck controller is equipped with various buttons and two joysticks that allow for precise robot control. Below is a detailed description of the button functions:
Ascento Basic Operation
|

|
Important
Always perform motor homing before initiating the Standup command to ensure proper robot alignment.
Deadman Switches
• L1
○ Deadman Switch Slow: Enables slow movement when held.
• R1
○ Deadman Switch Fast: Enables fast movement when held.
Movement Controls
• L1 + Left Joystick (LJ)
○ Move Forward
○ Move Backward
○ Move Left
○ Move Right
Lighting and Sensor Functions
• LJ
○ Hazard Light
• RJ
○ Flash Light
• Y
○ Reactivate Sensors
Robot Control Functions
• L2 + Up
○ Standup
• L2 + Right
○ Homing Wheels
• L2 + Down
○ Power Cycle
• L2 + B
○ Soft E-Stop
Drift Adjustment
• R2 + Up
○ Increase +x drift
• R2 + Down
○ Decrease -x drift
Additional Functions
• Press (Steam Deck Icon)
○ Activate Joystick
• Press (RViz Icon)
○ Visualize Robot
• Press (ROS Icon)
○ Clean ROS
This setup allows for full control of the Ascento robot via the Steam Deck, providing intuitive and efficient maneuvering capabilities.