
Ascento Interface
Note
Ensure your PC is set up correctly for network communication with the robot before proceeding.
Attention
Instructions on how to interface with the robot using Ubuntu 22.04 and ROS 2 Humble.
Static Network Connection
To configure a static network connection between your PC and the robot for the first time, follow these steps:
Connect via LAN Cable: Use a LAN cable to connect your PC directly to the robot. The LAN port is located on the back of the robot’s top cover.
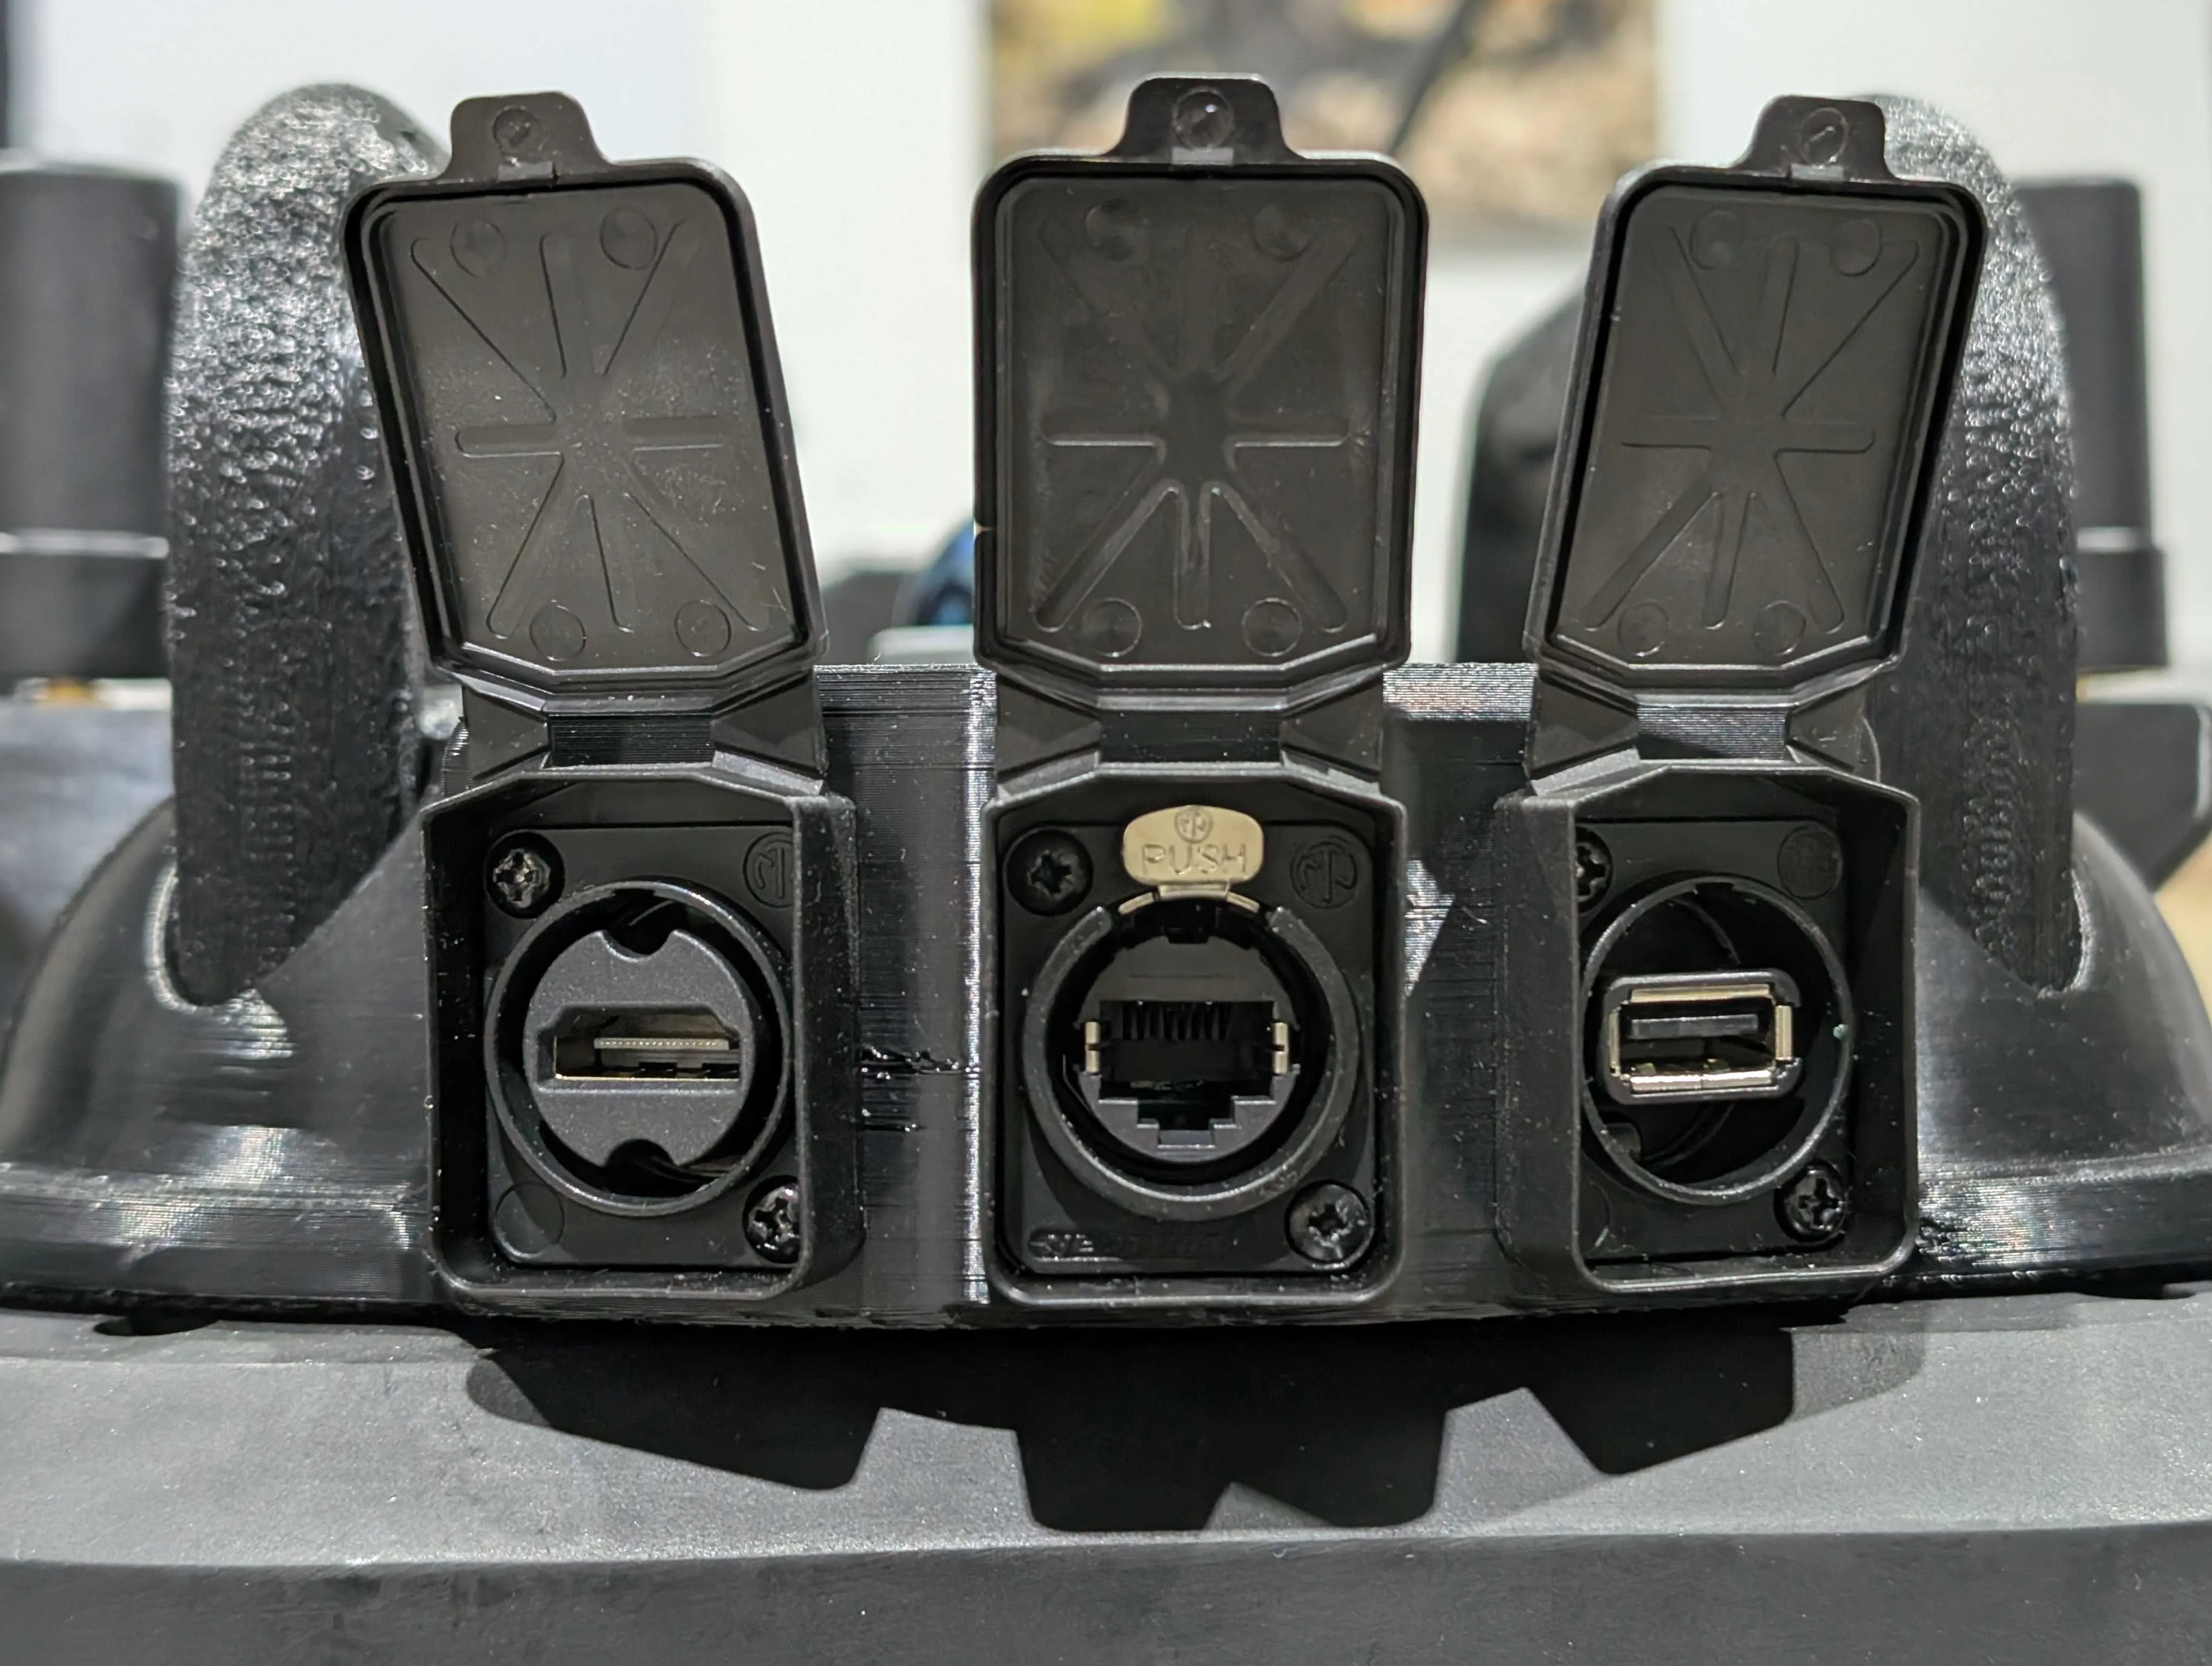
The ethernet port can be used for setting up communication via LAN.
Set Up a Manual Connection:
On an Ubuntu system, navigate to Settings → Network.
Click on the “+” icon to create a new connection.
In the IPv4 settings, change the connection mode to Manual.
Enter the following details:
Address IP: 10.42.0.51
Netmask: 24
Save the configuration and restart your network.
Verify the Connection:
Check the local IP of the host PC:
ifconfigPing the robot to ensure connectivity:
ping 10.42.0.50
Access the Robot via SSH:
Use the following command to connect:
ssh -X administrator@10.42.0.50Default password: mybotshop
Important
Disconnect from other active networks to avoid interference during this process.
IP Addresses
The table below provides a reference for the IP addresses and login credentials for various Ascento components:
Name |
IP Address |
Username |
Password |
|---|---|---|---|
Ascento Router |
10.42.0.1 |
ascento |
ascento |
Ascento Livox Mid360 |
10.42.0.20 |
x |
x |
Ascento Nvidia |
10.42.0.50 |
administrator |
mybotshop |
Ascento Nvidia (Web) |
10.42.0.50:9000 |
x |
mybotshop |
Ascento MCU |
10.42.0.100 |
x |
x |
Ascento Fixposition |
10.42.0.109 |
x |
x |
Ascento Cameras |
10.42.0.115 |
root |
ascento |
Ascento Steamdeck |
10.42.0.150 |
deck |
mybotshop |
Ascento Access Point |
10.42.0.200 |
ascento-5G |
mybotshop |
Ascento Access Point (Web) |
10.42.0.200 |
admin |
Admin123 |
Attention
Sometimes other networks can cause disruptions when connecting to the Ascento. It is best to have only your connection to the robot active and all others inactive.
Note
Use these credentials responsibly. Change default passwords where security is critical.
Ascento Fixposition
Each new unit has to configure its Fixposition. Several steps are required.
Web Interface
• Option 1 (Recommended):
Connect to the Ascento and open the webpage:
http://10.42.0.109/
• Option 2:
Connect your PC to the Fixposition Wi-Fi network with SSID starting with
fp-. The Wi-Fi password is1234567890.Open a web browser and navigate to:
10.0.1.1
This will take you to the Fixposition dashboard.
Software Upgrade
To update the software version of the Vision-RTK 2:
• Go to the System → Update panel in the web interface.
• Click inside the marked area to select the SWU file or drag and drop the SWU file there.
Configuration
At the top of the page, the Configuration tab allows you to set up Fixposition parameters according to your requirements.
Fusion Configuration
Available options:
• Autostart:
○ Enables automatic launching of the Fusion engine on system bootup. (Note: Enabling this will not start the Fusion engine immediately.)
• Housing:
○ Choose between Prototype (3D-printed) or Standard (aluminum).
• Tuning Mode:
○ Set expected platform dynamics. For example, use “Slow robot” for typical speeds. Adjust accordingly if operating at high speeds.
• GNSS Extrinsics:
○ Define the position of the GNSS antennas relative to the Vision-RTK 2 sensor frame in meters. These values should be accurate to the millimeter level.
GNSS Configuration
You can configure your own correction data here to receive the desired GNSS corrections.
For example, in Germany, the government provides free correction data to educational institutions, including:
• Username
• Password
• Host Name
• Port
Once acquired, enter this information in the Fixposition GNSS configuration panel at:
http://10.42.0.109/#gnss-config
Network Configuration
In the Network tab, you can configure:
• Wi-Fi Client:
○ Set the Wi-Fi network that Fixposition should connect to (required for localization startup).
• Wi-Fi Access Point:
○ Change the SSID and password of the Fixposition Wi-Fi network.
• Ethernet:
○ Change the Ethernet IP address to the desired one for PC access. (Do not change this IP if it would disrupt Ascento’s connection to Fixposition.)
I/O Configuration
In the Output messages table, select the TCP0 option in all sections except those that turn orange when selected.
Status
After updating and configuring Fixposition, start the Fusion engine by pressing the Start button.
• Monitor the IMU Status — it should display Converging.
• Monitor the Baseline Status — it should be Green.
Verification
For the first-time Fixposition calibration:
• The Ascento must move approximately 50 meters in a figure-8 pattern.
• This movement is necessary for calibrating the IMU and activating Fusion successfully.
Ascento Quick Start
Powering On:
Tilt the robot upward, insert the key into the bottom slot, and turn it clockwise to unlock.
The robot’s flashlights will blink indicating that the power has turned on.
Wait for 1 minute after powering up for the PC to bootup.
Powering Off:
• Press Soft E-Stop (L2 + B) — this will cause the robot’s motors to dampen, allowing it to gently fall to the ground.
• Lock the robot with the key.
Connecting via LAN:
To quickly establish a connection, use the following command:
ssh -X administrator@10.42.0.50
Warning
Ensure proper safety measures are in place when operating the robot. If issues arise during operation, refer to the specific troubleshooting commands provided below.
Disengage Estops
To disengage the emergency stops on Ascento:
• Disengage Hard Estop:
ros2 topic pub /ascento/cmd/hard_estop_set std_msgs/msg/Bool "{data: false}"
• Disengage Soft Estop:
ros2 topic pub /ascento/cmd/soft_estop_set std_msgs/msg/Bool "{data: false}"
Motor Homing Start
To initiate motor homing:
ros2 topic pub /ascento/cmd/homing_start std_msgs/msg/Empty {}
Warning
If homing fails, try power-cycling the robot:
ros2 service call /ascento/cmd/power_reset std_msgs/msg/Trigger {}
Standup
To command the robot to stand up:
ros2 service call /ascento/cmd/standup std_srvs/srv/Trigger {}
Visualization
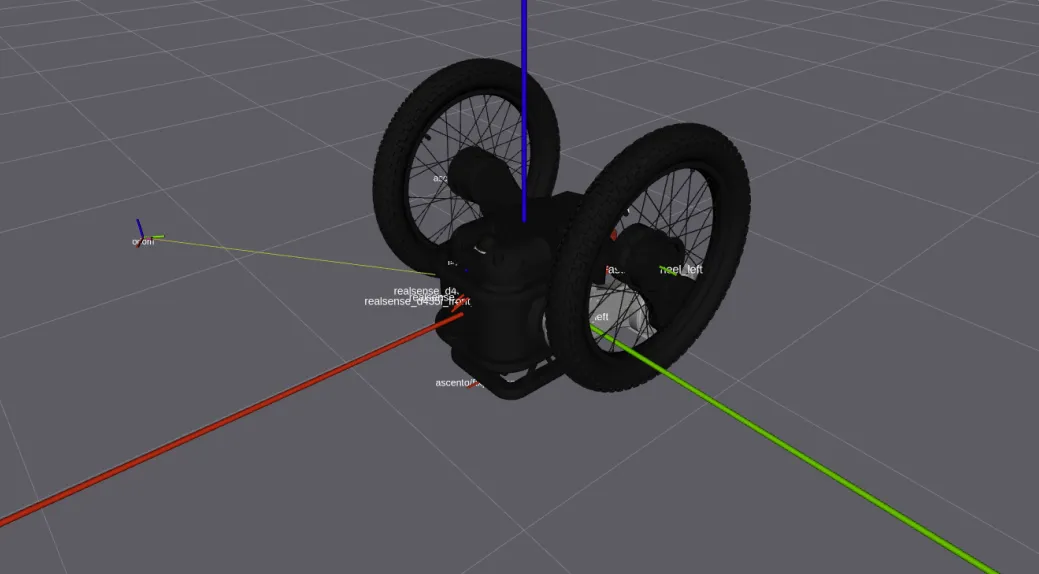
To visualize the robot in RViz:
ros2 launch ascento_viz view_robot.launch.py
Ascento Tele-operation
To control Ascento using the keyboard:
ros2 run teleop_twist_keyboard teleop_twist_keyboard --ros-args --remap cmd_vel:=/ascento/cmd/twist
Ascento TF Tree
To view the TF tree with remapped topics:
ros2 run rqt_gui rqt_gui --ros-args --remap tf:=/ascento_0116/tf --ros-args --remap tf_static:=/ascento_0116/tf_static
Ascento ROS2 Drivers
Important
Please contact support@mybotshop.de to gain access to the MBS Ascento repository for the latest changes and updates. When contacting support, please include your Mybotshop Order ID as well as your GitHub Username or GitHub Email ID.
All ROS2 drivers for Ascento developed by MYBOTSHOP operate under ROS DOMAIN ID=0 and utilize the Zenoh bridge for communication. The drivers are pre-configured and should already be running on the Ascento.
The Ascento ROS2 driver package includes the following:
• Joint States
• Robot Description
• Leg Control (High-level)
• Inertial Measurement Unit Publisher
• Sensor Fusion
• Twist Mux
• Steamdeck Control
• D435i Depth Camera Driver
• Livox Mid360 Lidar Driver
• 2D Scanner
• Fixposition
Ascento Startup Services
Several essential Ascento drivers and services run in the background to ensure smooth operation. Below is a list of the main services:
Service Name |
Description |
|---|---|
ascento-description |
Launches robot state publisher for visualization |
ascento-zenoh |
Bridges robot MCU with the onboard Nvidia |
ascento-mid360 |
Activates the mid360 lidar |
ascento-3d-odom |
Activates 3D Odom and localization |
ascento-webserver |
Activate Robot webserver |
ascento-realsense |
Actuvates the Intelrealsense D435i Camera |
ascento-fixposition |
Activates fixposition GPS |
ascento-battery-status |
Displays rviz battery marker |
ascento-jointstate-publisher |
Launches joint state publisher for visualization |
You can query, start, stop, or restart these services using the following commands:
sudo service {service_name} status
sudo service {service_name} start
sudo service {service_name} stop
sudo service {service_name} restart
Example:
sudo service ascento-desc status
To remove a service:
ros2 run robot_upstart uninstall {service_name}
Important
If you encounter an error such as Unit ascento-{service_name}.service could not be found., this indicates that the startup service is not installed.
Service Status Markers:
• Red Marker: Indicates the startup job has failed. Restart the service:
sudo service {service_name} restart
• Green Marker: Indicates the service is running correctly.
• Grey Marker: Indicates the service has not started.
To modify the upstart job or add additional ROS launch files, update the main upstart file (system.launch.py) in the ascento_bringup package. After making changes:
ros2 run ascento_bringup startup_installer.py
Ascento Simultaneous Localization and Mapping
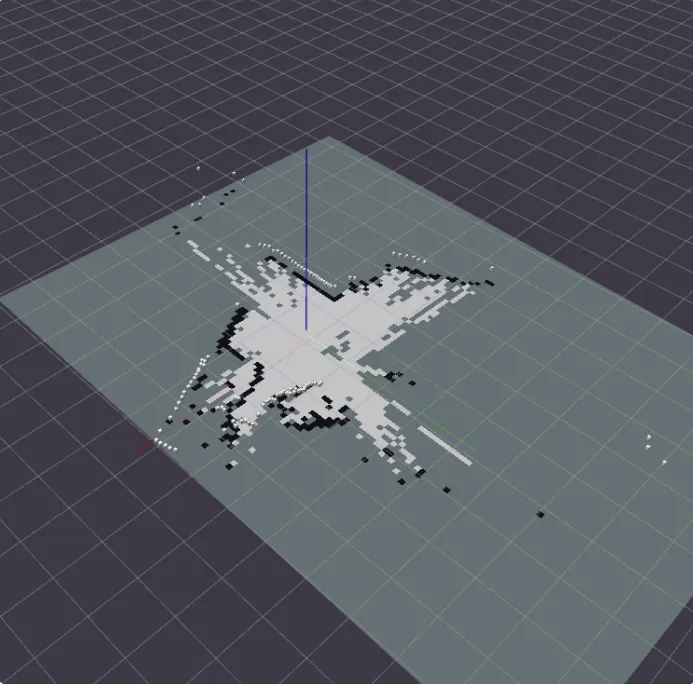
SLAM allows the robot to perform simultaneous localization and mapping. Follow these steps to perform SLAM:
Ensure the ascento_bringup service is running.
Launch the SLAM process:
ros2 launch ascento_nav2 slam.launch.pyBegin mapping using the teleoperation keyboard at a speed of 0.2 m/s.
Exporting the Map:
Once satisfied with your map, export it using:
cd /opt/mybotshop/src/mybotshop/ascento_nav2/maps
ros2 run nav2_map_server map_saver_cli -f map_
Rebuild the Workspace:
If the map name is not map_, rebuild the workspace:
colcon build --symlink-install && source install/setup.bash
Finally, source the updated environment:
source /opt/mybotshop/install/setup.bash
Note
Ensure all dependencies are properly installed and the environment is sourced before running these commands.
Ascento Fixposition
To connect to Fixposition:
• Connect to Ascento’s Wi-Fi network.
• Open a web browser and navigate to:
http://10.42.0.109
Refer to the official Fixposition documentation for integration instructions and parameter tuning.
Ascento ZED2i
To launch the ZED2i camera, use the following command:
ros2 launch ascento_depth_cameras zed2i.launch.py
Note
This service is currently not operational via systemd; please use the manual command.
Ascento Gazebo Fortress
Note
Ascento Gazebo Simulation is currently under development.
The Fortress Gazebo simulation currently does not support the high-level Ascento interface. It is intended for use with low-level control, training, and testing.
For simulation modifications, refer to the GZ ROS2 Control documentation.
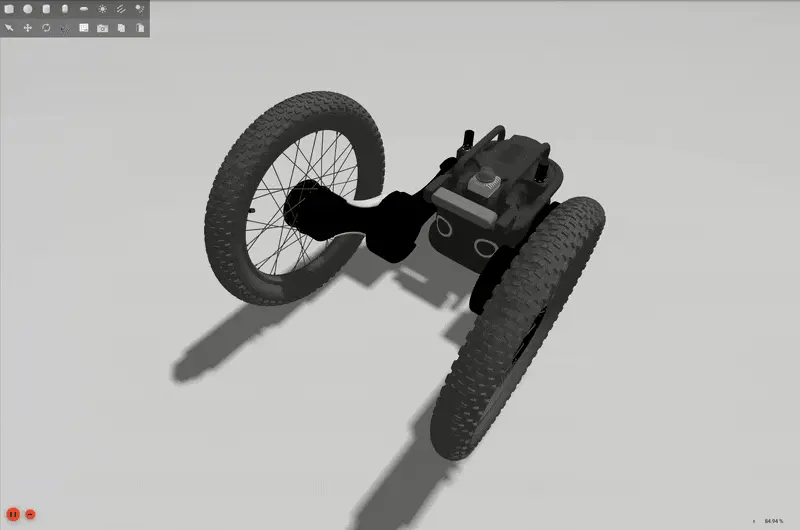
Ascento Simulation
To start the Ascento Fortress simulation:
ros2 launch ascento_gazebo fortress_simulation.launch.py
Cleanup After Simulation
To clean up the simulation environment after use:
ros2 run ascento_gazebo kill_gz.sh
Effort Trajectory Control Example
To send a joint trajectory goal:
ros2 action send_goal /joint_trajectory_controller/follow_joint_trajectory control_msgs/action/FollowJointTrajectory -f "{
  trajectory: {
    joint_names: [
      'ascento/hip_left',   'ascento/hip_right',
      'ascento/knee_left',  'ascento/knee_right'
    ],
    points: [
      {
        positions: [-2.0, 2.0, 0.0, 6.28],
        time_from_start: {sec: 2, nanosec: 0}
      }
    ]
  }
}"
Velocity Control Example
To publish velocity commands to the joint velocity controller:
ros2 topic pub -1 /joint_velocity_controller/commands std_msgs/msg/Float64MultiArray "{data: [0.5, -0.5]}"
Ascento Intel RealSense D435i
Color Image |

Depth Image |
Note
The D435i is launched by default through the Ascento bringup. Do not re-run the following command unless the ascento-realsense service has been stopped.
ros2 launch ascento_depth_camera realsense_d435i.launch.py
The launch file is pre-configured to enable continuous depth stream from the RealSense D435i without lag.
To modify parameters, edit the configuration file:
ascento_depth_camera/launch/realsense_d435i.launch.py
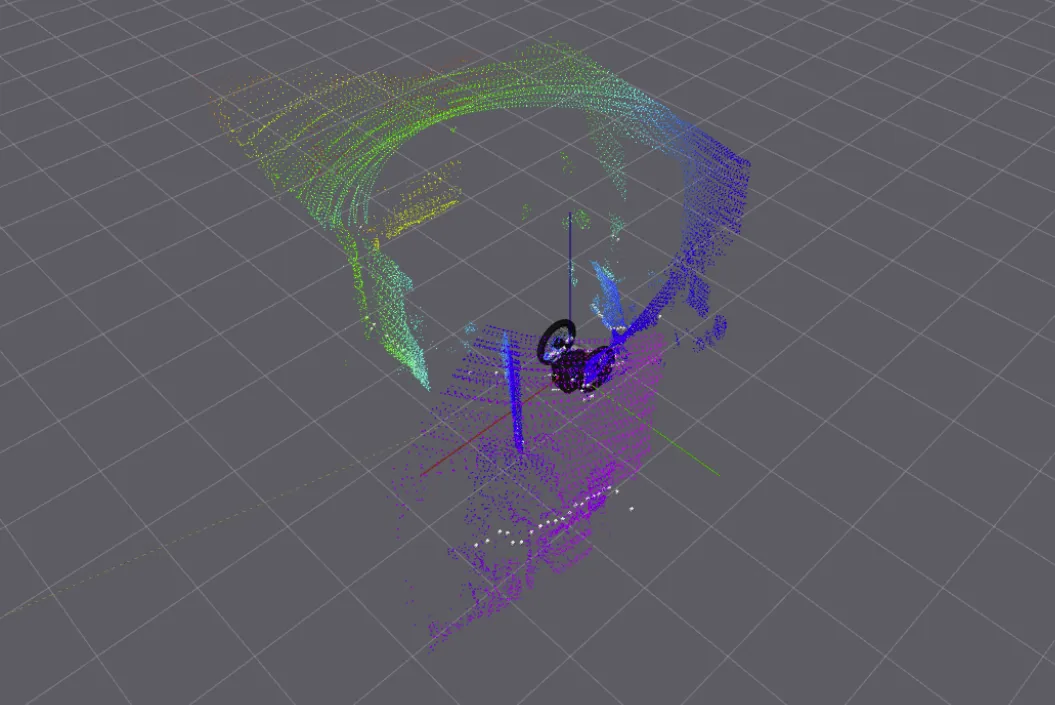
Ascento Mid360 LiDAR
Note
The Mid360 LiDAR is launched by default through the Ascento bringup. Do not re-run the following command unless the ascento-mid360 service has been stopped.
ros2 launch ascento_livox system.launch.py
Ascento Data Recording
Important
The ROS 2 bag should be started before launching any drivers; otherwise, it will not capture all the data.
To store data for 30 minutes, limited to 1 GB, use the following command:
ros2 bag record -a -b 1000000000
Ascento Development
For custom controls and interfaces, refer to the Ascento SteamDeck ROS 2 package as a reference for development.
Ascento Diagnostics
The Ascento Diagnostics system uses different LED colors to indicate various states.
The robot’s diagnostics are represented by the following color codes:
Color |
State |
|---|---|
RED |
The robot is in an error state. |
WHITE |
The robot is operational. |
ORANGE |
The robot is in a soft e-stopped state. |
BLUE |
The hardware manager is in none of the above states. |
Note
These diagnostics provide immediate visual feedback on the robot’s current status.
Ascento Status Commands
This section provides commands to monitor the various statuses of the Ascento Research Robot, including IMU, joint states, battery state, diagnostics, and other key metrics.
The following commands can be used to echo the respective statuses of the robot:
Status |
Command |
|---|---|
IMU |
|
Joint States |
|
Battery State |
|
Diagnostic Status |
|
Robot Description |
|
Robot Speed |
|
Current Height |
|
Motor Homing Status |
|
Head Light Status |
|
Hazard Light Status |
|
Eyes Status |
|
Note
These commands provide real-time status updates for the respective components of the robot. Use them as needed for diagnostics or monitoring during operation.
Ascento Service Commands
This section provides service commands to control and configure various features of the Ascento Research Robot.
Important
Always perform motor homing before initiating the Standup command to ensure proper robot alignment.
Below is a list of service commands and their purposes:
Command |
Description |
|---|---|
Standup |
Makes the robot stand up. |
Head Light |
Turns the headlight on or off. |
Hazard Light |
Turns the hazard light on or off. |
Eyes State |
Toggles the eyes state on or off. |
Powercycle Robot |
Restarts the robot power system. |
Speed Bias Increase |
Increases the robot’s speed bias by 0.002 per request. |
Speed Bias Decrease |
Decreases the robot’s speed bias by 0.002 per request. |
MCU Reboot |
Reboots the robot’s MCU. |
Motor Homing Start |
Starts the motor homing process. |
Motor Homing Cancel |
Cancels the motor homing process. |
Note
These commands are critical for controlling the robot’s operational features. Ensure the robot is powered on and connected before executing them.
Ascento Publish Commands
This section provides commands for publishing messages to control and configure various functionalities of the Ascento Research Robot.
Warning
The Ascento operates using a deep-learning control framework. Changing the height deactivates the leg lock, which maintains constant height stability. This makes the robot more susceptible to falling.
Below is a list of publish commands and their purposes:
Command |
Description |
|---|---|
Standard Height |
Sets the robot’s base height. Minimum height: 0.3m. Maximum height: 0.8m. |
Command Velocity |
Publishes velocity commands to the robot. |
Error Clear |
Clears error states of the robot. |
Hard E-Stop |
Engages or disengages the hard emergency stop. Engage Dis-engage |
Soft E-Stop |
Engages or disengages the soft emergency stop. Engage Dis-engage |
Attention
Ensure that commands for E-Stop and velocity are executed responsibly to avoid unintended robot behavior.
Note
These commands allow for precise control of the robot during operation. Confirm the robot is connected and powered on before issuing commands.
Ascento Installation
This section provides instructions for installing and configuring the Ascento Research Robot software.
Important
This repository should already be available and built on Ascento’s Nvidia board if it has been configured by the MYBOTSHOP Team.
Environment Setup
Update `.bashrc`
Add the following lines to your .bashrc file for automatic ROS2 activation:
# Ascento ROS2 Activation
source /opt/ros/humble/setup.bash
source /opt/mybotshop/src/mybotshop/ascento_bringup/hooks/setup.bash
Create Workspace Directory
Create the required directory and set ownership:
sudo mkdir /opt/mybotshop
sudo chown -R administrator:administrator /opt/mybotshop
Repository Setup
Clone Repository and Run Installers
Clone the repository to your local machine, copy it to the Ascento PC, and run the installer scripts:
cd /opt/mybotshop/src/mybotshop/
sudo chmod +x ascento_dependencies.sh
./ascento_dependencies.sh

cd /opt/mybotshop/src/mybotshop/ascento_webserver
sudo chmod +x webserver_installer.sh
./webserver_installer.sh
Build the ROS2 Workspace
Build the workspace and source the environment:
cd /opt/mybotshop
colcon build --symlink-install
source install/setup.bash
Zenoh Configuration
Verify Zenoh Version
The required version is 0.11. Check the installed version:
zenoh-bridge-ros2dds --versionRemove Incorrect Version
If the version is incorrect, remove it:
sudo apt-get remove zenoh-bridge-ros2dds -yInstall Correct Version
Navigate to the appropriate directory and install based on hardware (e.g., Nvidia → arch64):
cd /opt/mybotshop/src/mybotshop/ascento_hardware/launch/zenoh/arch64/
sudo dpkg -i zenoh-bridge-ros2dds_0.11.0_arm64.deb
Verify Again
zenoh-bridge-ros2dds --versionSet Ascento ID
Modify the startup configuration in ascento_bringup/hooks/ to reflect the correct Ascento number.
Final Setup
Run Startup Installers
ros2 run ascento_bringup startup_installer.pyUpdate Hostname
Set the PC name for the robot:
sudo hostnamectl set-hostname ASCENTO-0000Update Web Interface
Manually update the robot software version in the index.html file served by the web interface.
Ascento External Computer Installation
This section provides steps for setting up the Ascento software environment on an external computer.
Clone and Build the Workspace
Clone the mbs_ascento package and build it:
colcon build --symlink-install
source install/setup.bash
Configure Zenoh
Zenoh version 0.11 is required. Follow these steps:
• Check Zenoh Version
zenoh-bridge-ros2dds --version
• Remove Incorrect Version
sudo apt-get remove zenoh-bridge-ros2dds -y
• Install Correct Version (Assuming AMD architecture for external computers)
cd ros2_ws/src/mybotshop/ascento_hardware/launch/zenoh/amd/
sudo dpkg -i zenoh-bridge-ros2dds_0.11.0_amd64.deb
• Verify Installation
zenoh-bridge-ros2dds --version
Environment Configuration (Critical)
Important
This step is critical. Ensure the following environment variables are set in every terminal session. Adjust the CYCLONEDDS_CONFIG_PATH according to your system’s setup.
export ASCENTO_NS="ascento_0116"

# Example configuration path:
CYCLONEDDS_CONFIG_PATH=/home/administrator/projects/bipeds/ascento/mbs_ascento/src/mybotshop/ascento_bringup/config/cyclonedds.xml
export RMW_IMPLEMENTATION=rmw_cyclonedds_cpp
export CYCLONEDDS_URI="${CYCLONEDDS_CONFIG_PATH}"
Launch Zenoh and RViz2
• Launch Zenoh
ros2 launch ascento_hardware zenoh.launch.py
• Launch RViz2
ros2 launch ascento_viz view_robot.launch.py
Access to Ascento PC
This section explains how to access the Ascento PC remotely using VNC.
VNC Ascento Startup
The VNC server is typically started by default. If not, use the following commands to manage it manually:
• Start VNC Server
vncserver :1 -geometry 1920x1080 -depth 24 -localhost no
• Check Running VNC Sessions
vncserver -list
• Kill VNC Session
vncserver -kill :1 && rm -rf /tmp/.X1-lock /tmp/.X11-unix/X1
VNC Remote Startup
On your remote PC, follow these steps to access the Ascento interface:
Install TigerVNC Viewer
sudo apt install tigervnc-viewerAllow VNC Port Through Firewall
sudo ufw allow 5901/tcpConnect via VNC
vncviewer 10.42.0.50:1
Miscellaneous
This section includes additional commands and processes to enhance the usage and maintenance of the Ascento Research Robot.
Time Synchronization
Sync System Time
Use the following command to sync the system time with Google’s server:
sudo date -s "$(wget --method=HEAD -qSO- --max-redirect=0 google.com 2>&1 | sed -n 's/^ *Date: *//p')"Sync Host Computer and Ascento Computer
Synchronize the files between the host computer and the Ascento computer:
rsync -avP -t --delete -e ssh src administrator@10.42.0.50://home/administrator/ros2_wsSync Host Computer and Steamdeck
Synchronize the files between the host computer and the Steamdeck:
rsync -avP -t --delete -e ssh src deck@10.42.0.150://home/deck/ros2_ws
URDF Conversion
Convert a Xacro file to a URDF file using the following command:
ros2 run xacro xacro /home/administrator/ros2_ws/src/mybotshop/ascento_description/xacro/robot.xacro > /home/administrator/ros2_ws/src/mybotshop/ascento_description/xacro/ascento.urdf