Note
Instructions for interfacing with the robot using Ubuntu 20.04 LTS (Focal Fossa) and ROS 2 Foxy Fitzroy.
Note
Instructions for interfacing with the robot using Ubuntu 22.04 LTS (Jammy Jellyfish) and ROS 2 Humble Hawksbill.
Note
Instructions for interfacing with the robot using Ubuntu 24.04 LTS (Noble Numbat) and ROS 2 Jazzy Jalisco.
Important
This procedure should be followed after reading the manuals for the Clearpath Jackal. Furthermore, all of the Jackal’s functionality can be verified via the tutorials by Clearpath. Instructions for set up can be found at Jackal Docs .
Network Interface
Static Network Connection
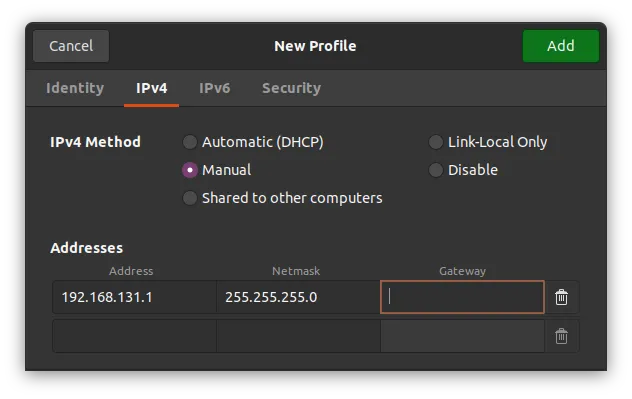
To create a static connection in your PC (not the robot), in Ubuntu go to Settings → Network then click on + and create a new connection.
Change the connection to Manual in the IPv4 settings.
Set the Address IP as 192.168.131.1 (note: this value might vary depending on the specific robot) and the Netmask as 24.
Click save and restart your network.
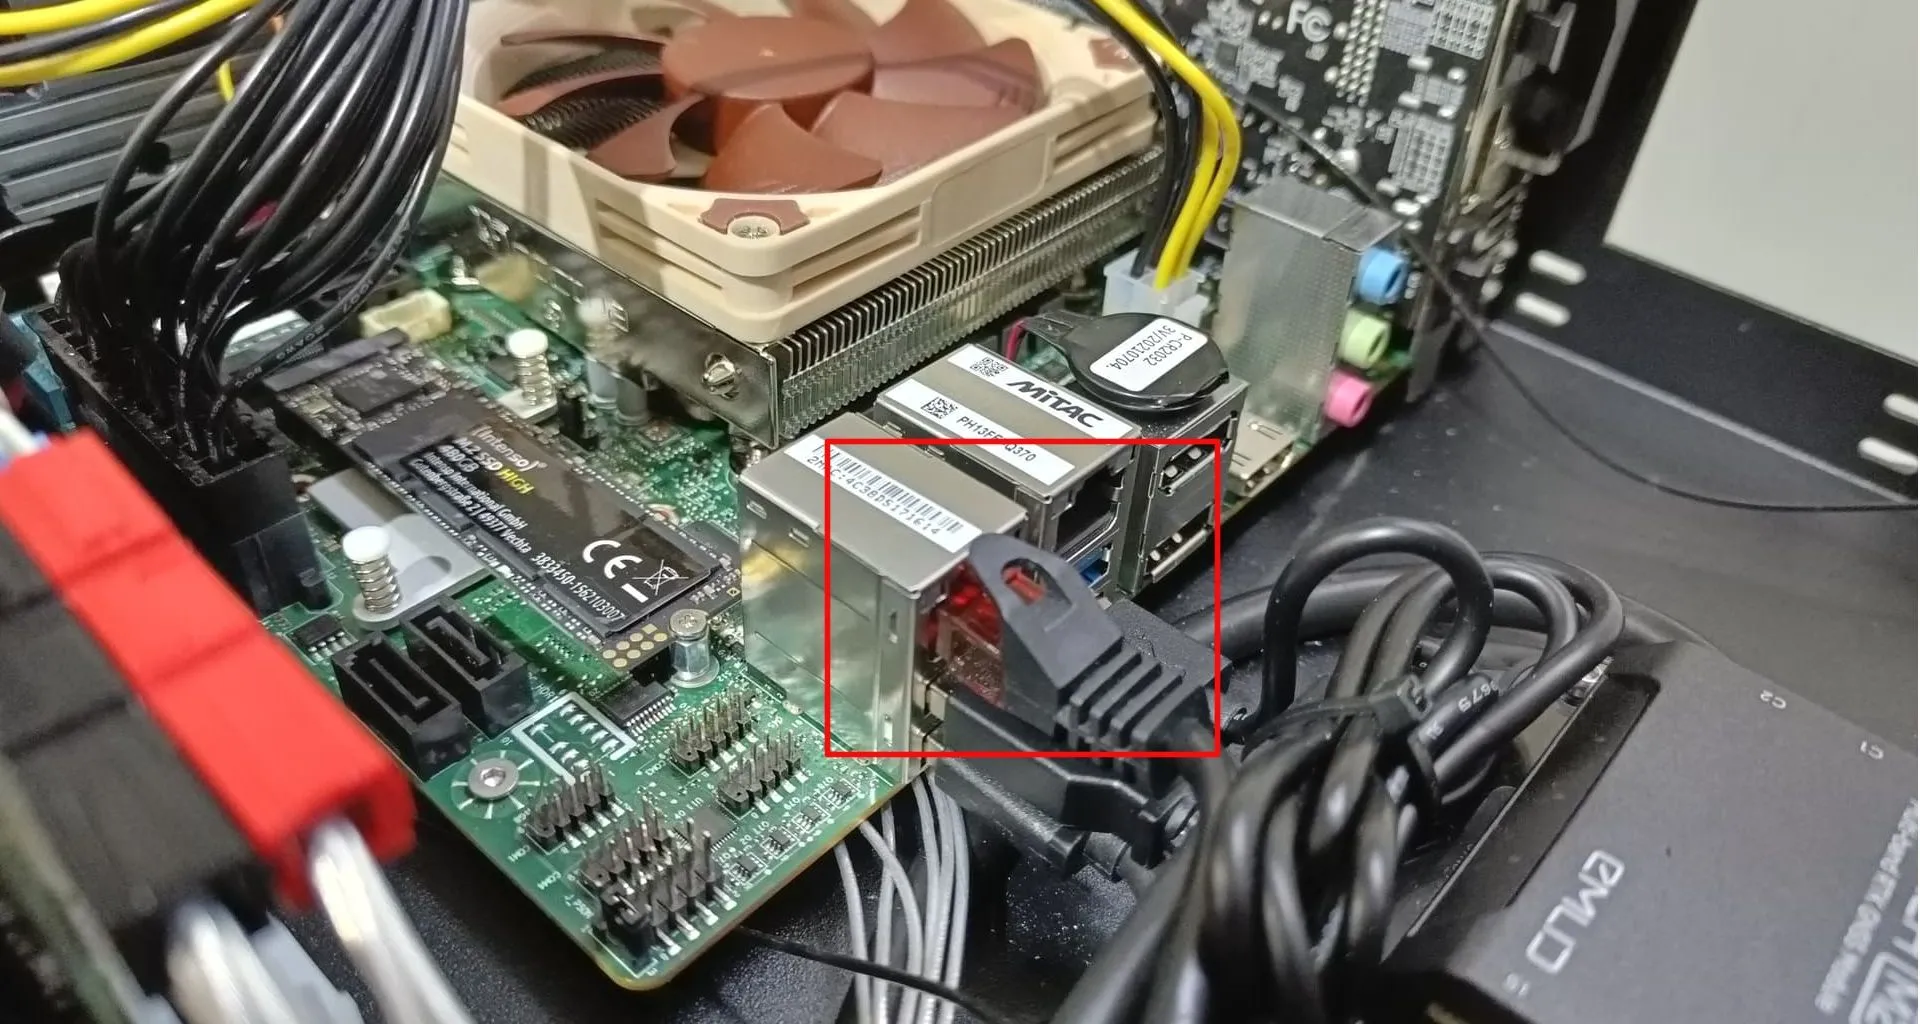
Once you’ve saved the settings and restarted your network, proceed by opening the Jackal and connecting the LAN cable to the robot.
After a successful connection, check the host’s local IP by typing in the Host PC’s terminal:
ifconfig
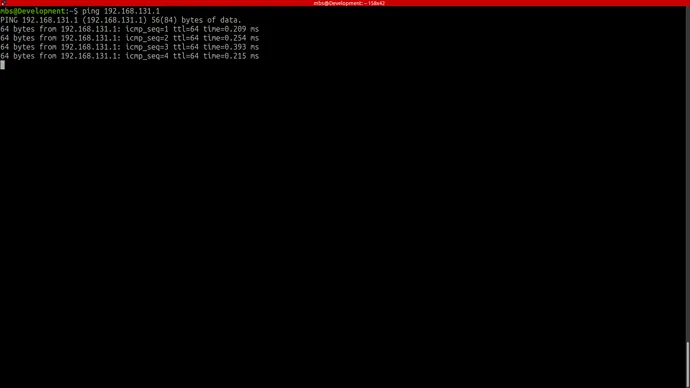
This command will display the assigned host IP from the previous step. To check if we can communicate with the robot, attempt to ping it from your host PC by executing:
ping 192.168.131.1
After a successful ping, you can access the robot by using the following command:
ssh -X administrator@192.168.131.1

The password required is:
mybotshop
Note
For Jackals operating on the default DHCP connections, there are a couple of approaches for connecting to the Jackal, one is described here.
Alternative for Static Connection: You can choose not to set up a static connection and instead run the command nmap -sP 192.168.0.*.
This command scans all available networks within the .0 range. After identifying the network associated with the Jackal, you can establish a
connection using SSH. This alternative method allows you to locate the Jackal’s network and subsequently connect to it via SSH without configuring
a static connection on your system.
Network Configuration
The Jackal is equipped with an industrial-grade onboard computer. Specifically:
The MCU port functions on 192.168.131.1.
The Ouster Lidar port operates on 192.168.132.20.
Device |
IP Address |
Password |
|---|---|---|
Jackal |
192.168.131.1 |
|
Ouster Lidar |
192.168.132.20 |
Note
Sometimes other networks can cause disruptions when connecting to the Jackal. It is best to have only your connection to the robot active and all others inactive.
Static Network Connection
For the first time, one needs to connect through a LAN cable to configure the robot’s network. To create a static connection in your PC (not the robots), in Ubuntu go to Settings → Network then click on + and create a new connection.
Change the connection to Manual in the IPv4 settings.
Set the Address IP as 192.168.131.51 and the Netmask as 24.
Click save and restart your network.
After a successful connection, check the host’s local IP by typing in the Host PC’s terminal:
ifconfig
Now, ping the robot:
ping 192.168.131.1
Access the robot via SSH:
ssh -X administrator@192.168.131.1
The default password is:
mybotshop
Jackal IP Addresses
Device |
IP Address |
Password |
|---|---|---|
Jackal Main PC |
192.168.131.1 |
mybotshop |
Jackal Ouster |
192.168.131.20 |
X |
Note
Sometimes other networks can cause disruptions when connecting to the Jackal. It is best to have only your connection to the robot active and all others inactive.
Static Network Connection
For the first time, one needs to connect through a LAN cable to configure the robot’s network. To create a static connection in your PC (not the robots), in Ubuntu go to Settings → Network then click on + and create a new connection.
Change the connection to Manual in the IPv4 settings.
Set the Address IP as 192.168.131.51 and the Netmask as 24.
Click save and restart your network.
After a successful connection, check the host’s local IP by typing in the Host PC’s terminal:
ifconfig
Now, ping the robot:
ping 192.168.131.1
Access the robot via SSH:
ssh -X robot@192.168.131.1
The default password is:
mybotshop
Jackal IP Addresses
Device |
IP Address |
Password |
|---|---|---|
Jackal Main PC |
192.168.131.1 |
mybotshop |
Note
Sometimes other networks can cause disruptions when connecting to the Jackal. It is best to have only your connection to the robot active and all others inactive.
Jackal Screen Connection
An alternative method to connect with the Jackal is by utilizing an HDMI cable along with a mouse and keyboard. This setup facilitates the connection of the Jackal to your local WiFi network, enabling subsequent connections via WiFi.

Jackal PC Setup
To utilize this method:
Access your networks and add your WiFi connection.
Open the terminal and type:
ifconfig
Identify the IP that starts with wl (e.g., wlps0 ). This IP corresponds to your WiFi connection. Use this IP to SSH into your robot:
ssh -X administrator@192.168.0.228
Replace 192.168.0.228 with the actual IP obtained from the ifconfig command. This will establish an SSH connection to your robot.
Note
The provided IP (192.168.0.228) is an example. The real IP is acquired from the ifconfig command output.