Powering on the Ridgeback
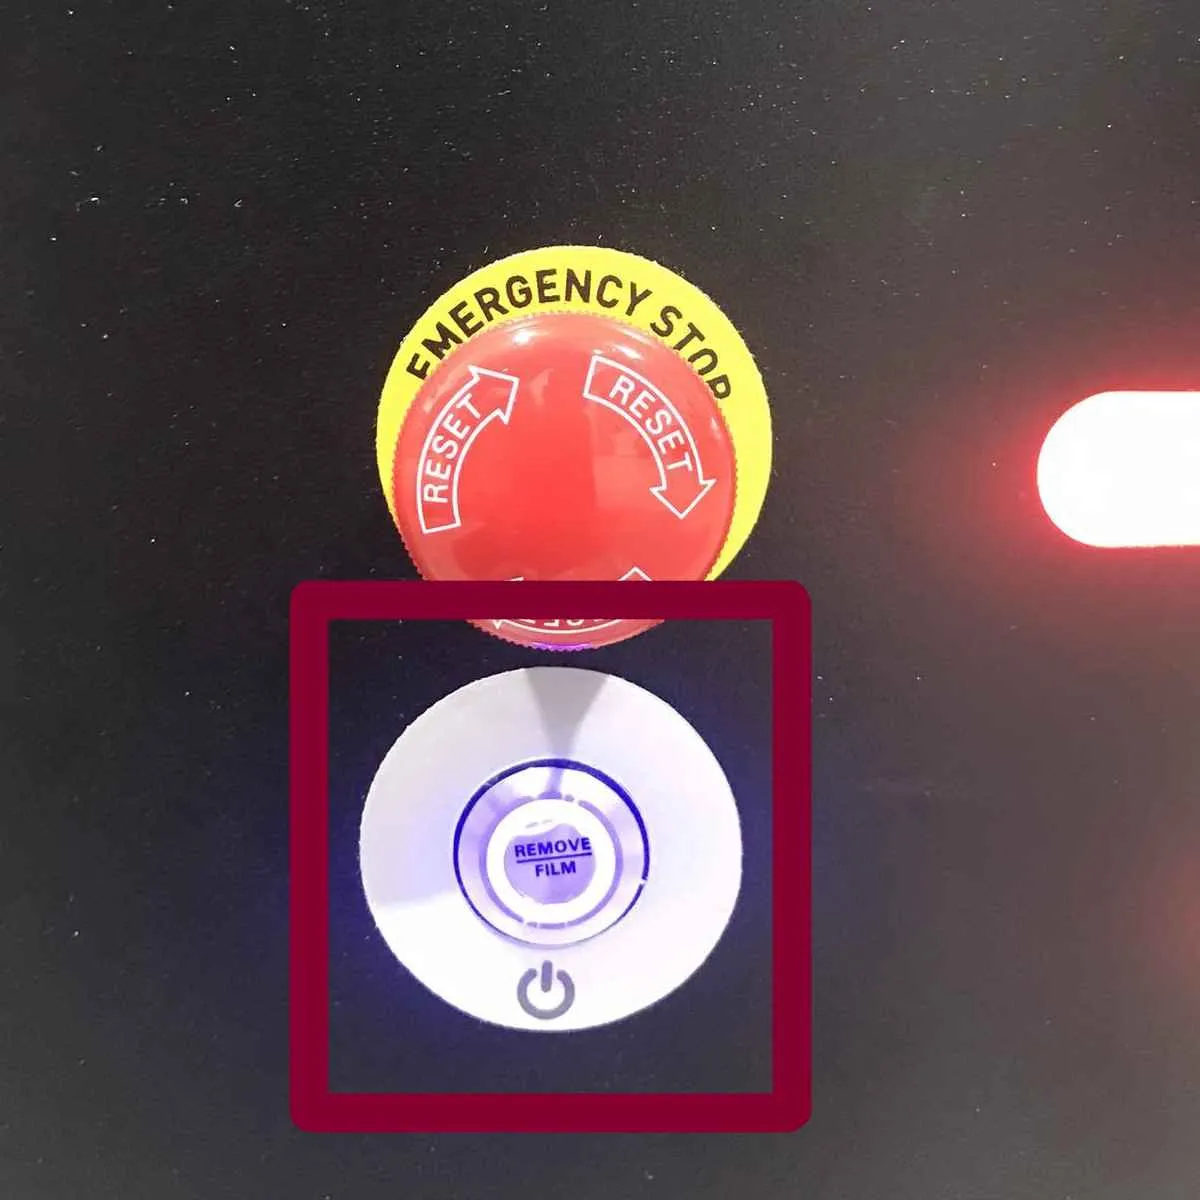
Power Button |
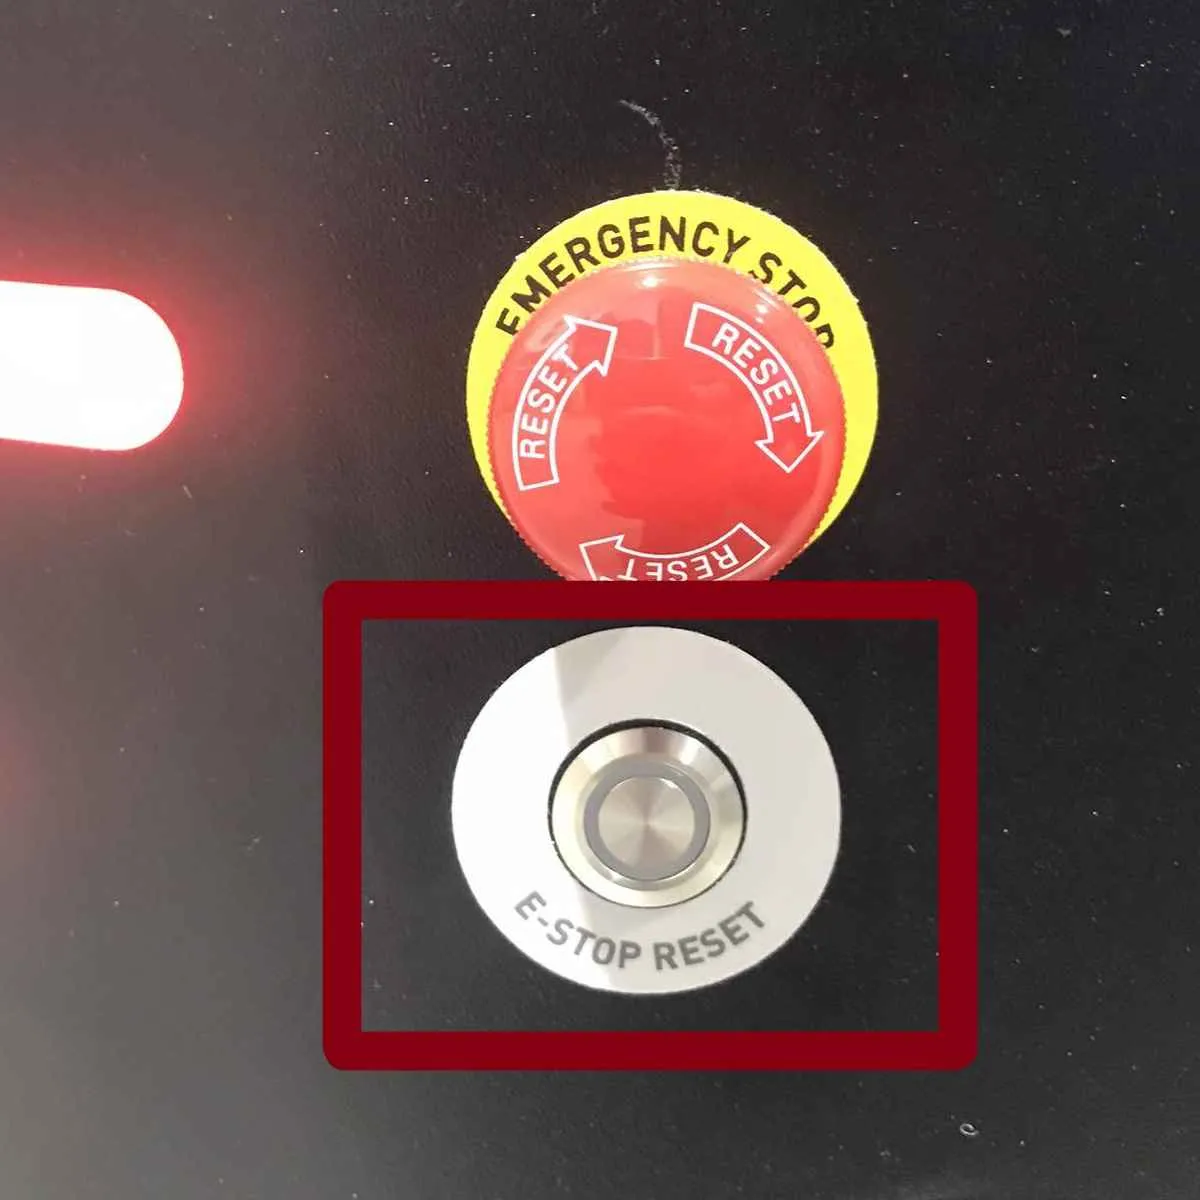
E-reset Button |
Release Switch |
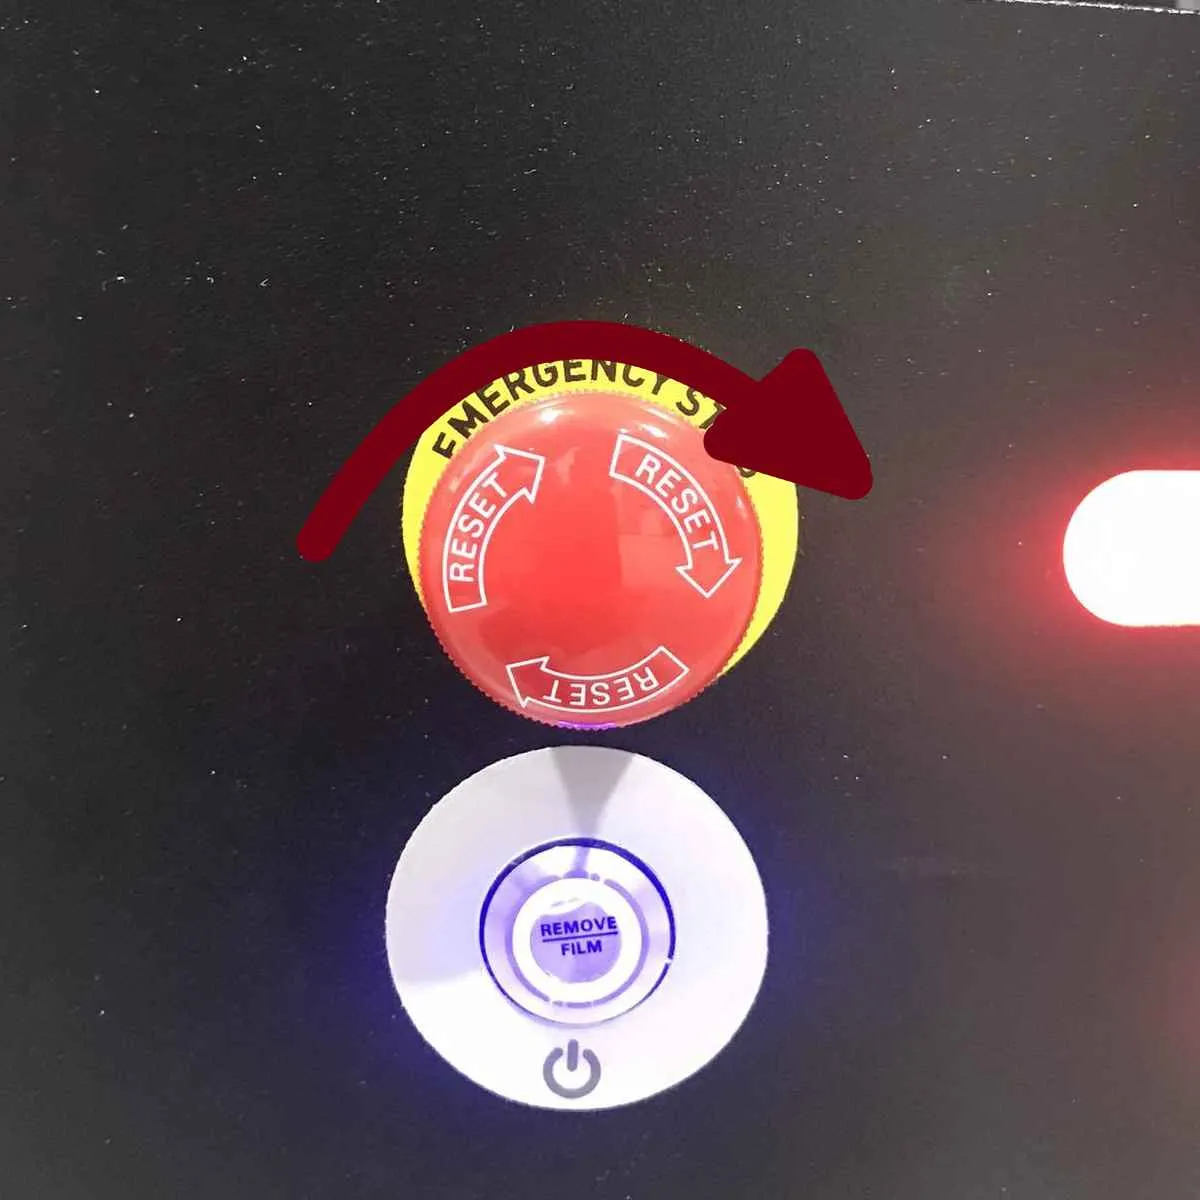
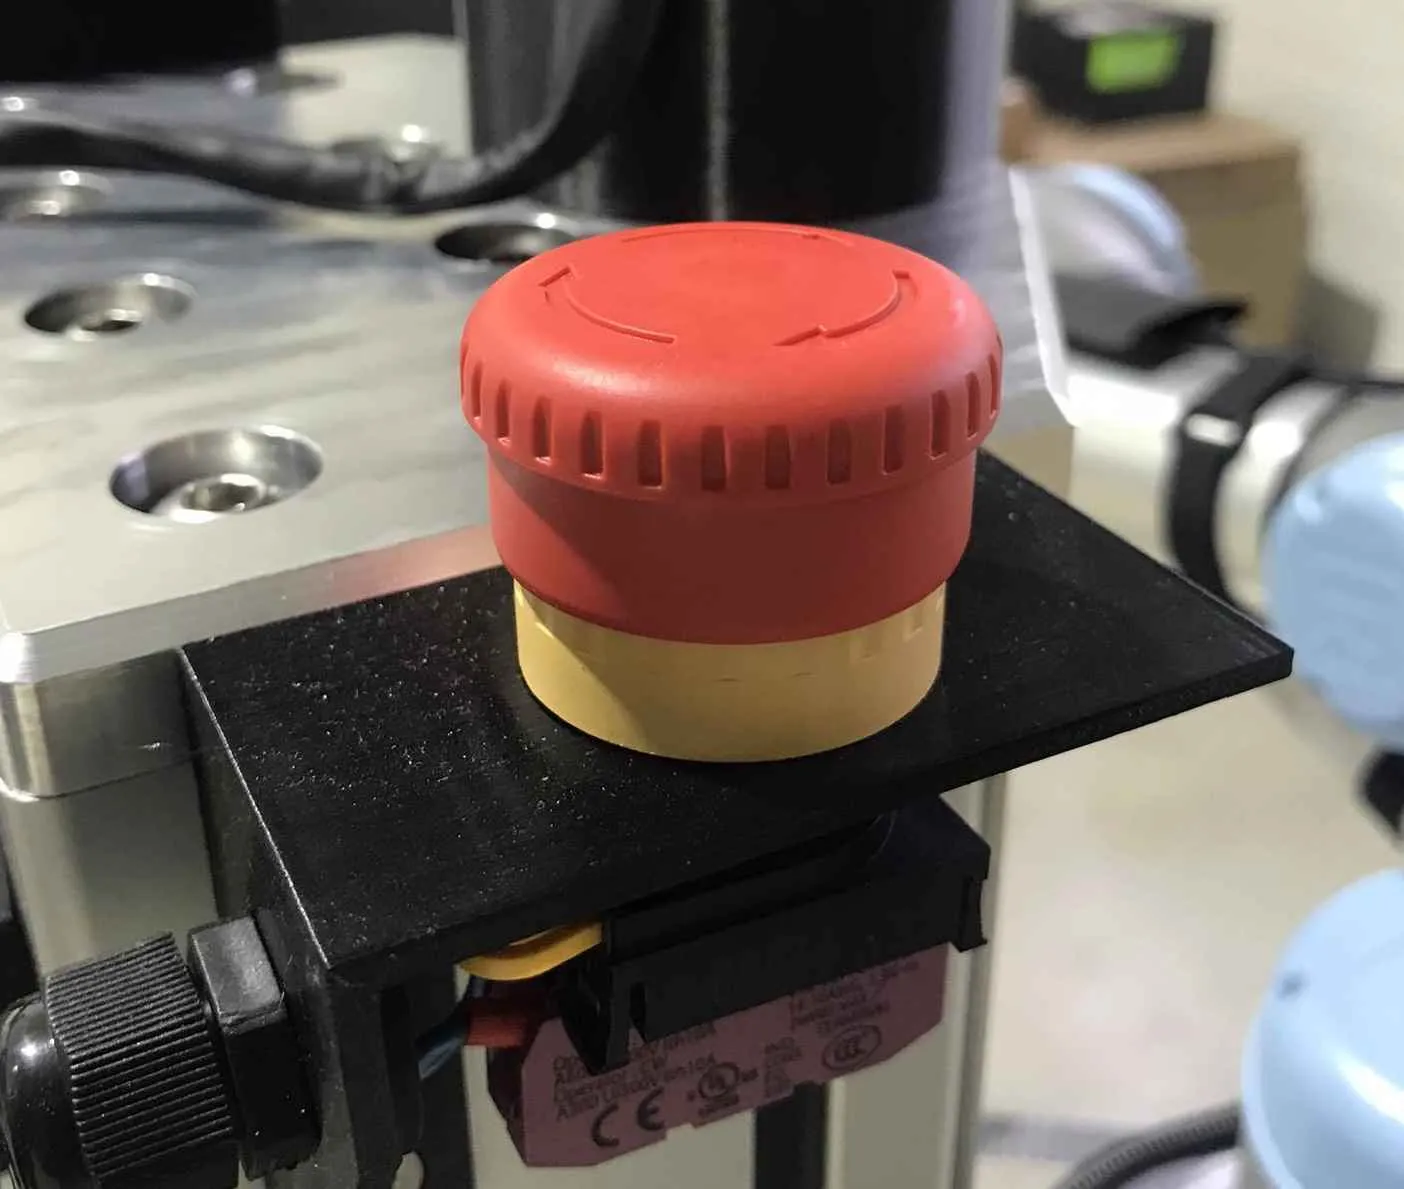
Ensure the emergency buttons on all 4 corners are released.
◦ To check if the emergency switch is released, twist the switch in the indicated direction on it. If it pops up, then the switch has successfully been released.
Press the power button on the rear of the ridgeback. It has the power symbol.
Once the ridgeback is powered on and all the switches have been released, press the e-reset button. It is on the rear where the ridgeback has a yellow flashing light.
Powering on the UR5e Arm

UR5e should be in, i.e. it is in remote mode and on power off state
The UR5e should only be powered on when the ridgeback is fully powered on (i.e. the ridgeback has white lights infront and/or the yellow light is flashing for the e-reset).
The UR5e can be powered on via the teach pendants power button.
It may take upto a few minutes for the UR5e to startup.
Ensure all the emergency switches are released (i.e. on the teach pendant as well as on the lift).
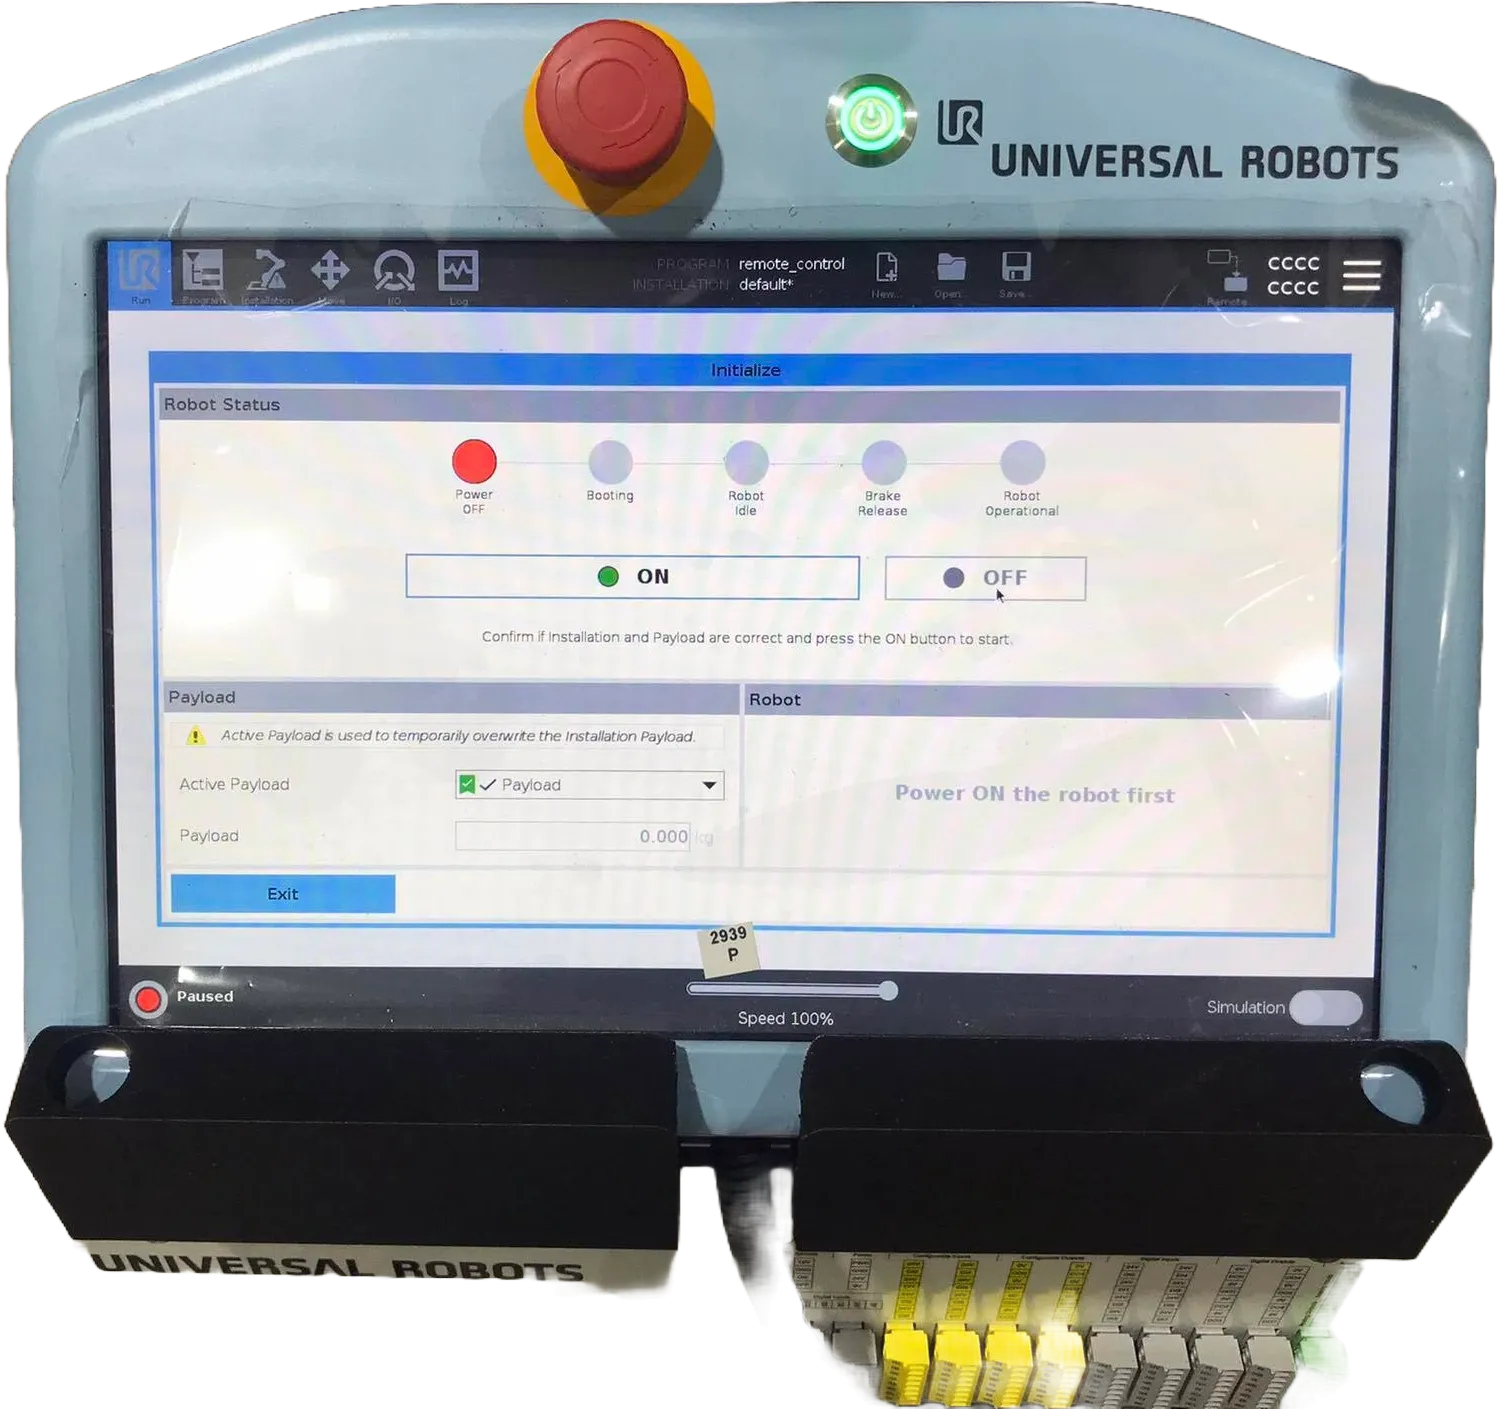
Teach pendant Switch Released |
Custom Emergency Switch Released |
Warning
Do not start anything else in the UR5e as this is all done automatically via ROS. Powering on is only required.
Powering Aux. Components
On startup the ridgeback launches, the lift drivers, and the Hokuyos. The auxiliary components such as the ouster, dynamixels, realsense cameras, nvidia, etc. are not powered on startup automatically but can be added via the startup launch file if required.
PS4 Controller
PS4 Controller
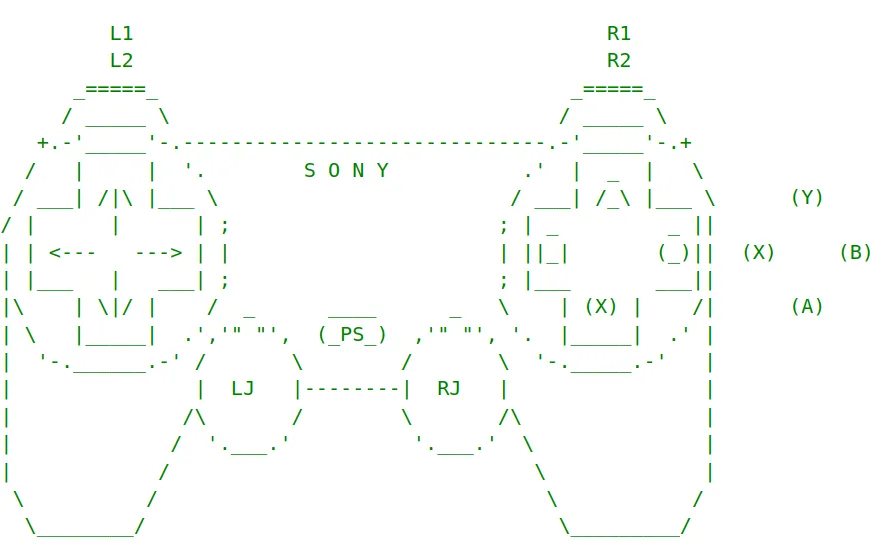
PS button is to power on.
X + Up arrow is for moving Lift up. (X is the square icon)
X + Down arrow is for moving Lift down. (X is the square icon)
B button for releasing Lift soft locks. (B is the circle icon)
L1 is the dead man’s switch.
LJ is to move in x and y direction.
RJ is to move in the yaw orientation.
Steamdeck Controller
Warning
The Steamdeck usage is in experimental phase. Loss of connection or (laggy connection) may lead to the robot moving and/or not stopping immediately. Caution should be taken when using the Steamdeck for the operation of the robot!
Steamdeck - Basic Controls
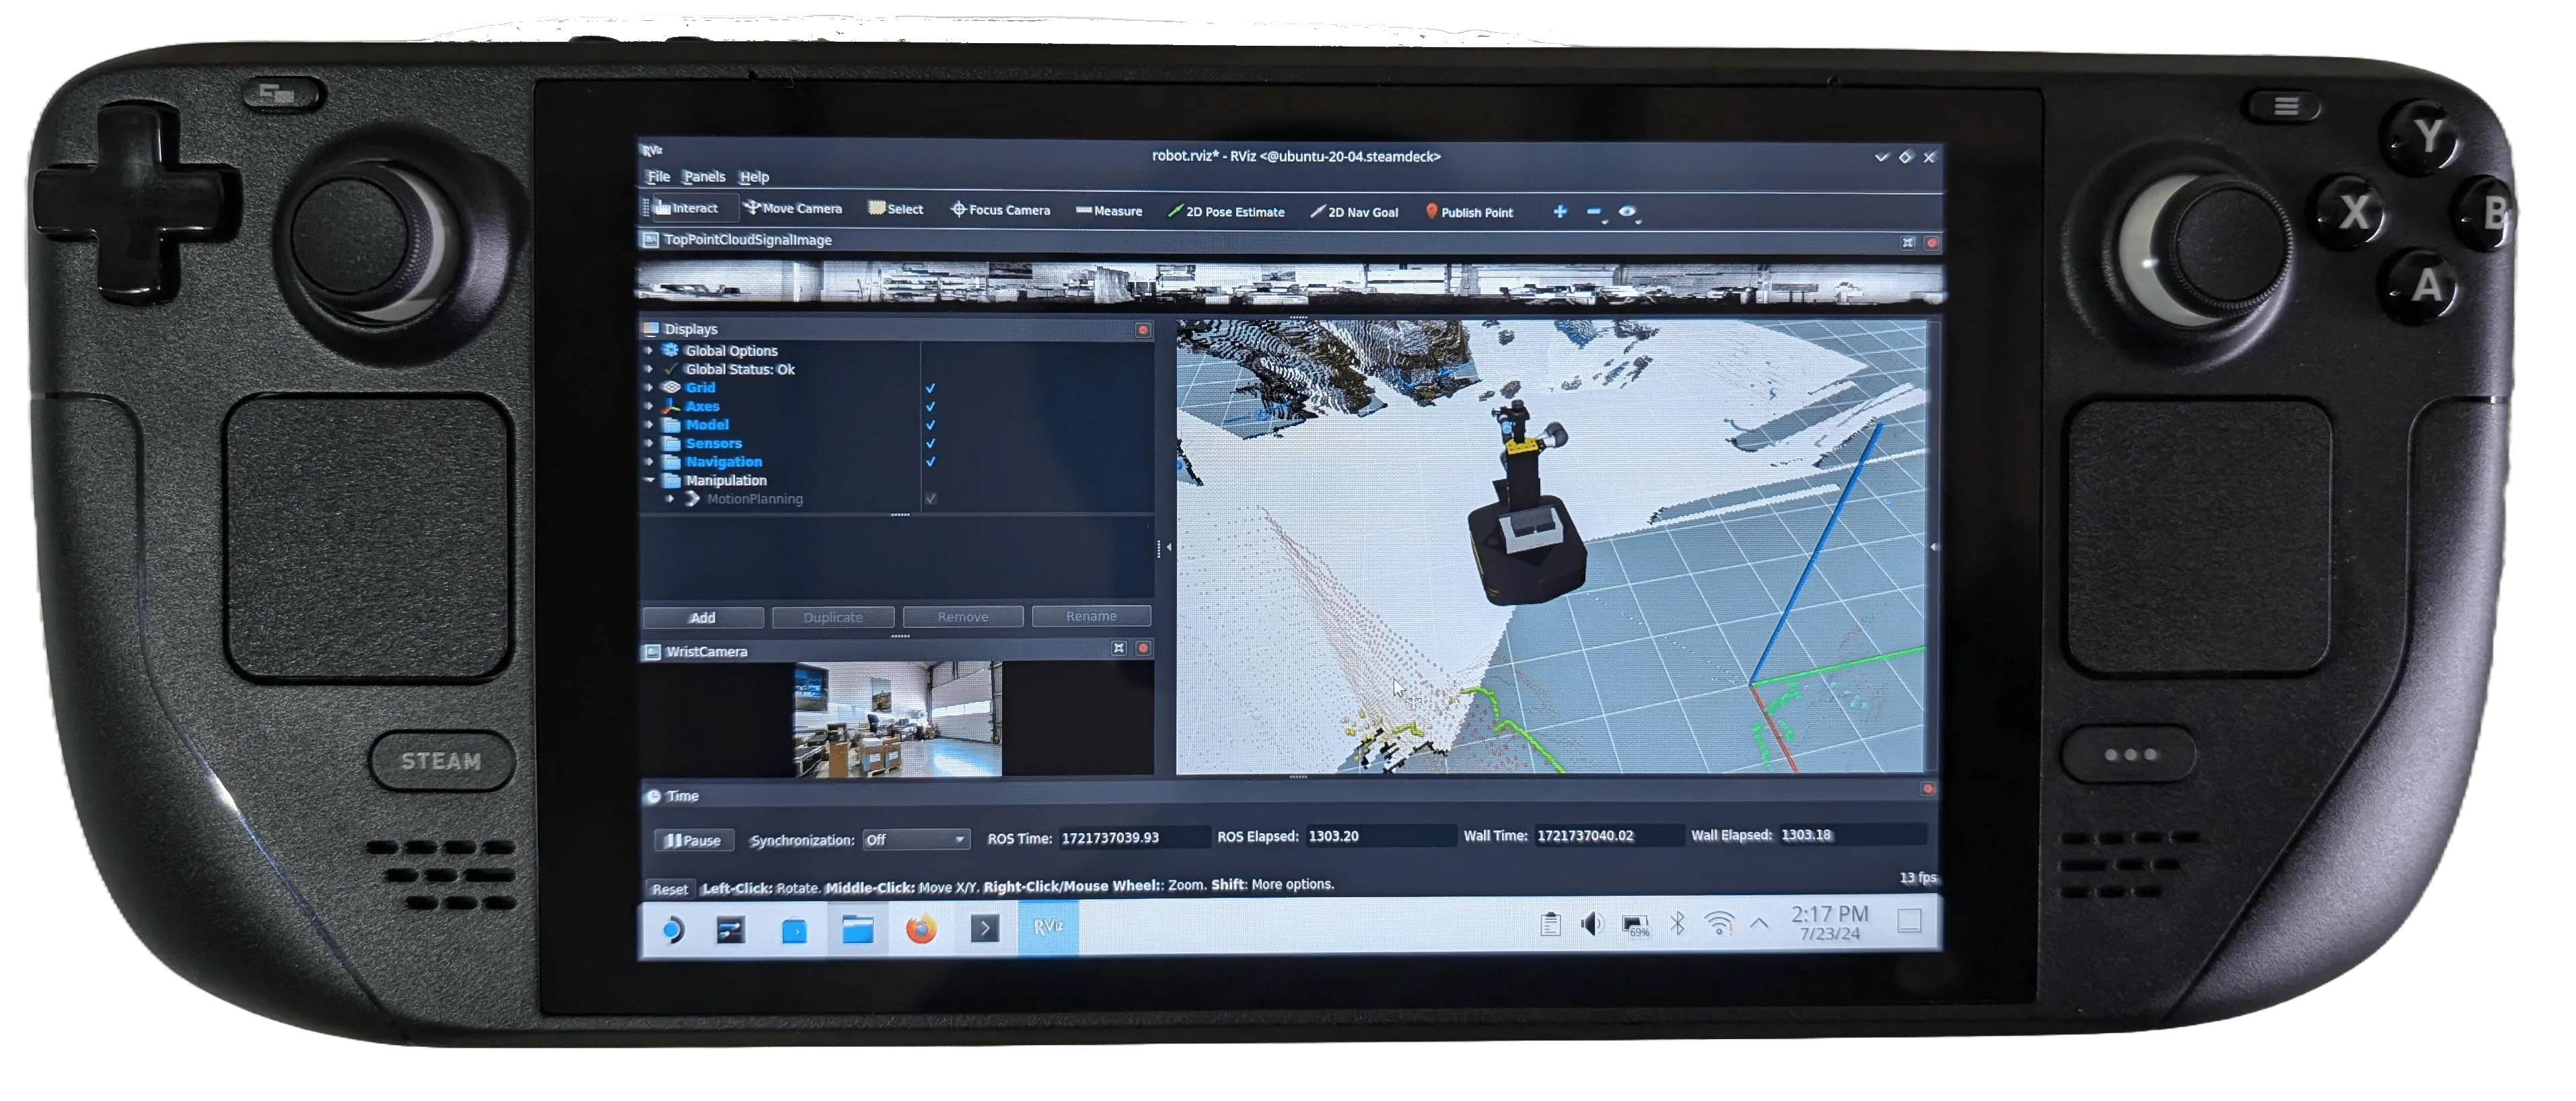
Power button is on the top of the Steamdeck with the power symbol.
R2 for mouse left-click
L2 for mouse right-click
Left trackpad for mouse scrolling
Right trackpad for mouse movement
L2+R2 for middle mouse button click
The 3 dashes button is located on the top right of the Steamdeck next to the Y button, Hold for 3 seconds to gamepadmode and hold for 3 seconds again to go to desktop mode(Switching to desktop mode activates the cursor for the trackpad as well).
Steamdeck Controller
Steamdeck - Initialization with Robot
Before usage:
Ensure the Steamdeck is connected to the robot’s WiFi access point.
Ensure the robot is powered on and operational.
Single tap the Joystick Launcher on the screen to activate the controller for the robot. (Do not open multiple instances of the joystick launchers, as this can cause zombie nodes).
Single tap the Rviz2 Launcher on the screen to visualize the robot.
Steamdeck - Robot Controls
L1 is the dead man’s switch for slow speed.
R1 is the dead man’s switch for high speed.
LJ is to move in x and y direction.
RJ is to move in yaw direction.
X+Up Arrow is to move lift up.
X+Down Arrow is to move lift down.
B is to release soft switches if the lift reaches maximum height.
Steamdeck - Rviz2 Controls
L2+R2 should be held when wanting to move the orbit in the xy plane.
R2 should be held to orbit around the orbits origin
Left trackpad can be moved up and down to zoom in and zoom out.
Manipulator Activation
Once the UR5e is powered on and its emergency switches are released.
Then check if the UR5e is in remote mode (should be in remote mode by default) — Located in Teach pendant Top right.
Then check if the UR5e is in Power off state with a icon — Located in Teach pendant Bottom left (Important).
Auxiliary ROS Drivers
Once the manipulator is activated, next step is to launch the following driver:
roslaunch mmp_startup accessories.launch
This should turn on all the components including the UR5e, Robotiq 2F-85, Ouster, Realsense Cameras, and pan & tilt.
Digital Twin (RVIZ)
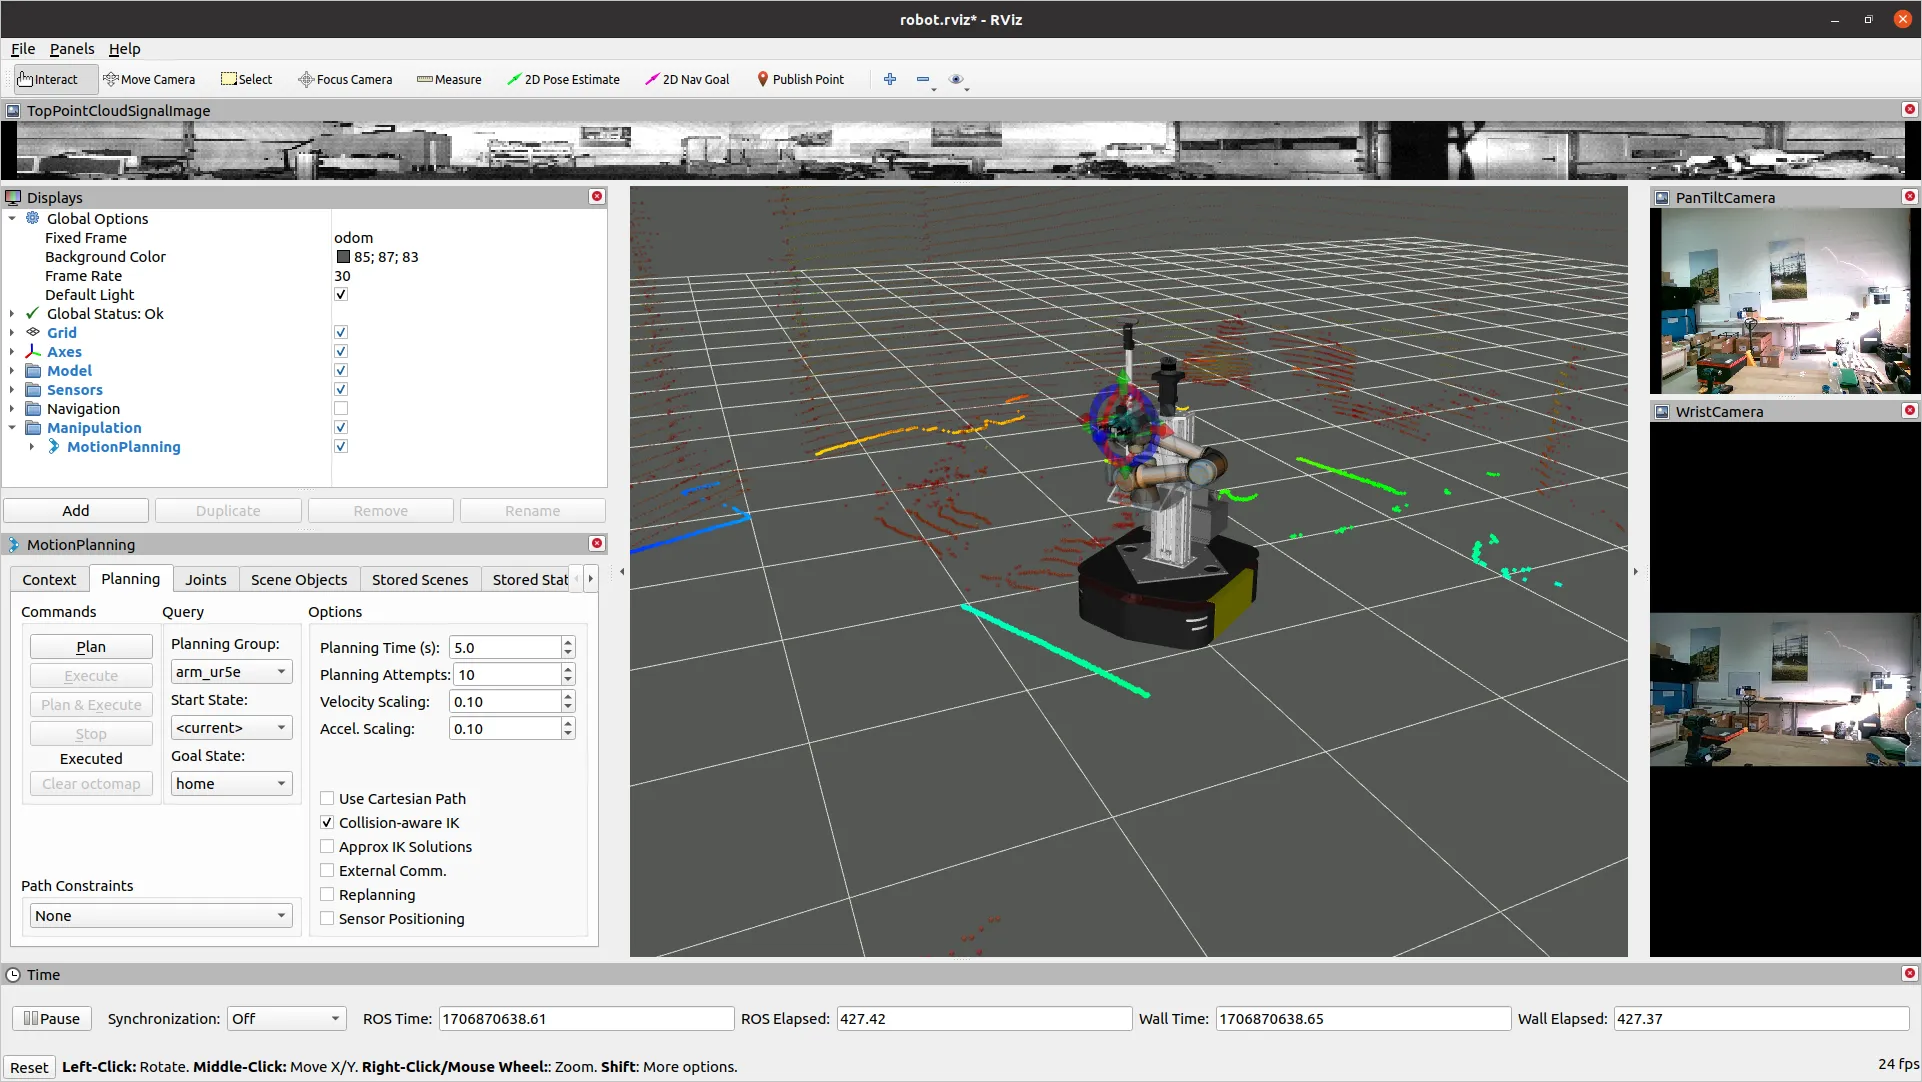
Visualizing the MMP in Rviz
To visualize the mmp, you can run:
roslaunch mmp_viz view_robot.launch
Ideally, for latency-free streaming, please utilize ROS multimachine setup.